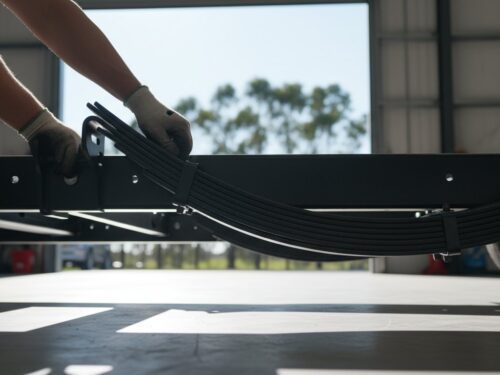
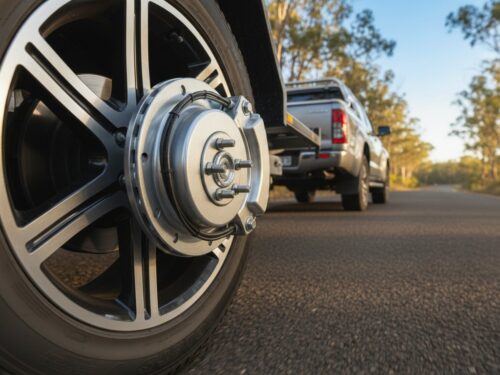
Last Tuesday, a transport operator discovered that a single corroded terminal in a 7-pin flat plug could sideline a heavy-duty plant trailer for three hours during a critical site delivery. Faulty trailer lights are more than just a nuisance. They represent a significant safety risk on Australian highways and often result in immediate roadside infringements. You understand that maintaining a reliable connection is essential for both legal compliance and operational safety. This technical reference provides the 12v trailer wiring diagram australia required to master national standards and ensure your towing setup remains dependable under harsh conditions.
We’ll provide clear diagrams for both flat and round plug configurations while addressing the specific challenges of marine-grade environments. You’ll gain the technical knowledge to troubleshoot common electrical faults and ensure your trailer meets all Australian Design Rules (ADR). This reference delivers the practical advice needed to stop flickering lights and prevent terminal failure before your next haul. Get your trailer back on the road with a professional-grade wiring setup that lasts. It’s time to ensure your equipment is as hardworking and reliable as your business.
Key Takeaways
- Understand why Australian trailer wiring standards differ from international codes to ensure your vehicle remains road-legal and safe.
- Use our 12v trailer wiring diagram australia to correctly map 7-pin flat and round plugs for reliable indicator and brake functions.
- Determine if your setup requires a 12-pin heavy-duty upgrade to support internal caravan batteries and auxiliary power needs.
- Master professional installation techniques, including stripping and tinning wires to prevent corrosion in harsh environments.
- Select marine-grade and heavy-duty components to protect your electrical connections against salt water, dust, and extreme heat.
Understanding Standardised 12V Trailer Wiring in Australia
Reliable electrical connections are the backbone of safe towing. In Australia, trailer wiring is governed by strict standards to ensure every vehicle on the road communicates clearly with the unit it pulls. Following a standardised 12v trailer wiring diagram australia prevents confusion and reduces the risk of rear-end collisions. These standards ensure that when you hit the brakes or signal a turn, the trailer mirrors those actions instantly. Australia uses a specific colour-coded system that differs from US or European markets. This local standard exists because our harsh environment and specific vehicle builds require a dedicated, uniform approach to electrical safety.
Modern towing relies heavily on 12V systems. Most contemporary trailers have transitioned to LED lighting. LEDs are superior to old incandescent bulbs because they draw roughly 80% less current and resist vibration much better. This low power draw is essential for modern tow vehicles equipped with complex Electronic Control Units (ECUs). Using the correct wiring ensures these LEDs function without triggering error codes on your dashboard. Whether you are maintaining high-quality trailer parts or building a new frame, sticking to the Australian standard is the only way to guarantee performance.
The Importance of ADR Compliance
Following the Australian Design Rules (ADR) isn’t a suggestion; it’s a legal obligation. ADR 13/00 dictates the installation of lighting and light-signalling devices on all trailers. If your wiring doesn’t match the standard 12v trailer wiring diagram australia, your vehicle is technically unroadworthy. This has massive implications for your insurance. In the event of an accident, an insurer can void your policy if they find the trailer wiring was non-compliant. Furthermore, AS4177.5-2004 specifically outlines the requirements for 7-pin and 12-pin flat connectors. These standards ensure that any trailer you hitch will work perfectly with your vehicle’s socket, provided both follow the rules.
Common Australian Plug Formats
Australia primarily uses three plug formats: flat, small round, and large round. Flat plugs are the most common for domestic trailers, including heavy duty single axle box trailers and boat trailers. They come in 7-pin or 12-pin varieties, with the 12-pin version allowing for high-current accessories like fridges or electric brakes. Small round plugs are often found on older rigs, while large round plugs are the standard for heavy commercial machinery and plant trailers. Choosing one format and sticking to it across your fleet saves time and eliminates the need for messy adapters. Consistency across your equipment ensures that any vehicle can pull any trailer at a moment’s notice without electrical failures.
Decoding the 7-Pin Trailer Plug Wiring Diagram
Wiring a trailer requires precision. A mistake leads to light failure or blown fuses. The 12v trailer wiring diagram australia follows a specific standard to ensure compatibility across different vehicles and trailers. You must understand the orientation before starting your project. Most diagrams show the plug from the rear where the cables enter the housing. If you look at the front mating face instead, the pattern is mirrored. Always double check your perspective to avoid cross-wiring your circuits.
Australian trailers typically use either a 7-pin flat or a 7-pin round plug. While the physical shape of the housing differs, the colour coding and pin functions remain consistent across both types. Reliability depends on clean connections. Stripping exactly 5mm of insulation from each wire prevents stray strands from touching adjacent terminals. This attention to detail prevents short circuits that can damage expensive vehicle ECUs.
The 7-Pin Standard Sequence
- Pin 1: Yellow. This controls the Left Hand Turn signal. It’s a dedicated circuit for the amber indicator lamp.
- Pin 2: Black. This pin serves as the reversing signal or auxiliary power. On many modern Australian trailers, it’s used to trigger reverse lights or provide a low-amp charge to an on-board battery.
- Pin 3: White. This is the Earth return. It’s the most critical wire in the loom. It must have a solid metal-to-metal connection. A weak earth causes “ghosting,” where multiple lights dim or flicker when you apply the brakes.
- Pin 4: Green. This controls the Right Hand Turn signal.
Tail Lights and Braking Circuits
The remaining three pins handle the heavy lifting for safety and visibility. Pin 5 uses a Blue wire for service brakes. This is essential for trailers with a Gross Trailer Mass (GTM) over 2,000kg, as it carries the signal from the electric brake controller to the magnets. Without a secure connection here, your trailer’s braking system won’t activate.
Pin 6 is the Red wire, dedicated to stop lamps. This circuit takes priority during operation. Finally, Pin 7 uses a Brown wire for tail lamps, clearance lights, and side markers. This circuit often runs for hours during night hauls, so ensure the terminal is tight to prevent heat buildup. If you’re refurbishing an old rig, sourcing high-quality trailer parts ensures your 12v trailer wiring diagram australia implementation remains durable against road vibration and dust.
Australian conditions are harsh. Salt air and red dust quickly corrode exposed copper. Use a small amount of dielectric grease on the pins to lock out moisture. This simple step extends the life of your wiring and ensures your lights work every time you hitch up. Professional fleet managers often check these connections every 5,000 kilometres to maintain safety standards.
Upgrading to 12-Pin and Heavy-Duty Connections
Standard 7-pin plugs manage basic indicators, brake lights, and tail lights. They reach their limit quickly once you add a caravan or a heavy-duty work trailer to the mix. If your setup includes an on-board battery or a 3-way fridge, you need additional circuits. Upgrading to a 12-pin flat plug is the most efficient solution for modern Australian towing. It keeps all connections in a single housing and prevents the need for messy auxiliary leads.
Reliability depends on using the correct 12v trailer wiring diagram australia for your specific application. A 12-pin system allows for high-amperage transfer that standard plugs cannot handle. Without this upgrade, you risk melting pins or failing to charge your trailer batteries while driving. It’s a practical necessity for anyone venturing off-grid or hauling commercial loads across the country.
The 12-Pin Flat Configuration
The 12-pin flat plug uses a two-row design for maximum versatility. The top row is identical to a standard 7-pin flat plug. This design ensures 7-pin compatibility; you can plug a standard box trailer into a 12-pin vehicle socket without an adapter. The bottom row contains five larger pins, numbered 8 through 12. These pins are designed for heavy-duty auxiliary power and high-current demands.
- Pin 8: Battery feed for charging internal trailer batteries.
- Pin 9: Dedicated auxiliary or fridge power, often ignition switched.
- Pin 10: Heavy-duty earth return for high-current circuits.
- Pin 12: Auxiliary power or signals for electric winches and jacks.
Wire gauge is critical here. While standard lighting uses 2mm or 3mm cable, the bottom row requires 6mm or 8mm automotive wire. Using thin wire leads to voltage drop. A fridge might show 12V at the plug but only 10.5V at the compressor. This prevents the appliance from cooling properly. Always match the cable thickness to the 30-amp rating of the larger pins to ensure performance.
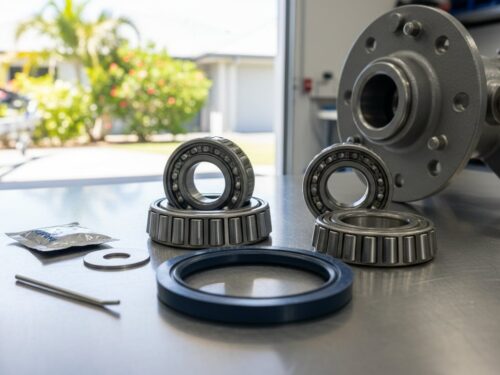
Heavy-Duty Round Plugs for Commercial Use
Trucks and industrial trailers often bypass flat plugs entirely. They use 7-pin large round plugs for superior durability in harsh environments. These connectors feature 13mm diameter earth pins and 10mm power pins. The housing is typically cast alloy or reinforced nylon. This construction resists vibration and stone damage on corrugated roads better than standard plastic units. Unlike flat plugs, round connectors often feature a screw-down locking ring to prevent accidental disconnection.
Small round plugs are common on older passenger vehicles but lack the current-carrying capacity for heavy machinery. When choosing components, ensure your socket matches the trailer’s requirements for both fit and amperage. Explore caravan parts for specialized 12-pin requirements and heavy-duty wiring solutions. Stick to Australian standards to ensure your 12v trailer wiring diagram australia setup remains compliant and safe on the road.
Practical Installation and Circuit Testing Procedures
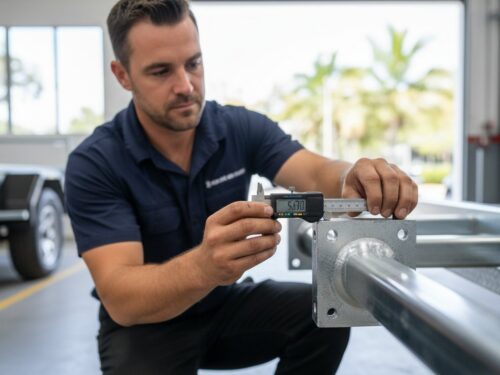
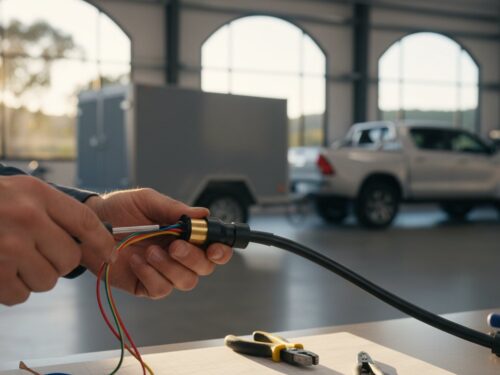
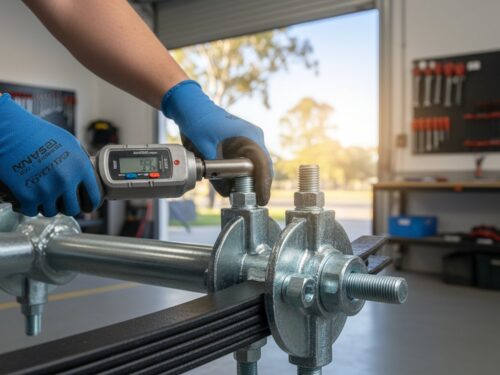
Reliable wiring starts with the right equipment. You need high-quality wire strippers, ratcheting crimpers, and a digital multimeter to ensure a professional result. Following a 12v trailer wiring diagram australia standard is essential; however, the physical execution determines how long the system lasts on corrugated roads or in salty environments. Don’t rely on a simple test light for modern vehicles. A multimeter provides the precise voltage and resistance data required to identify weak points before they cause a failure on the highway.
Preparation is the foundation of a heavy-duty electrical system. Strip exactly 10mm of insulation from each core to ensure the wire fits deeply into the terminal without leaving exposed copper. Tinning the wire ends with a soldering iron is a professional technique that prevents copper strands from fraying. This process also stops internal oxidation, which is critical for trailers used in marine environments. Once the wires are prepped, apply a liberal amount of dielectric grease to the terminal pins. This non-conductive grease blocks moisture and prevents the “green crust” corrosion that eventually kills electrical flow.
Terminal Preparation and Connection
Avoid over-tightening the small grub screws inside the trailer plug. Excessive force crushes the delicate copper strands, which reduces the current-carrying capacity and creates a potential heat hazard. Use bootlace ferrules on every wire end for a superior finish. These metal sleeves provide a solid surface for the screw to bite into without severing the conductor. It’s vital to ensure the outer cable sheath is clamped firmly by the internal strain relief bracket. This prevents physical tension and vibration from pulling the wires loose while you’re towing over rough terrain.
Troubleshooting Common Wiring Faults
Electrical gremlins usually stem from a poor earth connection. Industry data suggests that 82% of trailer lighting failures are earth-related issues. Use your multimeter to check for continuity between the trailer frame and the earth pin. If you notice “ghosting,” where indicators flash dimly alongside brake lights, you have high resistance in the circuit. This often occurs when the return path to the battery is restricted. Always test the vehicle-side socket first to isolate the fault. If the vehicle pins show a steady 12.6V, the problem lies in the trailer plug or the harness itself. Testing the vehicle and trailer separately saves hours of unnecessary work.
Looking for reliable components to complete your wiring project? Shop our range of heavy-duty trailer parts to ensure your build stands up to Australian conditions.
Selecting Durable Wiring Components for Australian Conditions
Australia’s environment destroys cheap electrical components quickly. High ambient temperatures exceeding 45 degrees Celsius in summer cause standard PVC insulation to become brittle and crack. Fine bulldust on unsealed roads penetrates non-sealed connectors, leading to high-resistance joints and total light failure. Salt water exposure causes rapid electrolysis that can eat through a wiring harness in months. Choosing heavy-duty parts ensures your 12v trailer wiring diagram australia stays a reliable reference instead of a constant troubleshooting map.
Selecting the right housing material for your plugs and sockets is a critical first step. Heavy-duty metal plugs offer superior crush resistance for commercial applications where the trailer might be stepped on or dropped. High-quality ABS plastic housings are often better for coastal areas because they don’t corrode or seize. Modern impact-resistant polymers provide the best balance of strength and weatherproofing for most 7-pin and 12-pin configurations.
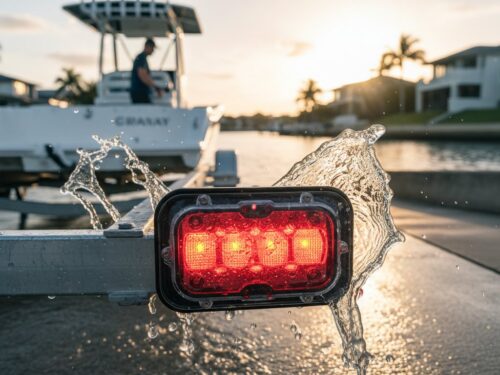
Marine-Grade Electrical Solutions
Standard copper wire oxidizes fast when exposed to salt air. You should always use tinned copper cabling for boat and jet ski trailers. The tin coating prevents the “black wire” corrosion that stops solder from sticking and increases electrical resistance. All lights must be submersible LED units with a minimum IP68 rating. Use waterproof junction boxes and heat-shrink terminals to lock out moisture. Find specialized boat trailer parts for marine wiring to avoid failures at the boat ramp.
Complete Your Trailer Build
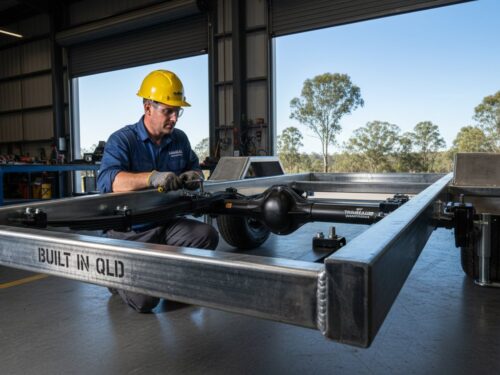
Wiring is the final stage of a build, but it shouldn’t be an afterthought. You must match your electrical quality to your axles and leaf springs. A heavy-duty suspension setup creates vibrations that shake loose poorly secured wires. Use P-clips or corrugated conduit every 300mm to prevent sagging and snagging. Ensure your plug is mounted securely to avoid ground contact during steep driveway transitions.
Follow this final checklist for a road-ready Australian trailer:
- Test every circuit with a multimeter to confirm the 12v trailer wiring diagram australia is followed correctly.
- Check ground connections for clean metal-to-metal contact.
- Apply dielectric grease to plug terminals to prevent moisture ingress.
- Verify that all joins use heat-shrink tubing rather than basic electrical tape.
- Confirm the safety chain doesn’t interfere with the wiring loom during tight turns.
Superior Trailer Parts provides the components needed to withstand these harsh conditions. We are Australian owned and operated, focusing on durability and performance. If you need expert advice on selecting the right hardware for your specific towing setup, contact our team today.
Secure Your Connection for Australian Roads
Standardised wiring is the foundation of trailer safety and legal compliance. Following a verified 12v trailer wiring diagram australia ensures your 7-pin or 12-pin plugs function correctly under heavy loads. Poor connections lead to lighting failures and significant safety risks on the highway. Use heavy-duty components designed specifically for harsh local conditions. Superior Trailer Parts provides the gear needed to maintain a reliable circuit every time you hitch up. We’re Australian Owned and Operated, offering nationwide shipping to all 8 states and territories. If you need assistance with specific technical layouts or circuit testing, our expert technical advice is available to help you get the job done right. Don’t settle for inferior parts that fail on corrugated tracks or in coastal salt air. Invest in genuine equipment built for longevity and performance. Reliable electrical systems keep your rig moving without unnecessary downtime. Grab your heavy-duty plugs, cables, and connectors from a trusted source today.
Shop Genuine Australian Trailer Parts and Wiring Accessories
Keep your trailer safe and your connections secure for the long haul.
Frequently Asked Questions
What are the standard trailer wiring colours in Australia?
Australian trailer wiring follows a standard colour code for 7-pin systems. Yellow is for the left turn signal, while green handles the right turn signal. White acts as the common earth. Blue is used for auxiliary or electric brakes, and brown operates the tail and clearance lights. Red indicates stop lights, and black is for reversing lights. Always verify your specific 12v trailer wiring diagram australia before starting any installation to ensure compatibility with your vehicle.
Is a 7-pin flat plug compatible with a 7-pin round socket?
No, a 7-pin flat plug is not physically compatible with a 7-pin round socket. These two designs use different pin layouts and housing shapes that cannot be connected directly. You must use a heavy-duty adapter to bridge the connection between the vehicle and the trailer. Most Australian auto retailers stock these adapters for roughly A$15 to A$30. Ensure the adapter is marine-grade if you’re towing a boat trailer in salt environments.
Why do my trailer lights flicker when I use the indicators?
Flickering lights usually indicate a poor earth connection or a “back-feeding” issue. This occurs when the white earth wire, known as Pin 3, is loose, corroded, or improperly grounded to the trailer chassis. If the earth fails, the current seeks an alternative path through other circuits, causing multiple lights to dim or flash. Clean all contact points with a wire brush and ensure the connection is tight to restore full voltage to the system.
Do I need a 12-pin plug for my caravan?
You need a 12-pin plug if your caravan includes high-draw accessories like an internal fridge or an on-board battery charging system. While a 7-pin plug handles basic road lights and electric brakes, the additional five pins in a 12-pin setup provide dedicated circuits for 35-amp power. This prevents overloading your standard lighting loom. Most modern Australian caravans weighing over 2,500kg come factory-fitted with 12-pin plugs to meet these power requirements.
Can I wire my trailer lights myself or do I need an auto electrician?
You can legally wire 12V trailer lights yourself in Australia as it falls under low-voltage DIY work. However, complex setups involving electronic brake controllers or 12-pin auxiliary circuits often require a professional auto electrician. An expert ensures the wire gauge matches the current draw, preventing heat build-up. If you’re unsure about your 12v trailer wiring diagram australia, hiring a pro typically costs between A$100 and A$250 for a standard installation.
What wire gauge should I use for 12V trailer wiring?
Use 2mm or 3mm automotive-grade wire for standard LED signal and tail lights. For electric brakes or battery charging circuits, you must upgrade to 5mm or 6mm wire to minimize voltage drop over the length of the trailer. Using thin wire on high-draw components reduces braking efficiency by up to 20 percent. Always select tinned copper wire for marine applications to prevent internal corrosion in harsh Australian coastal conditions.
How do I wire electric brakes on a 7-pin plug?
Wire the electric brake feed to Pin 2, which is the blue wire in a standard Australian 7-pin configuration. This pin carries the modulated power from your vehicle’s brake controller to the trailer’s magnets. Ensure the wire used for Pin 2 is at least 4mm to 5mm in diameter to handle the 10 to 15-amp load required by dual-axle braking systems. Test the connection with a multimeter to confirm signal strength before your first trip.
What is the difference between Pin 2 and Pin 5 in Australian wiring?
Pin 2 and Pin 5 serve completely different functions in Australian wiring standards. Pin 2 uses a blue wire and is designated for auxiliary power or electric brake control. Pin 5 uses a brown wire and is dedicated to tail lights, clearance lights, and number plate illumination. Mixing these up will cause your brakes to lock when you turn on your headlights. This is a dangerous safety hazard that can cause immediate mechanical damage to your trailer.