You’re reversing down a boat ramp at 5:00 AM when your trailer indicators start flickering and a fuse pops. Industry data suggests that 40% of trailer electrical failures stem from poor grounding or corroded terminals, especially after repeated saltwater exposure. It’s frustrating when conflicting diagrams online lead to a wiring mess that risks your safety on the road. You need a reliable 7 pin trailer plug wiring setup that stands up to harsh Australian conditions without failing when you need it most. Since the ADR 13/00 standards were updated, maintaining precise electrical connections has become essential for every Australian trailer owner.
We’ll help you get your trailer lights working perfectly with this technical breakdown of Australian 7-pin wiring diagrams, installation steps, and troubleshooting tips. You’ll gain the confidence to build a functional, ADR-compliant lighting system that’s weatherproof and durable. This article covers everything from identifying the correct wire colors to marine-grade terminal protection and knowing when to call a professional sparky. We provide the technical specifications required to keep your fleet or personal trailer road-legal and ready for the job.
Key Takeaways
- Understand AS 4177.5 standards to ensure your trailer and vehicle connections meet Australian regulatory requirements.
- Follow a technical walkthrough of the 7 pin trailer plug wiring colour code for reliable light operation.
- Select heavy-duty wire gauges to prevent voltage drop and maintain signal strength across the trailer.
- Diagnose common electrical failures like “disco” lights by identifying poor earth connections and tracing voltage loss.
- Evaluate when to upgrade to a 12-pin system for high-demand auxiliary power and electric brake applications.
The Australian 7 Pin Trailer Plug Standard Explained
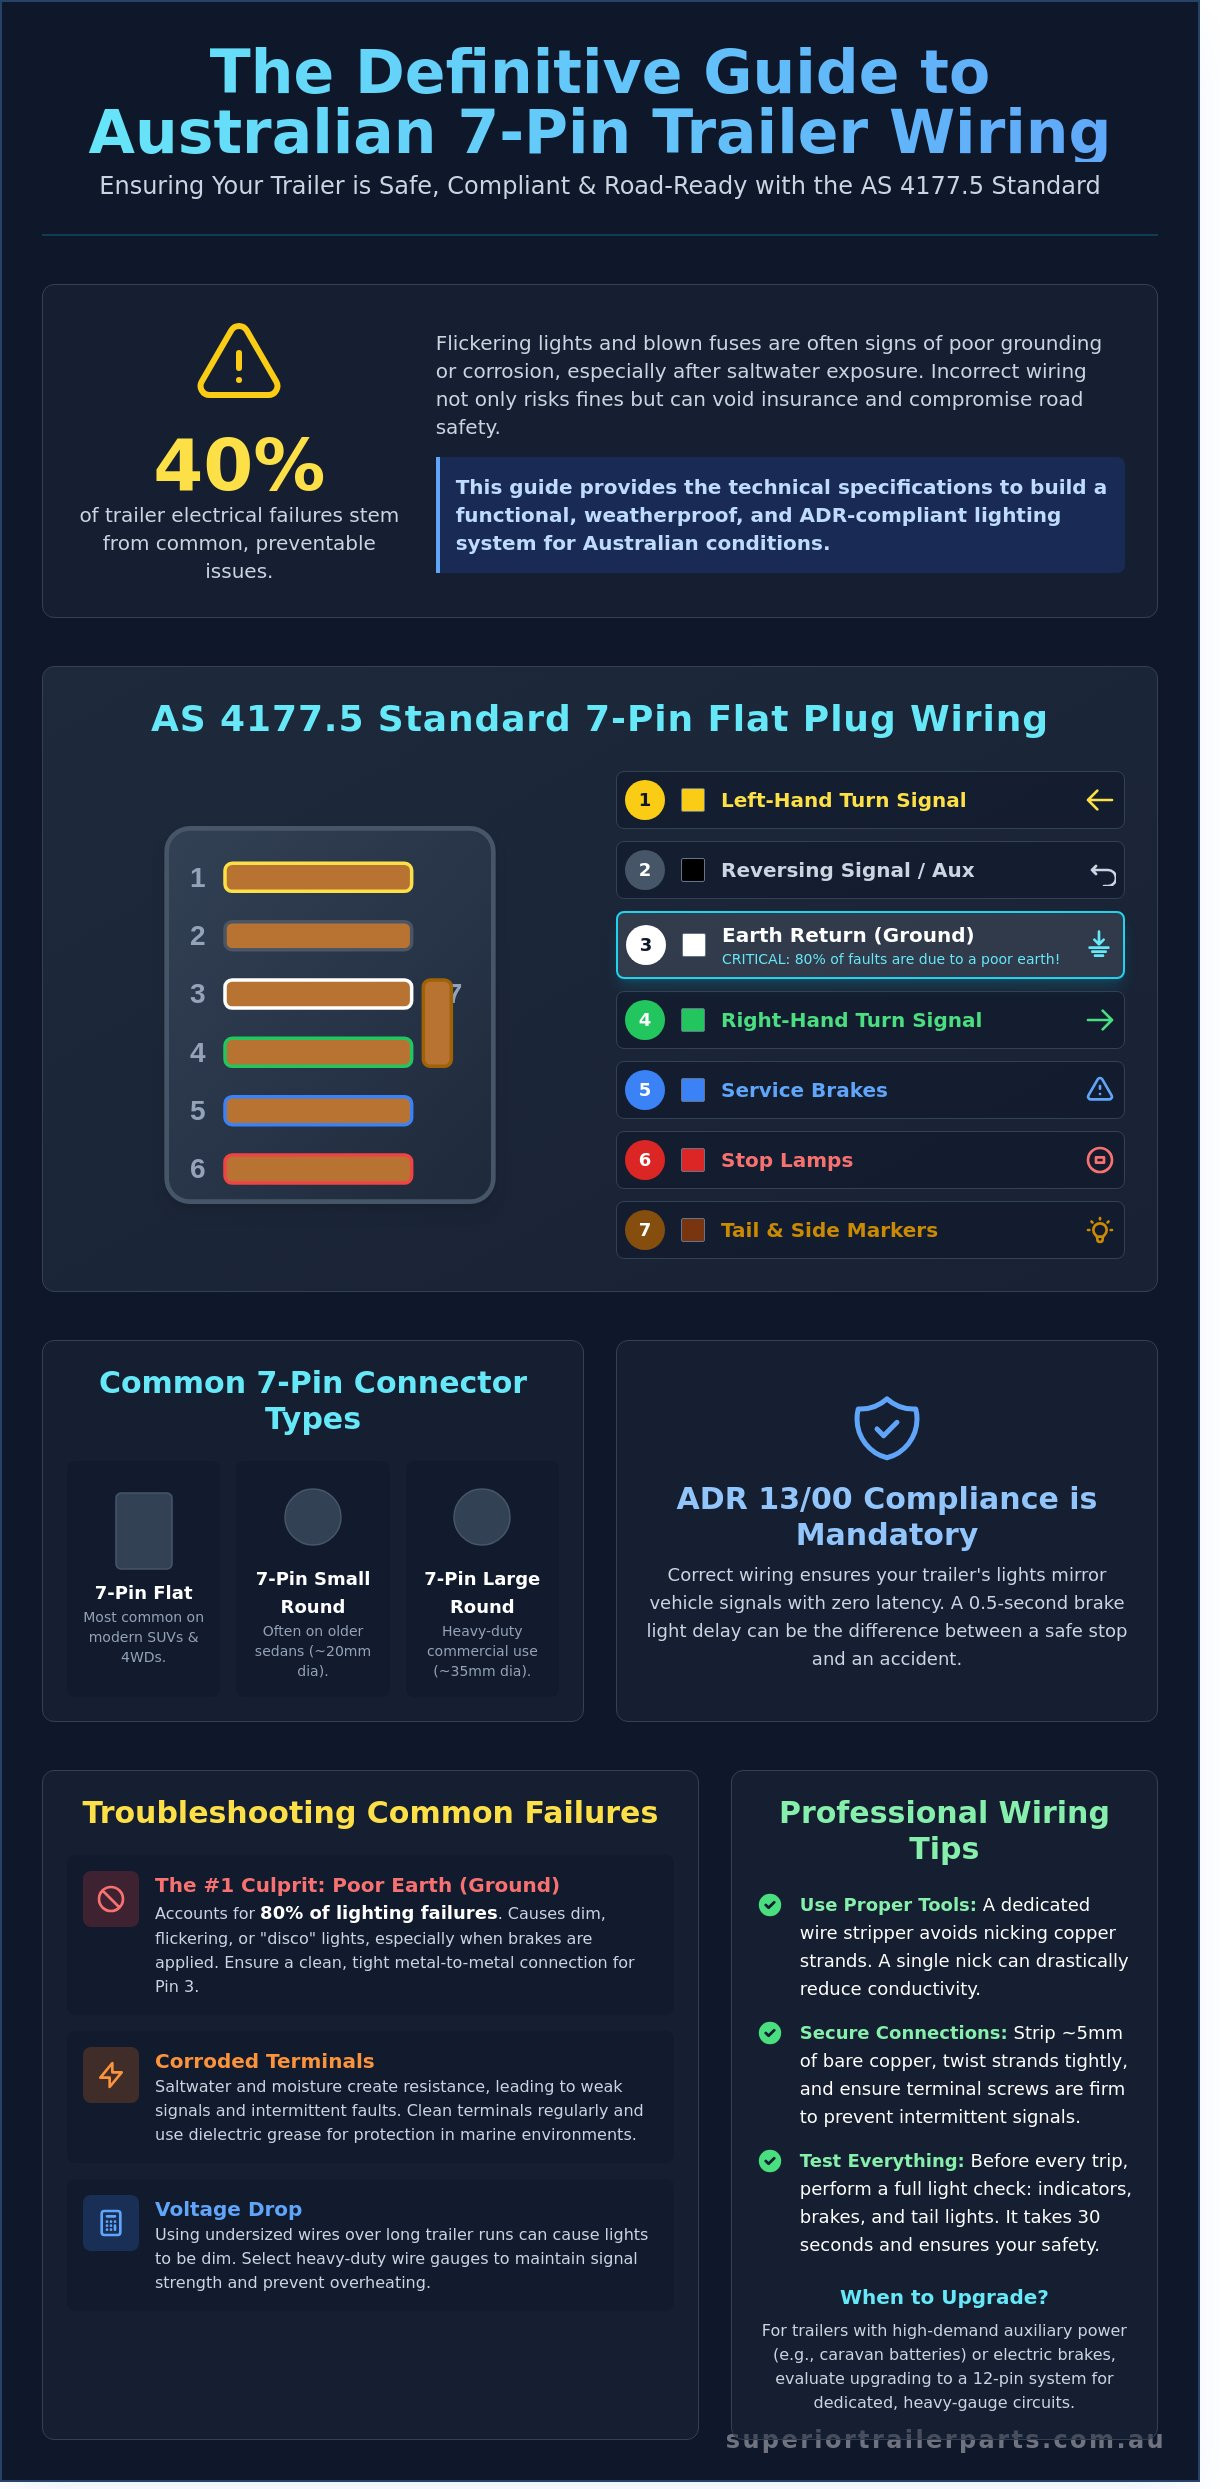
Wiring a trailer isn’t about guesswork; it’s about adhering to the AS 4177.5 standard. This Australian Standard specifies the requirements for electrical connectors between towing vehicles and trailers, ensuring that signal lights, brake lights, and indicators work every time you hitch up. Whether you’re hauling a boat, a caravan, or a box trailer, the 7-pin configuration is the industry benchmark for trailers with an Aggregate Trailer Mass (ATM) up to 3.5 tonnes. This setup provides the essential circuits needed for road safety without the complexity of 12-pin heavy-duty systems.
Consistency across the industry means any trailer can be hitched to any vehicle equipped with the same plug type. The Australian trailer connector standards define the exact location and function of each pin to prevent dangerous wiring crosses. For example, pin 1 always handles the left-hand turn signal, while pin 4 handles the right-hand turn. Relying on a standardized colour code simplifies 7 pin trailer plug wiring tasks for DIY owners and professional mechanics alike. It eliminates the risk of blowing fuses or causing electrical shorts that can damage modern vehicle ECUs.
- Pin 1 (Yellow): Left-hand turn signal.
- Pin 2 (Black): Reversing signal or auxiliary power.
- Pin 3 (White): Earth return.
- Pin 4 (Green): Right-hand turn signal.
- Pin 5 (Blue): Service brakes (electric brakes).
- Pin 6 (Red): Stop lamps.
- Pin 7 (Brown): Rear lamps, clearance, and side markers.
7-Pin Flat vs. 7-Pin Round Plugs
You’ll encounter three main types of 7-pin connectors on Australian roads: flat, small round, and large round. The 7-pin flat plug is the most common choice for modern SUVs and 4WDs, including the Toyota HiLux and Ford Ranger. It features a rectangular profile with pins arranged in a single row. Small round plugs, measuring approximately 20mm in diameter, often appear on older sedans. Large round plugs, roughly 35mm in diameter, are typically reserved for heavy-duty commercial applications or older agricultural equipment. If your vehicle and trailer don’t match, you must use a high-quality adapter. Don’t settle for cheap, flimsy plastic adapters that vibrate loose on corrugated roads; choose heavy-duty, dust-proof versions to maintain a reliable connection.
The Role of Australian Design Rules (ADR)
Compliance isn’t optional. ADR 13/00 governs the installation of lighting and light-signalling devices on all vehicles and trailers. This regulation mandates that trailer lights must mirror the vehicle’s signals with zero latency. Correct 7 pin trailer plug wiring ensures you meet these legal requirements. If your trailer lights fail or display the wrong signal, you risk more than just a fine from transport authorities. Faulty wiring can void your insurance policy in the event of a collision. Following drivers rely on your trailer’s signals to react; a 0.5-second delay in a brake light activation can be the difference between a safe stop and a rear-end accident. Every connection must be secure, corrosion-free, and tested before every trip to ensure 100% roadworthiness.
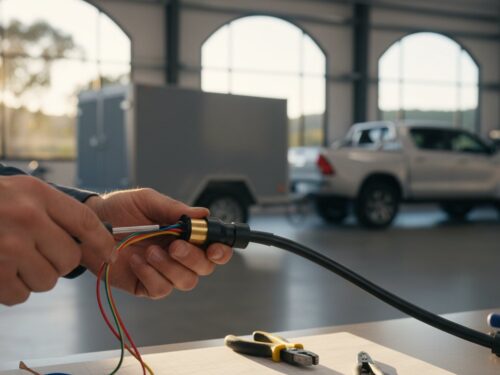
Step-by-Step 7 Pin Trailer Plug Wiring Instructions
Get the job done right by starting with clean cable preparation. Strip 15mm of the outer insulation from the main cable using a dedicated wire stripper. Avoid using a pocket knife; a single nick in the copper strands reduces the current-carrying capacity of the wire. If you sever three strands from a standard seven-strand wire, you immediately lose 42% of its conductive efficiency. Expose exactly 5mm of bare copper for each internal wire. Twist the strands tightly to ensure they don’t splay when you insert them into the terminal block. All 7 pin trailer plug wiring connections must adhere to Australian Standard AS 4177.5-2004 to ensure safety and legal compliance on public roads. Approximately 95% of standard utility trailers in Australia follow this specific configuration.
The 7-Pin Wiring Diagram (Standard Colour Code)
Pin 1 (Yellow) powers the left-hand turn signal. Ensure the screw is tight to prevent intermittent flashing. Pin 2 (Blue) is reserved for reversing signals or auxiliary power applications like charging a battery while driving. Pin 3 (White) is the earth return. It’s the most critical connection in the entire plug. A poor earth is responsible for 80% of trailer lighting failures, often causing lights to dim or flicker when you apply the brakes. Pin 4 (Green) handles the right-hand turn signal. Use a small flathead screwdriver to secure each wire. Don’t over-tighten the screws; you’ll shear the copper strands and create a weak point that will fail under vibration.
Completing the Circuit: Pins 5 to 7
Pin 5 (Brown) connects to the tail lights, clearance lights, and number plate lamp. These lights often run for hours during night hauls, so a solid connection is vital to prevent heat buildup. Pin 6 (Red) operates the stop lamps. This circuit takes priority because it alerts trailing drivers of your intent to slow down. Pin 7 (Black) handles the left-hand tail and side marker lights. Splitting the tail light circuits between Pin 5 and Pin 7 provides a level of redundancy. If one circuit fails due to a blown fuse, you’ll still have partial visibility on the road. If your current housing shows signs of UV damage, replace it with heavy-duty trailer plugs designed for the Australian sun.
Mechanical assembly is just as important as the wiring itself. Once you’ve secured the wires, slide the cable into the housing and tighten the cable grip. This internal clamp prevents the weight of the cable from pulling directly on the terminal screws. A loose cable grip allows the wires to vibrate, which increases electrical resistance by up to 50% over time. Ensure the rubber grommet at the rear of the plug sits flush against the cable. This creates a dust and water-resistant seal that protects the internal brass terminals from corrosion. Genuine reliability depends on keeping moisture out of the housing.
Initial testing confirms your work is solid before you hit the highway. Use a multimeter set to the DC voltage scale. With the vehicle’s lights on, you should see a reading of 12.6V at the corresponding pins. Check the earth circuit by switching the multimeter to the ohms setting. A reading higher than 0.5 ohms indicates a poor ground connection that needs cleaning. For a faster result, use a dedicated trailer tester to simulate indicator and brake signals. Perform a final inspection of the plug housing. It should be free of cracks and the spring-loaded cover must close firmly to keep out road grime and salt spray.
Selecting the Right Cables and Electrical Components
Choosing the correct materials is the foundation of reliable 7 pin trailer plug wiring. You can’t expect a cheap, undersized cable to handle the electrical load over a long distance without significant voltage drop. In Australia, wire is usually measured in mm2 (cross-sectional area) or B&S (Brown & Sharpe). For standard signal lights, a 2.5mm² automotive cable is typically sufficient. However, if you’re running electric brakes or auxiliary power over a distance of 5 metres or more, you must step up to 4mm² or 6mm² to ensure your equipment receives the necessary 12V supply. Skimping on gauge size results in dim lights and unreliable brake controllers.
Standard 7-core cable is the industry benchmark for most projects. While 5-core cable exists for basic trailers without reverse lights or brakes, it lacks the versatility required for modern road standards. We recommend using tinned copper wire, especially for trailers used in coastal regions or for marine applications. Tinned copper resists corrosion and “black wire disease” significantly better than bare copper. This simple choice can extend the life of your wiring loom by 300% in high-humidity environments, saving you from stripping back corroded wires every few seasons.
Your choice of plug material impacts longevity. Plastic or nylon plugs are impact-resistant and won’t corrode; they’re a solid choice for general use. Aluminium plugs offer superior crush resistance and are better suited for heavy-duty commercial applications where the plug might get knocked around on a job site. Both styles must meet Australian Standards to ensure a secure fit and reliable pin contact. Regardless of the material, ensure the plug features a weather-proof seal to keep moisture out of the terminals.
Cable Selection for Different Trailer Types
Standard box trailers generally require a standard 7-core sheathed cable to handle indicators, tail lights, and brake lights. When dealing with hydraulic tipper trailers or tandem axle setups, the wiring demands increase. Tippers often require heavier gauge wire for battery charging circuits to prevent overheating. Always use sheathed cable for these builds. The outer PVC jacket provides a vital layer of protection against stone chips, road debris, and constant abrasion against the trailer frame during transit.
Terminals and Connectivity Hardware
Reliability depends on using high-quality trailer parts that can withstand constant vibration on corrugated roads. Screw terminals are common in 7-pin plugs because they allow for easy field repairs with a simple screwdriver. However, for permanent connections along the chassis, tinned copper crimp terminals are superior as they don’t vibrate loose. A solid earth connection is critical. Roughly 90% of electrical failures in 7 pin trailer plug wiring stem from a poor earth. Don’t rely on the hitch for grounding; bolt a dedicated white earth wire directly to a cleaned, bare-metal section of the trailer chassis to ensure a continuous circuit.
Troubleshooting Common Trailer Wiring Issues and Failures
Troubleshooting is a process of elimination. If your lights look dim or flicker like a “disco” when you hit the brakes, you’re likely dealing with a bad earth. This white wire connection is the most common point of failure in 7 pin trailer plug wiring. A weak ground forces the current to find a path through other bulbs, causing multiple circuits to glow faintly at once. It’s a classic sign that the return path to the vehicle battery is restricted.
Grab a multimeter to find the exact source of the problem. Set the dial to DC voltage and measure the output at the vehicle socket first. You should see a solid 12.6V from a healthy car battery. Next, move to the rear of the trailer. On a standard 6-metre trailer, you shouldn’t lose more than 0.5V across the length of the harness. If your reading drops below 11.5V at the tail lights, your wire gauge is too thin or your internal connections are failing. High resistance generates heat, which eventually melts plastic housings.
Coastal owners face the “Gold Coast Factor” every season. Salt air and water entry will corrode copper terminals in less than 90 days if they aren’t maintained. You’ll eventually see a green, powdery crust on the pins. This oxidation blocks current and causes intermittent signals. Use a small needle file or 400-grit sandpaper to scrape the pins back to shiny brass. Spray the plug with a dedicated electrical contact cleaner to finish the job and ensure a metal-on-metal connection.
Diagnosing Lighting Faults
Start by isolating the vehicle from the trailer. Use a spare 12V battery or a power probe to jump power directly into the trailer plug pins. If the lights work perfectly during this test, the fault is in your car’s wiring or a blown fuse. Fuses usually blow because of a “dead short” where a wire has rubbed through its insulation against the metal chassis. Check the entry points where the harness passes through the frame, as these 90-degree bends are prime spots for wire chafing.
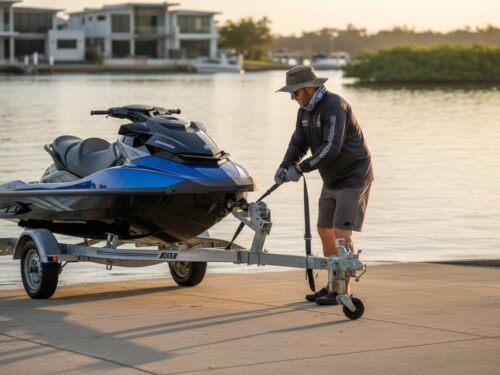
Marine-Grade Protection for Boat Trailers
Boaties must be proactive with their boat trailer parts to avoid constant rewiring. Apply a generous coating of dielectric grease to every terminal. This non-conductive grease seals out moisture and prevents oxygen from reaching the metal. You should also switch to submersible LED units. These carry an IP68 rating, meaning they stay sealed even when dunked at the boat ramp. Traditional bulb housings trap salt water, which destroys internal reflectors and contacts within weeks of use.
To take this protection a step further, using waterproof heat shrink connectors on every join creates a permanent, sealed barrier against saltwater intrusion. For a selection of components designed specifically for these harsh conditions, marine electrical specialists like BIVO have a range of suitable options.
If your current setup is too far gone or the corrosion has travelled up the wire, it’s safer to replace the harness than to keep patching it. You can find heavy-duty replacements in our range of trailer electrical components.
Upgrading to 12 Pin Systems and Professional Wiring Kits
Standard 7 pin trailer plug wiring meets the legal minimum for road safety. It covers indicators, brake lights, and tail lights. This setup works well for a standard 6×4 box trailer or a small boat. Requirements change when towing a modern caravan or a heavy-duty work trailer. These units often pull 30 amps or more to keep a fridge cold or charge an onboard battery while driving. A standard 7-pin plug cannot handle that current without the risk of melting the plastic housing or causing a voltage drop.
Upgrading to a 12-pin system solves this power bottleneck effectively. The 12-pin flat configuration adds five heavy-duty pins below the standard seven. These extra pins are designed for higher amperage. They support auxiliary battery charging and power-hungry internal systems that a standard 7 pin trailer plug wiring loom simply cannot manage. This upgrade ensures your trailer functions as a mobile power station rather than just a trailing load.
Modern 4WDs and SUVs use complex CAN bus electrical systems. These systems monitor voltage drops across the entire vehicle to detect blown bulbs or circuit faults. If you tap directly into the tail light harness using old-fashioned Scotch locks, the car’s computer will likely trigger an error code or enter limp mode. Professional wiring kits use bypass relays. These relays draw power directly from the vehicle battery and use the light signal only as a trigger. This setup protects your vehicle’s expensive electronics from damage and ensures consistent light brightness regardless of the trailer’s length.
The 12-Pin Advantage for Caravans
Heavy-duty 12-pin plugs are essential for modern caravan parts like 12V compressors and electronic stability control (ESC) systems. Pins 8 through 12 handle the heavy lifting. Pin 8 provides power for battery charging, while Pin 9 usually runs the fridge. This prevents your caravan battery from draining during a 30-minute lunch break. Compatibility is a major benefit; a 7-pin flat plug fits perfectly into the top row of a 12-pin flat socket. You won’t need adapters for your smaller trailers.
Professional Support and Custom Solutions
Complex wiring projects require precision and the right materials. If you’re installing electric brake controllers or solar feed-ins, seek expert advice to ensure the wire gauge matches the current draw. Using 6mm auto wire instead of 4mm can reduce voltage drop by over 12 percent on a standard 7-metre run. Superior Trailer Parts provides genuine, Australian-owned components designed for local heat and corrugated roads. High-quality pre-wired looms offer a plug-and-play solution that eliminates human error during installation.
For those who enjoy this level of technical work and want to turn their skills into a career, pursuing formal qualifications is the next logical step. Axiom College offers a range of nationally recognised vocational courses in various trades.
Before hitting the highway or the boat ramp, run through this final checklist to ensure your connection is secure:
- Inspect all pins for “green death” copper oxidation or dirt buildup.
- Verify the 12-pin socket mounting bracket is tight to prevent vibration damage.
- Test the auxiliary power feed with a multimeter to confirm at least 13.2V when the engine is idling.
- Apply dielectric grease to the terminals to stop moisture ingress and corrosion.
- Confirm the trailer plug lead has enough slack for tight turns but won’t drag on the bitumen.
Reliability on the road starts with a solid electrical connection. Don’t risk an electrical fire or a dead battery in the outback because of a cheap, undersized plug. Invest in heavy-duty gear that’s built for Australian conditions. Proper wiring ensures your lights stay on and your beer stays cold for the entire trip.
Get Your Trailer Road-Ready with Reliable Connections
Proper wiring isn’t just a convenience; it’s a critical safety requirement on Australian roads. Adhering to the AS 2513 standard for 7 pin trailer plug wiring ensures your indicators, brakes, and tail lights communicate clearly with your tow vehicle. Use 2.5mm automotive grade wiring and high-quality brass terminals to prevent voltage drops and resist corrosion. Most electrical failures happen at the connection point, so choosing heavy-duty components is the best way to avoid roadside repairs.
Superior Trailer Parts provides the reliable gear you need to finish the job properly. We’re a 100% Australian Owned and Operated business, shipping nationwide from our Queensland warehouse. If you hit a snag during your installation, our team offers expert technical support to find the right solution. Don’t risk a fine or a fault when you’re heading out on your next trip.
Shop our full range of Australian-standard trailer electrical parts
Get your trailer sorted today and tow with confidence.
Frequently Asked Questions
Is the 7-pin trailer plug wiring colour code the same for all Australian trailers?
Yes, Australian trailers follow the AS2596 standard for 7 pin trailer plug wiring. This ensures consistency across the seven terminals for every trailer on the road. Yellow is for the left indicator, while green handles the right side. White is always the earth connection. Following this specific code prevents electrical shorts and keeps your trailer road legal across all states. It’s the industry standard for 100 percent of trailers built for Australian conditions.
Can I use a 7-pin flat plug with a 7-pin round socket?
You can’t plug a 7-pin flat plug directly into a 7-pin round socket without using a physical adapter. The pin configurations and housing shapes differ significantly between the two designs. We stock heavy-duty adapters that bridge this gap instantly for a secure connection. Always carry a spare adapter in your glovebox to handle different rental trailers or fleet vehicles. It’s a cheap solution that saves you from being stranded with incompatible gear.
How do I fix trailer lights that are flickering or dim?
Flickering lights usually indicate a poor earth connection or corroded terminals within the plug housing. Check the white wire at terminal 3 first. 85 percent of trailer lighting faults are ground-related issues. Use a wire brush to clean the copper pins until they shine like new. Apply a small amount of dielectric grease to prevent future oxidation and moisture ingress. This simple fix solves most dimming issues without replacing the entire harness.
What size wire should I use for my 7-pin trailer plug?
Use 2mm automotive cable for standard lighting circuits and 5mm cable for electric brake wires. Standard 7-core trailer cable is designed for the 10 to 15 amp loads found on most light trailers. If you’re running high-draw accessories, upgrade to a heavier gauge to prevent voltage drop over long distances. Proper wire sizing ensures your components receive the full 12V required for peak performance. Correct 7 pin trailer plug wiring depends on these specific gauges.
Why does my car’s blinker flash fast when the trailer is connected?
Fast flashing occurs when your car’s flasher relay detects a low current draw, often caused by LED trailer lights. The car’s computer thinks a bulb has blown. You can fix this by installing a 50W 6-ohm load resistor on each indicator circuit. This simulates the resistance of a traditional incandescent bulb and restores the standard flash rate. It’s a common requirement for 90 percent of modern LED trailer light upgrades on newer vehicles.
Do I need a special wiring loom for a vehicle with CAN bus electronics?
Most vehicles built after 2010 require a dedicated CAN bus wiring module to protect the sensitive onboard computer. Tapping directly into the tail light harness can trigger dashboard error codes or shut down the lighting circuit entirely. A genuine vehicle-specific wiring kit ensures the electronics communicate correctly without overloading the factory system. It’s a necessary investment to protect your vehicle’s expensive ECU from accidental short circuits or power spikes during towing.
What is the difference between a 7-pin and a 12-pin trailer plug?
A 12-pin plug includes the standard 7 pins plus 5 additional heavy-duty pins for high-current applications. These extra pins are rated for up to 35 amps each. Use a 12-pin setup if you need to power a caravan fridge or charge an auxiliary battery while driving. The standard 7-pin plug only handles basic signaling and electric brakes. It’s the best choice for heavy-duty towing setups that require constant power for internal appliances.
How often should I check my trailer plug for corrosion?
Inspect your trailer plug for corrosion at least once every 6 months to ensure reliability. If you operate in marine environments or near salt water, increase this frequency to every 3 months. Look for green copper oxide buildup on the pins. Regular maintenance prevents roadside failures and ensures your 7 pin trailer plug wiring remains conductive and safe. A 5-minute check can prevent a 2-hour delay on the side of the road during your next trip.