You’re halfway to the job site when you realize your trailer indicators stopped working, leaving you vulnerable to a roadside fine or a rear-end collision. It’s a frustrating situation that many Australian drivers face when dealing with corroded terminals or incorrect diagrams. Mastering how to wire a 7 pin flat trailer plug is essential for any reliable towing setup. We agree that struggling with mismatched wire colours is a waste of your time and a major risk to your safety on the road.
You’ll gain the confidence to wire your trailer correctly by following the Australian standard wiring sequence for a dependable connection. This ensures your lights work every time you hitch up, regardless of the conditions. We’ll break down the specific pin assignments and provide the technical steps needed for a clean, heavy-duty result that lasts for years of hard use.
Key Takeaways
- Understand the Australian Design Rules (ADR) to ensure your trailer lighting is compliant and safe for local road conditions.
- Identify the essential tools and heavy-duty automotive cables needed for a professional, long-lasting electrical setup.
- Follow the standard pin-by-pin colour codes to learn how to wire a 7 pin flat trailer plug for a secure, durable connection.
- Use proven troubleshooting techniques and multi-meter checks to verify your circuit reliability before hitting the road.
- Determine when your setup requires a 12 pin upgrade and how genuine trailer parts prevent common electrical failures.
The Australian Standard for 7 Pin Flat Trailer Plugs
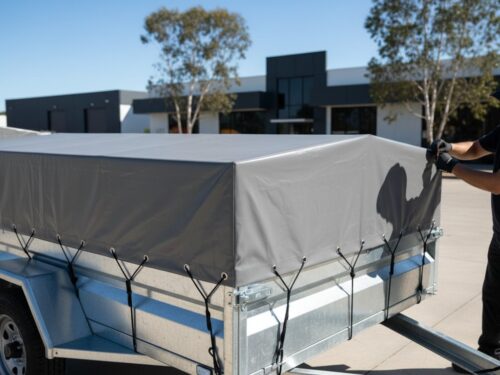
Wiring a trailer isn’t a task for guesswork. In Australia, the 7 pin flat plug is the industry standard for most light-duty towing applications, including heavy duty single axle box trailers and boat trailers. This dominance exists because the flat design provides a secure, low-profile connection that resists vibration better than many older styles. All trailer lighting in Australia must comply with the Australian Design Rules (ADR), specifically ADR 13/00 and ADR 42/04. These regulations mandate that your trailer lights must mirror your vehicle’s signals perfectly to ensure road safety. Understanding trailer connector standards is the first step in maintaining a roadworthy setup that keeps you and other drivers safe.
Standardisation ensures that any vehicle equipped with a 7 pin flat socket can hitch up to any trailer with a matching plug. This interoperability is vital for fleet managers and DIY owners alike. If you don’t know how to wire a 7 pin flat trailer plug correctly, you risk blowing fuses or causing expensive damage to your vehicle’s Electronic Control Unit (ECU). Most modern vehicles use complex CAN bus wiring systems. These systems are sensitive to voltage drops and incorrect loads, so if you are planning to integrate more advanced in-car technology, consulting specialists like Bassjunkies can help you select compatible components. Following the established Australian standard protects your vehicle’s hardware while ensuring your trailer remains visible at night.
Why Colour Coding Matters
The AS4177.5-2004 standard defines the specific colour and position for every wire in a 7 pin flat connector. This uniform system prevents electrical shorts that occur when circuits cross. You should never assume a wire’s function based on its appearance alone without testing it. In the Australian standard, yellow always handles the left-hand turn signal, while white is reserved for the earth return. Using the correct trailer parts and following the colour code ensures that your brake lights don’t accidentally activate your indicators. Consistent wiring makes troubleshooting simple if a bulb fails or a connection corrodes over time.
Flat vs Round Plugs: Making the Choice
The physical difference between flat and round plugs is significant. Flat plugs are generally preferred for domestic towing because they’re compact and less likely to be crushed against a bumper. They feature a slide-in locking mechanism that stays tight over long distances. Round plugs are often found on older commercial vehicles or heavy-duty 4WD setups. They’re typically bulkier and use a different pin configuration. Knowing how to wire a 7 pin flat trailer plug gives you the flexibility to use the most common connection type in the country. If your vehicle has a round socket but your trailer has a flat plug, you can use a temporary adapter. However, rewiring the trailer to a 7 pin flat plug is a more reliable, permanent solution for frequent towing.
Preparation and Tools for a Professional Wiring Job
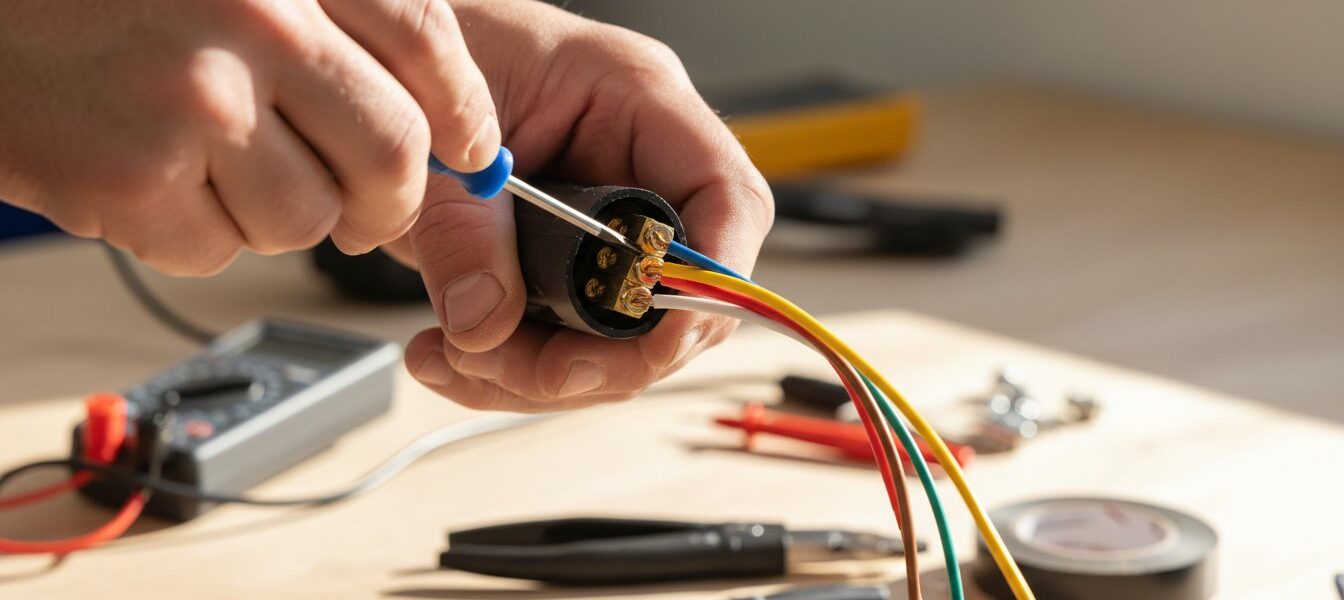
Proper preparation prevents the frustration of intermittent light failures and short circuits. Before you begin learning how to wire a 7 pin flat trailer plug, clear a clean, flat workspace and ensure you have adequate lighting. Safety is the first priority. Disconnect the vehicle’s negative battery terminal to protect the sensitive electrical system from accidental surges. Modern vehicle ECUs are expensive to replace; taking two minutes to pull a terminal saves hundreds of dollars in potential damage.
You must distinguish between the two components of the connection. The trailer side features the male plug with exposed pins. The vehicle side holds the female socket. Most Australian trailers use a standard 7-core automotive cable. Ensure your cable has a heavy-duty outer sheath to withstand road debris and UV exposure. If you’re unsure about your current setup, sourcing high-quality trailer parts ensures your wiring lasts through harsh conditions.
Essential Tool Kit for Trailer Wiring
Ditch the pocket knife for this job. A quality pair of wire strippers allows you to remove insulation without nicking the copper strands. Even a small nick can reduce the wire’s current-carrying capacity by 10% or more, leading to heat buildup. You’ll also need a small flat-head screwdriver, specifically a 2mm or 3mm tip, to fit the terminal screws inside the plug housing.
A multi-meter or a 12V circuit tester is non-negotiable. Don’t rely on wire colours alone, as previous owners or manufacturers might have used non-standard looms. Use the multi-meter to verify the function of every pin on the vehicle socket before connecting the trailer. For older vehicles, keep a can of electrical contact cleaner handy. A quick spray removes oxidation and ensures a low-resistance connection between the pins and sockets.
Preparing the Cable and Plug Housing
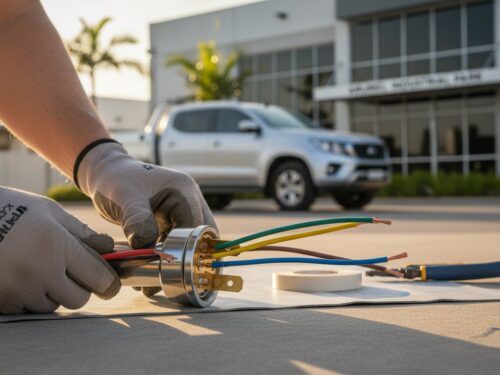
Slide the plug cover onto the cable before you strip any wires. This is the most common mistake in trailer maintenance. If you forget the cover, you’ll have to disconnect all seven wires and start again. Strip approximately 40mm of the outer black sheath. Be careful not to cut into the coloured insulation of the inner cores. Strip about 5mm of insulation from each individual wire to expose the copper.
The practice of “tinning” wire ends with solder is a common debate. While solder prevents strands from fraying, it makes the wire end rigid. In the high-vibration environment of Australian towing, soldered ends can become brittle and snap at the terminal. Most professional installers prefer using bare, twisted multi-strand copper or crimped ferrules. This allows the screw terminal to bite into the wire, creating a secure connection that flexes with the movement of the trailer. This approach is the most reliable way to handle how to wire a 7 pin flat trailer plug for long-term durability.
7 Pin Flat Wiring Diagram and Colour Codes
Consistency is the key to a reliable towing setup. Following the Australian Standard AS 2513-1982 ensures your trailer functions correctly with any modern vehicle. Knowing how to wire a 7 pin flat trailer plug correctly saves time and prevents expensive electrical damage to your tow vehicle. You must focus on the specific numbering moulded into the plastic housing of the plug, as each number corresponds to a specific lighting function and wire colour.
The Standard 7 Pin Sequence
- Pin 1 (Yellow): Left-hand turn signal.
- Pin 2 (Black): Reverse lights or auxiliary 12V power.
- Pin 3 (White): Earth connection. This is the return path for every circuit.
- Pin 4 (Green): Right-hand turn signal.
Strip exactly 5mm of insulation from each wire end. Twist the copper strands tightly before inserting them into the screw terminals. Loose strands are the primary cause of short circuits. If one stray wire touches the terminal next to it, you’ll likely blow a fuse in your vehicle’s power distribution box immediately. Use a small flat-head screwdriver to tighten the terminals firmly, but don’t over-tighten and strip the threads.
Tail, Brake, and Earth Details
- Pin 5 (Blue): Service brakes. This connects to your electric brake controller.
- Pin 6 (Red): Stop lamps. These must be bright and responsive for road safety.
- Pin 7 (Brown): Tail lamps, clearance lights, and side markers.
High-quality trailer parts rely on these connections to maintain safety on the road. Pin 5 is especially critical for heavy-duty trailers equipped with electric brakes. A poor connection here can lead to intermittent braking force, which is dangerous when hauling heavy loads at 100 km/h. Always double-check that the blue wire is seated deeply in the terminal to handle the current required by the brake magnets.
Securing the Earth Wire
Pin 3 is the foundation of the entire system. Statistics from roadside repairs suggest that 85% of trailer lighting issues are caused by a faulty earth. If you notice dim lights or a “disco” effect where multiple lights flash at once, your white wire is likely loose or corroded. This is the most common hurdle when learning how to wire a 7 pin flat trailer plug for the first time.
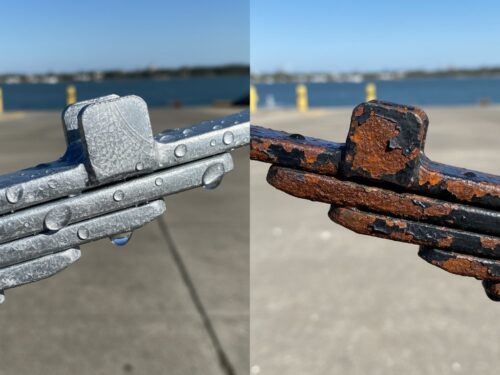
Don’t just screw the wire into the plug and hope for the best. Ensure the other end of the white wire is bolted directly to a clean section of the trailer frame. Scrape away any paint, zinc, or rust to achieve genuine metal-to-metal contact. Using a galvanised star washer helps bite into the steel, ensuring the circuit remains closed even during heavy vibrations on corrugated roads. This simple step prevents the most common electrical headaches for DIY owners and fleet managers across Australia.
Testing the Circuit and Troubleshooting Faults
Wiring the plug is only half the job. You must verify every connection before hitting the road. A faulty trailer connection causes safety risks and can lead to heavy fines under Australian vehicle standards. Follow this systematic approach to ensure your work is solid and reliable.
Systematic Testing Procedure
Start by testing each circuit individually. Use a 12V power source, such as a spare battery, for bench testing before you connect to the vehicle. Connect the negative terminal to pin 3 (White) and touch the positive lead to each other pin one by one. Check that the correct light illuminates on the trailer. This step prevents blowing vehicle fuses if you have a hidden short circuit. Once you hook up to the vehicle, have a partner stand behind the trailer while you cycle through the left indicator, right indicator, brakes, and tail lights. If you notice lights dimming when multiple circuits are active, you likely have a voltage drop issue. This often occurs on trailers longer than 5 metres where the wire gauge is too thin for the length of the run.
Common Wiring Problems and Solutions
If you followed the steps on how to wire a 7 pin flat trailer plug but the wrong light flashes, you’ve likely swapped the green and yellow wires. Recheck pins 1 and 4 immediately. Flickering lights usually indicate a loose terminal screw or a poor earth connection. Ensure the white wire is secured to a clean, unpainted section of the trailer chassis. If the vehicle fuse blows as soon as you plug in, look for a short circuit. This usually happens when a stray wire strand touches the metal casing or an adjacent terminal inside the plug. Open the housing and inspect the internal assembly for small “whiskers” of copper that might be bridging two pins.
Corrosion Prevention
Environment and moisture are the primary enemies of trailer electronics. Apply a liberal amount of dielectric grease to the brass terminals. This non-conductive coating seals out oxygen and prevents the green copper oxide build-up that stops current flow. For boat trailers or units used in coastal areas, upgrade to LED submersible tail lights. These units are vacuum-sealed to prevent water ingress, offering significantly better longevity than standard bulb housings that trap salt water. Perform a physical inspection every six months if you use the trailer for heavy-duty work. Check for cracked insulation or pins that have lost their spring tension over time.
Ensure your trailer remains roadworthy with the right components. Browse our full selection of heavy-duty trailer parts for professional-grade reliability.
Upgrading Your Trailer Electrical System
Standard 7-pin setups handle basic lighting for box trailers and small boats. If you tow a modern caravan with a 12V fridge or an internal battery system, upgrade to a 12-pin plug. This configuration includes the standard seven pins for lights and adds five larger pins for high-current power. Integrating quality trailer parts ensures your system manages these increased loads without overheating. Heavy-duty housings are essential for off-road use where vibration and dust ingress are constant threats. Cheap components often fail under these conditions, leading to intermittent light flickering or total power loss.
Choosing High-Quality Plugs and Sockets
Australian conditions test every electrical connection. Plastic housings are ideal for marine environments because they don’t corrode in salt air. Metal housings offer better impact resistance for trailers frequently used on gravel or corrugated roads. Premium plugs feature internal rubber dust seals and spring-loaded locking mechanisms. These seals keep moisture out of the terminals, preventing the green corrosion that ruins conductivity. Using genuine couplings and parts ensures the mechanical connection is as secure as the electrical one. This prevents the plug from dragging on the bitumen if it vibrates loose.
Modern LED Lighting Considerations
LED lights are now standard on most Australian trailers. They draw approximately 80 percent less current than traditional incandescent bulbs. This low power draw often tricks the computer in modern tow vehicles into thinking a bulb has blown. You’ll need to install load resistors or an LED pulse secondary module to resolve these dashboard warnings. Knowing how to wire a 7 pin flat trailer plug correctly means ensuring your cable gauge matches the trailer’s requirements. Use 4mm or 5mm automotive cable for brake circuits to prevent voltage drop over long distances. This ensures your electric brakes receive the full signal required for safe stopping.
Before hitting the highway, run through this final road-ready checklist to confirm your connection is safe:
- Inspect all pins for signs of arcing or black soot.
- Confirm the earth wire (White, Pin 3) is securely fastened to a clean metal surface on the trailer frame.
- Check that the plug cover snaps firmly over the socket to lock it in place.
- Test every light function: left indicator, right indicator, tail lights, and brake lights.
- Apply a small amount of dielectric grease to the pins to repel moisture.
Maintaining a reliable electrical system isn’t just about passing a rego check. It’s about ensuring other drivers see your intentions clearly. High-quality components and a methodical approach to how to wire a 7 pin flat trailer plug will keep your gear operational for years of heavy use across Australia.
Get Your Trailer Road-Ready Today
Correct wiring is essential for road safety and legal compliance across all Australian states. Following the Australian Standard AS 2513-1982 ensures your indicators, brake lights, and tail lights function perfectly every time you hit the road. Mastering how to wire a 7 pin flat trailer plug prevents electrical shorts and protects your vehicle’s sensitive onboard computers from damage. Always use a circuit tester to verify each pin before you head out on your next trip. Faulty connections lead to heavy fines and dangerous situations, so don’t cut corners on your electrical setup.
Superior Trailer Parts provides the gear you need to get the job done right. We’re Australian Owned and Operated, supplying high-quality components built to withstand harsh local conditions. You can rely on our expert advice and nationwide shipping to keep your trailer moving. We focus on durability and performance because we know how tough the Australian environment is on electrical systems. Our heavy-duty components are designed for a precise fit and long-term resilience, ensuring you stay on the road longer.
Shop Heavy-Duty Trailer Plugs and Electrical Parts
Get your tools ready and start your wiring project with confidence today. Your trailer is only as reliable as its weakest connection.
Frequently Asked Questions
What are the 7 pin flat trailer plug wire colours in Australia?
Australian trailer wiring follows a standard colour code to ensure consistency across all trailers and vehicles. Pin 1 is yellow for the left turn signal, pin 2 is blue for service brakes, and pin 3 is white for the earth connection. Pin 4 is green for the right turn signal, pin 5 is brown for tail lights, pin 6 is red for stop lights, and pin 7 is black for reverse lights.
Is a 7 pin flat plug the same as a 7 pin small round plug?
No, these two plugs are physically different and won’t fit into the same socket without an adapter. A 7 pin flat plug is rectangular with the pins arranged in a single row, whereas a small round plug is circular and measures approximately 20mm in diameter. While they both carry the same seven electrical functions, you must match the plug type to your vehicle’s socket for a secure connection.
Why are my trailer lights dim even though I wired the plug correctly?
Dim trailer lights are almost always caused by a poor earth connection at pin 3. Check the white wire to ensure it’s making clean contact with the trailer frame and isn’t obstructed by paint or rust. Voltage drop can also occur if you’ve used thin, low-quality wiring over a long distance. Inspect all terminals for corrosion, as even a small amount of oxidation increases resistance and reduces light output.
Can I wire a 7 pin trailer plug myself or do I need an auto electrician?
You can wire a 7 pin trailer plug yourself using basic hand tools like a wire stripper and a small screwdriver. Learning how to wire a 7 pin flat trailer plug is a straightforward DIY task for most trailer owners who follow a standard wiring diagram. If your vehicle uses a complex CAN bus system or requires a specific plug-and-play wiring harness to avoid dashboard error codes, hiring a professional auto electrician is a safer choice.
What does the blue wire do on a 7 pin trailer plug?
The blue wire is dedicated to the service brakes or the electric brake controller system. It carries the electrical signal from the vehicle to the trailer’s brake magnets to slow the trailer down when you apply the vehicle’s brakes. This connection is a legal requirement for any trailer with a Gross Trailer Mass (GTM) over 750kg that features electric brakes. Always ensure this connection is tight to maintain braking safety.
How do I fix a trailer plug where the wires have pulled out?
To fix wires that have pulled out, start by opening the plug housing to reveal the internal screw terminals. Strip approximately 5mm of insulation from the end of each wire and twist the copper strands together so they don’t fray. Insert the wires back into their correct numbered terminals based on the Australian wiring standard and tighten the grub screws firmly. Use the cable clamp on the housing to provide strain relief so the wires don’t pull out again.
Which pin is the earth on a 7 pin flat trailer plug?
Pin 3 is the designated earth pin on a 7 pin flat trailer plug and it always uses a white wire. This pin is the most important part of the circuit because it provides the return path for the electricity for all other lights. If the white wire is loose or the connection is dirty, you’ll experience flickering lights or a total system failure. Always use a heavy-duty wire for the earth to handle the combined load of all functions.
Can I use a 7 pin flat plug with a 12 pin socket on my car?
Yes, a standard 7 pin flat plug is fully compatible with a 12 pin flat socket. The 7 pin plug fits into the top row of the 12 pin socket, which contains the seven primary lighting and braking circuits. The bottom row of five pins on the 12 pin socket is for high-current applications like fridge power or battery charging and remains unused when a 7 pin plug is connected. This allows for easy compatibility across different trailer setups.