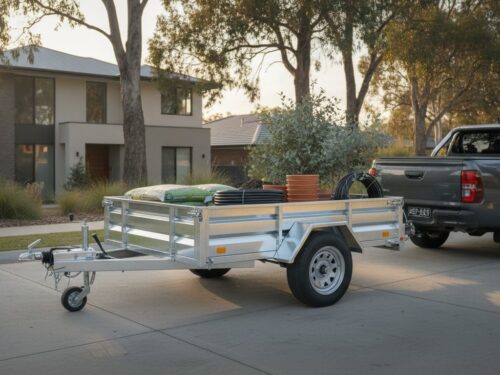
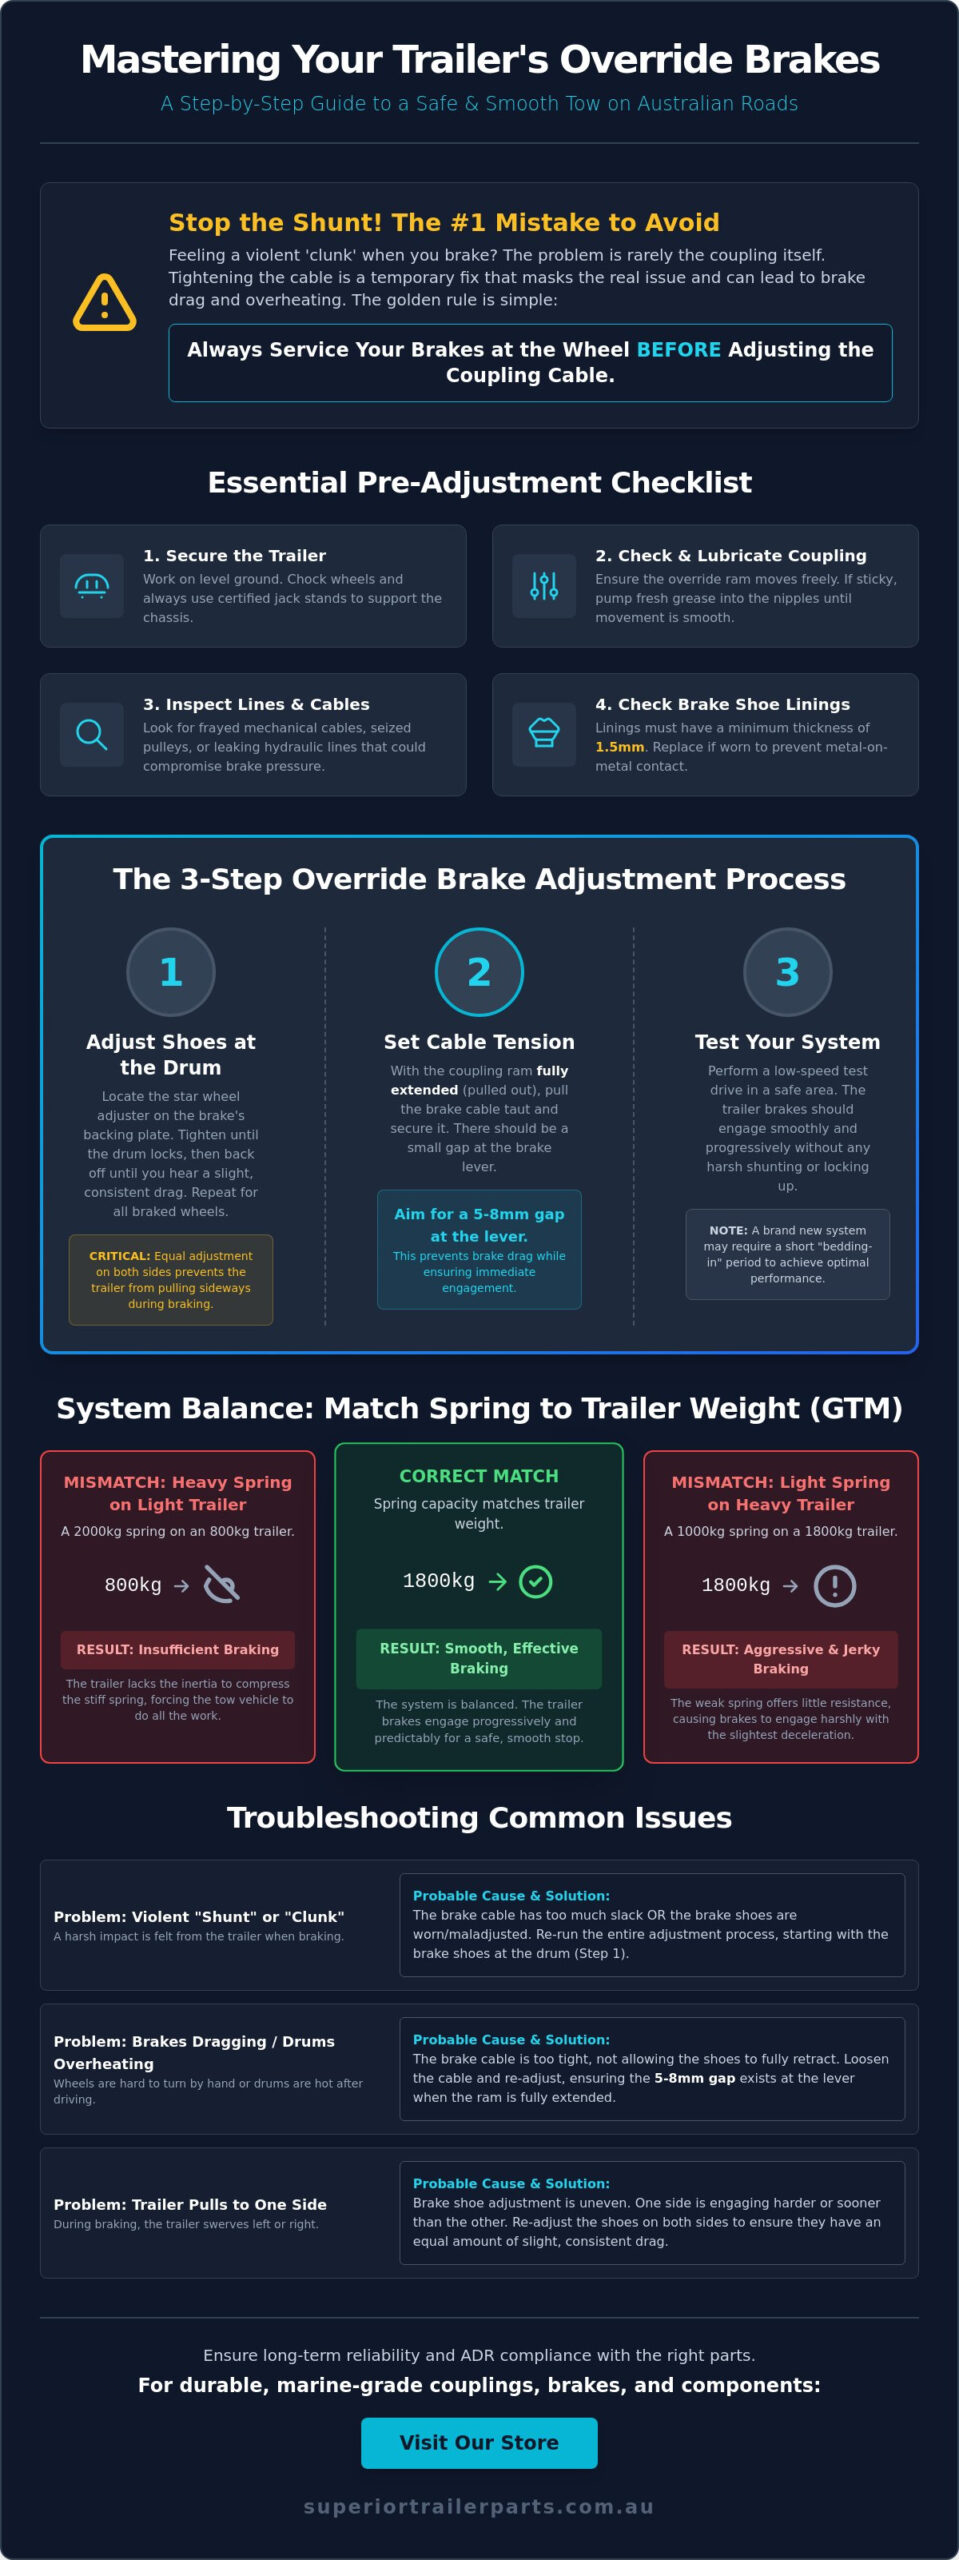
If your trailer shunts every time you hit the brakes, adjusting your coupling might actually be the last thing you should do. Most owners assume a tight cable equals better stopping power, but a poorly executed override brake coupling adjustment often leads to overheating drums or brakes that fail to engage on steep descents. Under ADR 38/05 regulations, trailers with a Gross Trailer Mass between 751kg and 2,000kg require a functional braking system. Getting the mechanical sequence wrong doesn’t just ruin your gear; it makes your rig unroadworthy for Australian roads.
We know the stress of towing a trailer that feels like it’s pushing your tow vehicle. This guide explains how to correctly set and maintain your override braking system to ensure smooth performance and total compliance. You will learn why you must adjust the wheels before the cable, the specific gap required at the brake lever, and how to pass a safety inspection with confidence. As an Australian owned and operated specialist, we provide the practical steps to stop the shunting and ensure your trailer is ready for the longest hauls.
Key Takeaways
- Learn how override systems use trailer inertia to engage brakes and why precise setup is required for smooth, consistent stopping.
- Understand why servicing wheel-end components is a mandatory first step before attempting any override brake coupling adjustment.
- Master the technique for setting cable tension with the ram fully extended to eliminate trailer shunting without causing brake drag.
- Identify and fix common mechanical issues like brake lock-ups during reversing and excessive clunking during acceleration or braking.
- Select durable, marine-grade replacement parts to ensure long-term reliability and ADR compliance in demanding Australian conditions.
Understanding Override Brake Couplings and Why Adjustment Matters
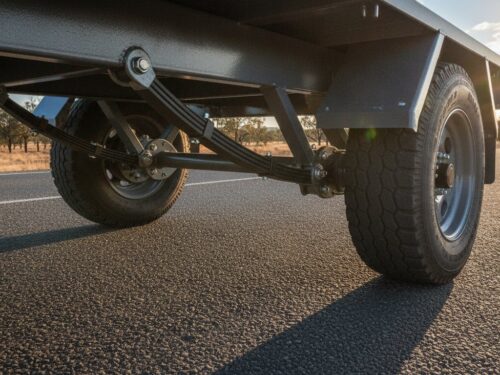
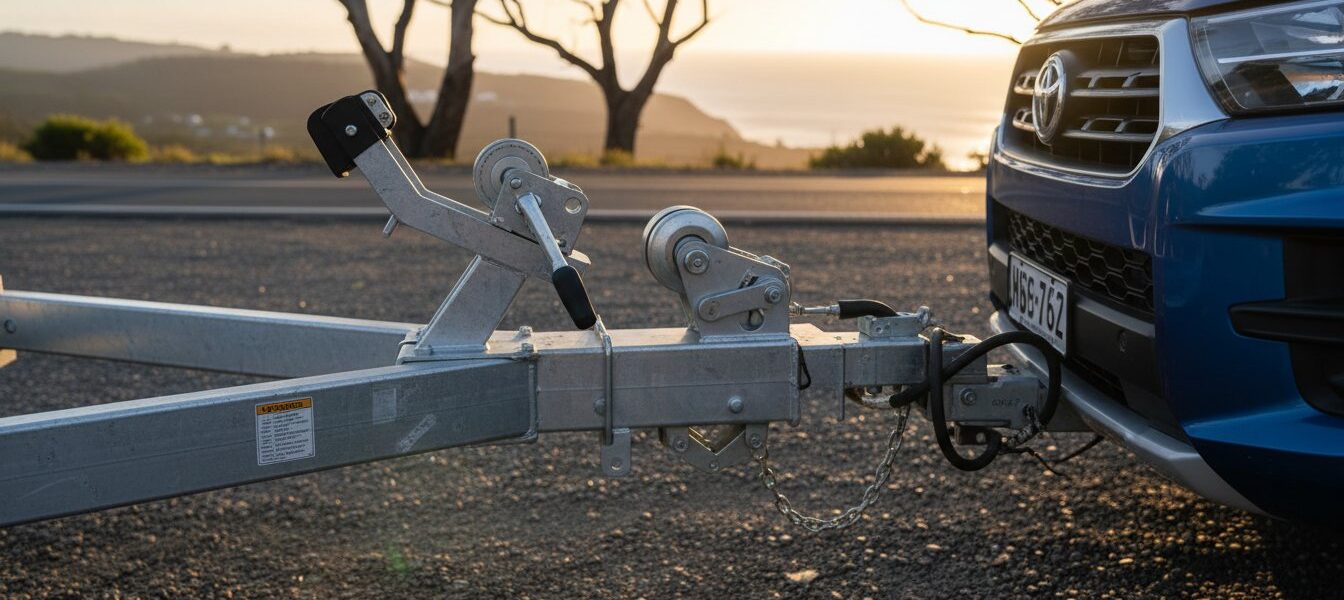
Override brakes are the standard for trailers between 751kg and 2,000kg Gross Trailer Mass (GTM). These systems, often referred to as overrun brake systems, rely on the trailer’s own weight and momentum to slow itself down. When the tow vehicle decelerates, the trailer pushes forward against the tow ball. This force compresses a sliding ram within the coupling, which then activates the brakes via a mechanical cable or a hydraulic master cylinder. It is a simple, effective design that doesn’t require a dedicated controller in the tow vehicle.
Getting your override brake coupling adjustment right is a matter of safety and legal compliance. Australian Design Rule (ADR) 38/05 mandates that trailers in this weight class must have functional brakes on at least one axle. If the adjustment is loose, you’ll feel a violent “shunt” or “clunk” every time you stop. If it’s too tight, your brakes will drag, leading to overheating, brake fade, and premature wear on your 4 hole over-ride couplings. A poorly maintained system can fail entirely on long descents, putting your rig and other road users at risk.
How the Override Mechanism Functions
The core of the system is a sliding shaft supported by an internal damper or spring. This spring provides resistance against minor movements, preventing the brakes from engaging every time you lift off the accelerator. In a mechanical system, the ram pulls a steel cable connected to the brake arms. Hydraulic systems use the ram to push a piston into a master cylinder, sending fluid to the calipers or cylinders. A loose setup creates a delay in braking, followed by a sudden impact as the ram hits its limit. This “clunk” signals that the linkage has too much slack and needs immediate attention.
Spring Capacities and Load Ratings
Coupling springs are usually rated at either 1000kg or 2000kg. This rating determines how much force is required to compress the ram and engage the brakes. If you install a 2000kg rated spring on a light 800kg trailer, the trailer won’t have enough inertia to compress the spring effectively. The result is a trailer that barely brakes, forcing the tow vehicle to do all the work. Conversely, a weak spring on a heavy trailer will cause the brakes to engage too aggressively with every slight deceleration. Matching the spring capacity to your trailer’s loaded weight is essential for a smooth override brake coupling adjustment and reliable stopping power.
Essential Pre-Adjustment Checklist: Servicing Trailer Brakes
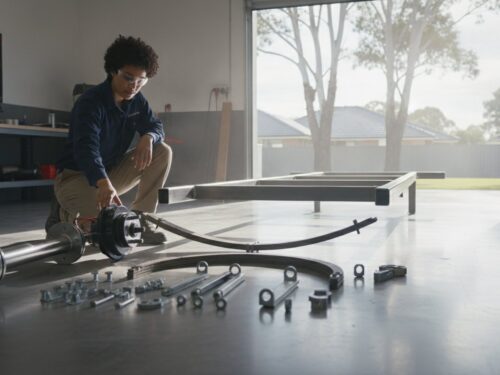
You can’t perform an effective override brake coupling adjustment if your wheel-end components are failing. Many owners make the mistake of tightening the coupling cable to compensate for worn shoes, which only masks the problem. Before you touch the coupling, you must ensure the foundation of your braking system is sound. A loose cable is often a symptom of poor shoe adjustment at the drum rather than a fault in the coupling itself.
Start by securing the trailer on level ground. Chock the wheels that will remain on the ground and use a heavy-duty jack to lift the axle. Always support the chassis with jack stands; never rely on the jack alone while working underneath. Once lifted, verify the override ram moves freely. If it’s sticky or resistant, use the grease nipples to pump in fresh lubricant until the movement is smooth. Check the entire length of your trailer for frayed cables, seized pulleys, or leaking hydraulic lines that could cause a loss of braking pressure.
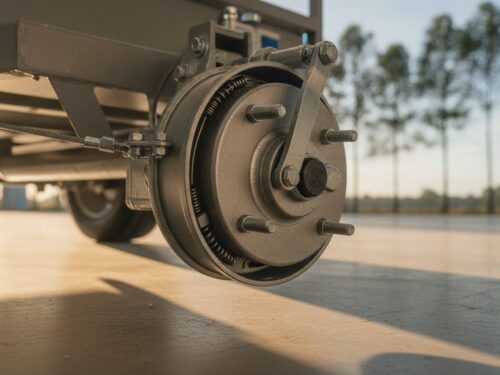
Adjusting Brake Shoes at the Drum
For trailers with 9 Inch Mechanical Drum Brakes, adjustment happens at the back of the backing plate. Locate the star wheel adjuster through the small access slot. Rotate the wheel until the brake shoes lock the drum completely. Once locked, back the adjuster off a few notches until the hub spins with a slight, consistent drag sound. This ensures the shoes are as close to the drum as possible without causing heat buildup. Repeat this on the opposite side. If one side is tighter than the other, the trailer will pull to one side during braking, which can lead to dangerous trailer sway on the highway.
Inspecting Mechanical and Hydraulic Components
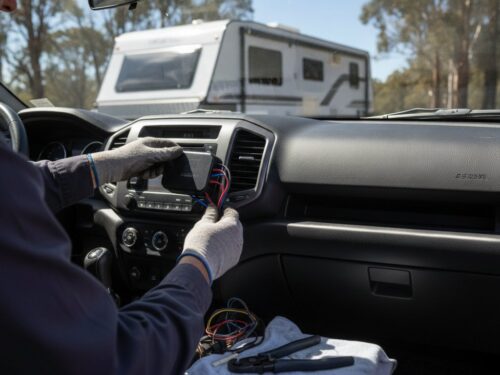
Visual inspection is your best defense against mechanical failure. Check that your brake linings have a minimum thickness of 1.5mm; anything less requires immediate replacement to prevent metal-on-metal contact. If you’re running a hydraulic setup, open the master cylinder and ensure the fluid is clear and topped up to the correct level. Dark or cloudy fluid indicates moisture contamination and needs a full flush. Don’t forget the small moving parts. Rusted pulleys or seized cable guides will prevent the ram from returning to its neutral position after braking. If you find components are beyond a simple clean, browse our range of genuine trailer parts to find reliable replacements that stand up to harsh Australian conditions.
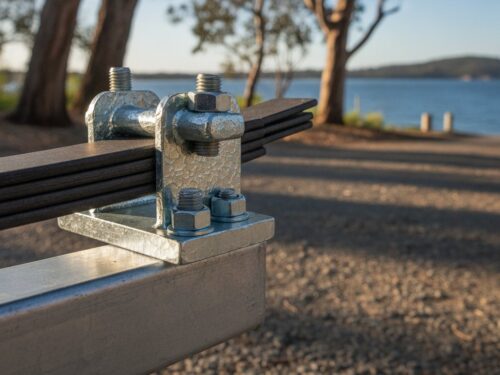
Adjusting Your Override Coupling: A Step-by-Step Process
With your wheel-end brakes serviced and shoes set, you can now perform the override brake coupling adjustment. The objective is to achieve minimal slack in the linkage without causing the brakes to drag while you tow. This process works best when the trailer is hitched to the tow vehicle or when the override ram is pulled into its fully extended position. If the ram is partially compressed, your adjustment will be too loose, leading to the shunting issues mentioned earlier. Before you begin, verify that the reversing lock or flip-over latch is disengaged. If this latch is active, the ram cannot move through its full range, and your settings will be inaccurate.
Setting the Mechanical Cable Tension
Mechanical systems rely on a steel cable to bridge the gap between the coupling and the brake arms. Start by loosening the lock nuts on the cable adjuster at the lever plate. You need to leave a gap of 10mm to 15mm between the back of the override ram and the brake lever. This small amount of free play allows the tow vehicle to move slightly without engaging the brakes immediately. Ensure the cable has a slight, visible droop when the ram is fully extended. If the cable is bar-tight, the brakes will drag as the trailer bounces over road irregularities. Once the gap is set, tighten the lock nuts securely to prevent road vibrations from backing them off.
Hydraulic Override Cylinder Adjustment
Hydraulic systems, common on boat trailers, use a pushrod to activate a master cylinder. Check the clearance between the ram and the cylinder pushrod. There should be just enough space to ensure the piston returns fully to its neutral position. If the brakes feel spongy or the trailer takes too long to slow down, you likely have air in the system. Bleed the lines starting from the wheel furthest from the coupling. Finally, check that the internal return spring is strong enough to push the ram back out after a braking event. A weak spring will cause the brakes to stay partially applied, leading to drum overheating and potential failure.
Always finish the job by testing the park brake function. Pull the lever to its full upright position and attempt to move the trailer by hand. The wheels should lock firmly. If they don’t, you may need to revisit the cable tension or the shoe adjustment at the drum. For replacement components, our range of 4 hole over-ride couplings offers the durability needed for heavy-duty applications across Australia. A precise override brake coupling adjustment ensures your rig remains safe and ADR compliant for every haul.
Troubleshooting Common Override Braking Issues
Troubleshooting your braking system requires a methodical approach to separate mechanical failure from poor setup. If your trailer wheels lock up every time you reverse, check the reversing latch first. This flip-over lock prevents the ram from compressing when you back up. If it’s disengaged and the brakes still lock, the shoes may be adjusted too close to the drum. This is why setting the wheel-end components correctly is the foundation of any repair.
Excessive clunking usually means your override brake coupling adjustment has too much free play. This allows the ram to slam into the lever with too much force. Conversely, brakes that run hot on the highway are a major safety risk. This often stems from over-tightened cables that don’t allow the shoes to fully retract. Alternatively, a seized sliding ram might be stuck in the “on” position. If you find grease on the shoes or air in the hydraulic lines, your stopping power will drop significantly, even if the coupling is adjusted perfectly.
Identifying and Fixing “Shunting”
Shunting occurs when the internal damper in the coupling fails. This shock absorber is designed to control the ram’s movement and prevent it from bottoming out too quickly. When it wears out, the ram hits the end of its travel with a jarring impact. Perform a “push test” by hand to check the health of the damper. Push the ram into the coupling; it should offer firm resistance and return slowly to the neutral position. If it moves easily or stays compressed, the damper is shot. Replacing these internal components is a standard part of maintaining a heavy-duty coupling for long-haul reliability.
Park Brake and Emergency Situations
Your park brake must be strong enough to hold the fully loaded trailer on a 1:5 gradient. If it slips, your cable tension or shoe adjustment is inadequate. In emergency scenarios where a breakaway cable is triggered, the system must lock the wheels immediately. If your components are rusted, pitted, or consistently failing to hold, it is time for a full rebuild. Signs like deep scoring on the ram or a cracked master cylinder housing indicate that your couplings and parts need replacing. Explore our full range of replacement couplings and parts to ensure your trailer remains compliant and safe for Australian roads.
Selecting Reliable Replacement Parts for Your Braking System
Matching replacement parts to your trailer’s Gross Trailer Mass (GTM) is a safety requirement. A common mistake is installing a 2000kg rated coupling on a trailer that only weighs 1000kg. The internal spring in a 2000kg unit is too stiff for a lighter trailer to compress. This prevents the brakes from engaging during normal deceleration. Always verify the rating stamped on the coupling body before purchasing a replacement. This ensures the inertia of the trailer matches the resistance of the internal damper. This alignment is critical for a successful override brake coupling adjustment that actually stops the trailer.
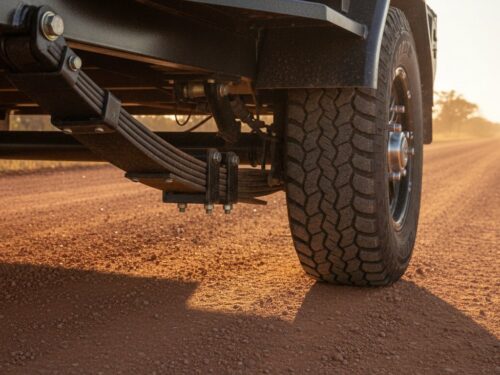
Heavy-Duty vs Light-Duty Components
For trailers that carry heavy loads or tackle steep descents, consider upgrading to Hydraulic Disc Brake Kits. These systems offer better heat dissipation than mechanical drums, reducing the risk of brake fade. Using genuine 4-hole over-ride couplings ensures a secure connection for tandem axle box trailers. Check the condition of your leaf springs regularly. Sagging springs change the angle of the trailer, which can affect how the override ram interacts with the tow vehicle.
Ordering Parts Australia-Wide
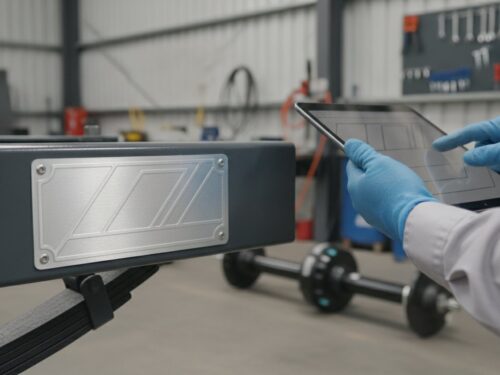
Identify your coupling brand and model before ordering spares. Most Australian couplings use a standard 50mm tow ball, but you should verify the fit to avoid excessive play. If you’re unsure about compatibility or need help with a complex setup, contact us for expert advice. We provide technical support to help you find the right parts and get your trailer back on the road. We ship Australia-wide to ensure you have access to heavy-duty components regardless of your location.
Secure Your Trailer for the Long Haul
Maintaining a functional braking system is about more than just legal compliance; it’s about maintaining control on the road. You now understand that a successful override brake coupling adjustment depends on serviced wheel-end components and correctly matched spring ratings for your GTM. Don’t let trailer shunting or overheating drums compromise your safety. Regular inspections every 5,000km or 6 months will keep your mechanical or hydraulic system operating exactly as designed under ADR 38/05 regulations.
Superior Trailer Parts is a 100% Australian Owned and Operated specialist providing reliable solutions for every towing application. Whether you need a 2000kg rated coupling or marine-grade spares for a boat trailer, our team offers Expert Technical Advice to help you choose the right gear. We provide Nationwide Shipping on all Trailer Parts to ensure you get what you need quickly. Browse our range of heavy-duty couplings and braking spares today. Get your rig ready for the highway and enjoy the peace of mind that comes with a roadworthy trailer.
Frequently Asked Questions
How much gap should be between the override ram and the brake lever?
You should maintain a gap of 10mm to 15mm between the back of the override ram and the brake lever. This specific measurement provides enough free play to prevent the brakes from dragging while you tow over uneven road surfaces. If the gap is smaller than 10mm, the shoes may stay partially applied. If it exceeds 15mm, you will experience a violent shunting sensation when the tow vehicle decelerates.
Why do my trailer brakes lock up when I try to reverse?
Brakes lock up during reversing because the override ram is compressing and activating the braking system. To prevent this, you must engage the reversing latch or flip-over lock on the coupling body. This mechanical block stops the ram from sliding backward when the tow vehicle pushes against the trailer. If your trailer lacks a functional latch, you may need to upgrade to a modern 4 hole over-ride coupling with a built-in reverse lock.
Can I convert my mechanical override brakes to hydraulic disc brakes?
Yes, you can convert your system by replacing the mechanical cable components with a hydraulic master cylinder and disc brake calipers. This upgrade is common for boat trailers because hydraulic systems offer superior performance in wet conditions. You will need a hydraulic-compatible coupling head and a full brake line kit. Ensure the new master cylinder matches your trailer’s GTM rating to maintain a correct override brake coupling adjustment and reliable stopping power.
How often should I grease the sliding ram on my override coupling?
You should grease the sliding ram every 6 months or every 5,000km, whichever comes first. Use a high-quality multi-purpose grease and pump it through the grease nipples until you see fresh lubricant emerging from the ends of the housing. For boat trailers submerged in salt water, perform this maintenance after every trip. A well-lubricated ram ensures the internal spring and damper can return the system to a neutral position after every braking event.
What causes the trailer to clunk loudly when I pull away from a stop?
A loud clunk is usually caused by excessive slack in the brake cable or a failed internal damper within the coupling. When you pull away, the ram slides forward rapidly and hits its limit because there is no resistance or tension holding it back. Inspect your cable for stretch and verify the 10mm to 15mm gap at the lever. If the clunking persists after a proper override brake coupling adjustment, the internal shock absorber is likely worn and requires replacement.
Do I need to adjust my brakes differently for a fully loaded trailer?
No, the mechanical adjustment settings remain the same regardless of the load, but you must ensure your coupling spring is rated for the weight. A 2000kg rated spring is required for heavy loads to provide the correct resistance against the trailer’s inertia. If you use a light-duty spring on a heavy trailer, the brakes will engage too aggressively. The 10mm to 15mm gap rule applies to both empty and fully laden trailers to ensure consistent performance.
Is it normal for the brake drums to feel warm after a long drive?
It is normal for brake drums to feel warm to the touch after operation, but they should never be hot enough to cause a burn. Excessive heat indicates that the brake shoes are dragging against the drum while you are towing. This is often a sign that your cable tension is too tight or the return springs in the drum are weak. If you detect a burning smell or see discoloured paint on the drums, back off the adjustment immediately.