Seized pins, cracked rubber, and a hull that won’t slide cleanly off the trailer. If that sounds familiar, your boat trailer rollers have been telling you something for a while. Knowing how to replace boat trailer rollers correctly isn’t just about swapping worn parts. It’s about protecting your hull, restoring smooth launching, and making sure every roller is doing its job before you back down the ramp.
Most boat owners put this job off because they’re not sure how to keep the hull properly supported during the swap, or they’ve already rounded off a galvanised pin trying to free it. Those are real concerns, and they’re worth addressing properly.
This guide walks you through the entire process safely and efficiently. You’ll learn how to free stubborn seized pins without damaging surrounding hardware, how to position your hull correctly so nothing shifts mid-job, and how to fit new rollers that spin freely and sit true. Get this right, and launching and retrieving your boat becomes noticeably easier every single time.
Key Takeaways
- Flat spots and seized pins are the clearest signs your rollers have failed. Catching these early prevents hull damage that costs far more to fix than the rollers themselves.
- Knowing how to replace boat trailer rollers safely means understanding how to support your hull correctly first, so nothing shifts or settles unevenly while hardware is removed.
- Keel rollers and wobble rollers serve different functions. Choosing the right material and type for your hull profile directly affects how smoothly your boat launches and retrieves.
- Freeing a seized roller pin without rounding off the hardware requires the right tools and technique; a drift punch and penetrating lubricant are non-negotiable for this job.
- Fitting new rollers is only half the job. Post-installation adjustment and load testing confirm every roller is spinning freely and sharing weight as it should.
Identifying Wear and Damage in Boat Trailer Rollers
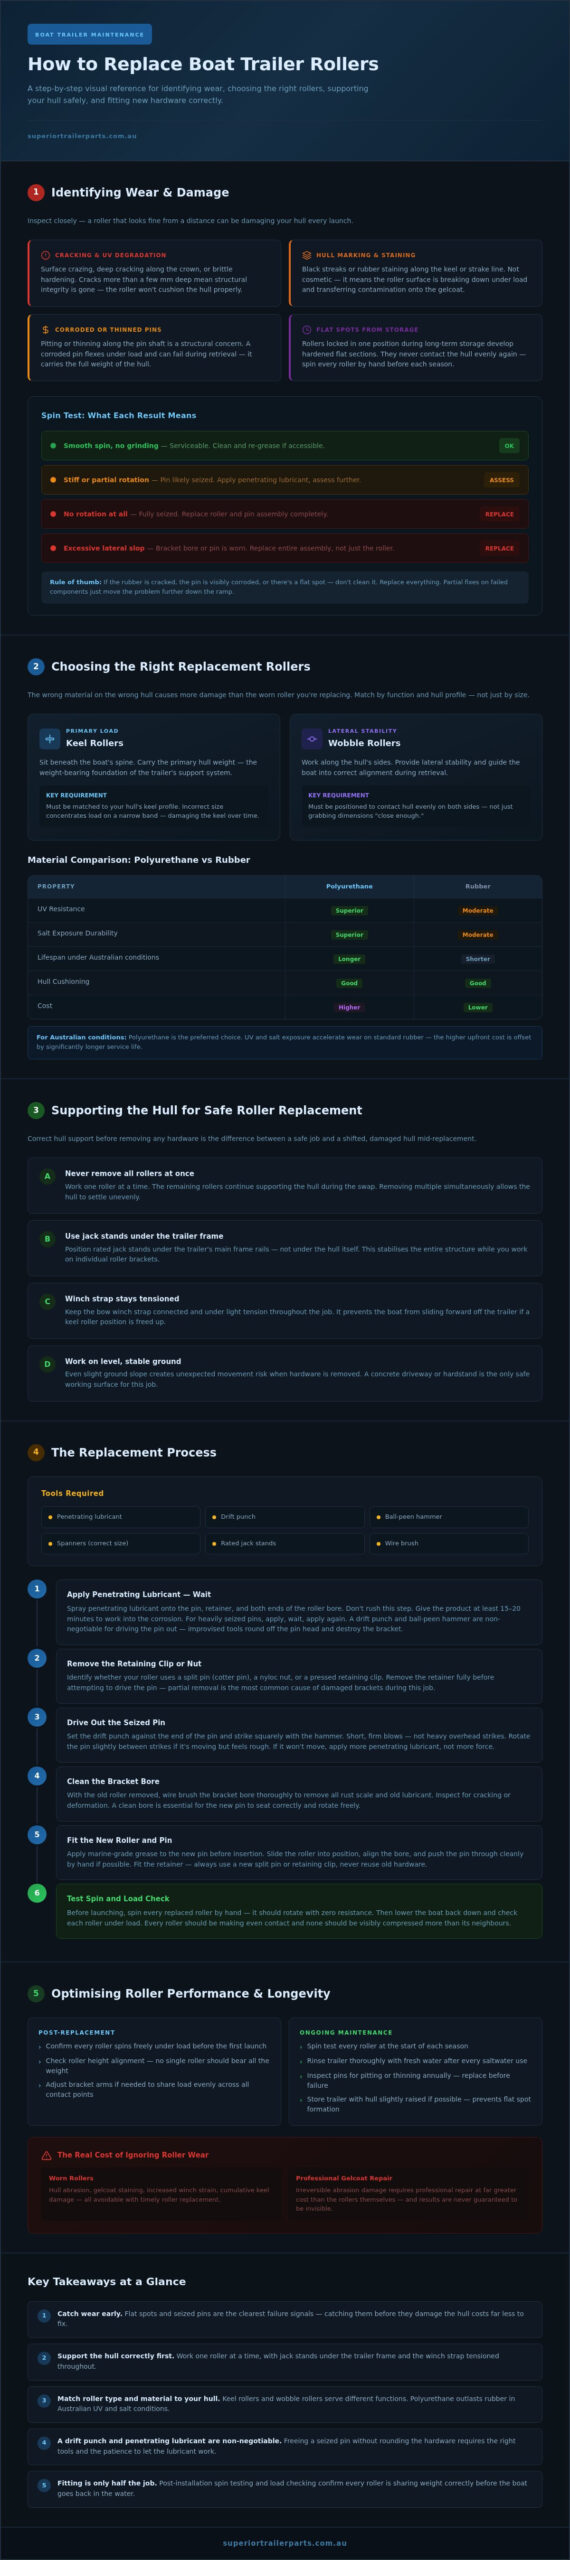
Before you can understand how to replace boat trailer rollers correctly, you need to know exactly what you’re dealing with. A roller that looks serviceable from a distance can be causing real damage every time your hull slides across it. Close inspection tells a different story.
Start with the rubber or polyurethane material itself. UV degradation is the silent killer of trailer rollers in Australian conditions. Look for surface crazing, deep cracking along the roller’s crown, or sections where the material has gone hard and brittle. Polyurethane rollers typically last longer under UV exposure, but they’re not immune. Any cracking that extends more than a few millimetres into the body of the roller means the structural integrity is compromised. It won’t cushion the hull the way it should.
Hull marking is another direct indicator. If you’re seeing black streaks, rubber staining, or scuff marks along your hull’s keel or strake line, deteriorating roller material is almost certainly the cause. These marks aren’t just cosmetic. They indicate the roller surface is breaking down under load and transferring contamination directly onto the gelcoat.
Check your galvanised pins carefully. Surface rust is expected on older hardware, but thinning or pitting along the pin’s shaft is a structural concern. A pin that’s corroded down significantly from its original diameter will flex under load and can fail during retrieval. Understanding boat trailer components and design makes it clear that the pin and bracket assembly carries the full weight of the hull, so compromised hardware isn’t a minor issue.
The Impact of Seized Rollers on Launching
A seized roller doesn’t rotate. Instead of the hull rolling smoothly off the trailer, it drags. That friction translates directly into increased winch strain during retrieval and a grinding contact between the hull surface and the stationary roller. Gelcoat damage from this type of abrasion is cumulative and often irreversible without professional repair. Flat spots develop when a roller locks in one position during long-term storage, leaving a worn, hardened section that never contacts the hull evenly again. Spin every roller by hand before each season. If it doesn’t turn freely, it’s already causing problems.
Testing Roller Rotation and Bearing Surfaces
With the boat off the trailer, grip each roller firmly and attempt to spin it. It should rotate smoothly with minimal resistance. Then check for lateral play by pushing the roller sideways on its pin. Some minor movement is normal, but noticeable slop in the bracket suggests the pin bore has worn out or the retaining hardware has loosened. A worn bore won’t hold the roller in the correct position under load.
- Smooth spin with no grinding: Roller and pin are serviceable; clean and re-grease if accessible.
- Stiff or partial rotation: Pin is likely seized; penetrating lubricant and further assessment required.
- No rotation at all: Roller has seized completely; full replacement of roller and pin assembly is necessary.
- Excessive lateral slop: Bracket bore or pin is worn; replace the entire assembly, not just the roller.
Cleaning the pin is only worth attempting when the roller itself is still in good condition and the seizure is minor. If the rubber is cracked, the pin is visibly corroded, or the roller has a flat spot, clean nothing. Replace everything. Partial fixes on failed components just move the problem further down the ramp.
For replacement rollers and galvanised hardware suited to Australian marine conditions, the boat trailer parts range covers both keel rollers and wobble rollers built to handle the salt and UV exposure that accelerates wear on standard components.
Choosing Replacement Rollers: Materials and Types
Not all rollers are interchangeable. The wrong material on the wrong hull causes more damage than the worn roller you’re replacing. Before you get into how to replace boat trailer rollers, you need to know exactly what you’re fitting and why the choice matters.
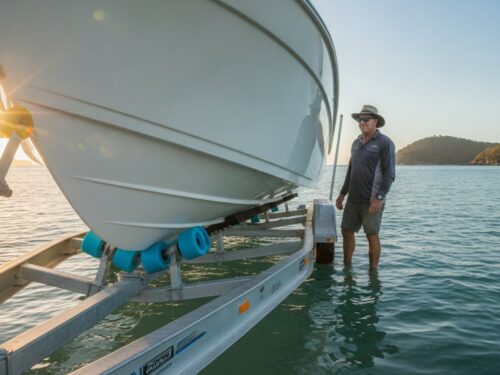
Rollers fall into two functional categories. Keel rollers sit beneath the boat’s spine and carry the primary load. They’re the weight-bearing foundation of the trailer’s support system. Wobble rollers work along the hull’s sides, providing lateral stability and guiding the boat into alignment during retrieval. Both types need to be matched to your hull material and profile, not just grabbed off the shelf because the dimensions look close enough.
Polyurethane vs Rubber Rollers
Polyurethane is the preferred material for fibreglass hulls. It’s harder than rubber, which means it resists compression and holds its shape under sustained load. UV resistance is significantly better than standard rubber, which matters in Australian conditions where trailers sit in direct sun for months at a time. Poly rollers don’t degrade as quickly, they don’t leave transfer marks on gelcoat, and they maintain a consistent contact surface across the hull’s full bearing area.
Rubber rollers are the right call for aluminium hulls, commonly called tinnies. The softer compound is gentler on painted aluminium surfaces and less likely to cause surface abrasion when the boat shifts slightly during transport. Using a hard poly roller against a painted aluminium hull risks scuffing the surface along the contact line every time the boat moves. That’s a problem competitors who recommend poly for everything simply don’t address.
Nylon rollers occupy a specific niche. They’re used primarily for heavy-duty keel support on larger trailer boats where compressive load is high and a firmer contact surface is needed. Nylon won’t compress under sustained weight the way rubber will, making it a practical option for keel rollers on heavier vessels.
- Fibreglass hull: Polyurethane keel and wobble rollers for UV resistance and clean gelcoat contact.
- Aluminium hull: Rubber rollers to protect painted surfaces from abrasion.
- Heavy keel loads: Nylon keel rollers where compressive strength is the priority.
Selecting the Correct Hardware and Pins
The roller is only as reliable as the pin holding it. Pin diameter must match the roller’s bore precisely. A pin that’s even slightly undersized allows the roller to shift laterally under load, throwing off the hull’s alignment and accelerating wear on both the roller and the bracket bore.
Galvanised steel is non-negotiable for marine hardware. Bare steel pins corrode rapidly in salt-water environments, seizing inside the bracket and making future removal extremely difficult. Galvanised pins resist that corrosion cycle and extend the service life of the entire assembly. Secure every roller with the correct split pin through the shaft. Standard marine split pins are sized to the pin diameter, and using an undersized split pin in a marine application is a failure point waiting to happen.
The boat trailer parts range includes both keel rollers and wobble rollers alongside the galvanised pins and hardware needed to complete the assembly correctly, so you’re not sourcing components from multiple suppliers and hoping the dimensions align.
Supporting the Hull for Safe Roller Replacement
Getting the hull properly supported before you touch a single pin is the step most guides skip over. It’s also where things go wrong. When you understand how to replace boat trailer rollers safely, you quickly realise that the preparation phase carries more risk than the replacement itself. A hull that shifts while hardware is being removed can cause serious injury and expensive gelcoat damage in the same moment.
On-trailer replacement is practical and entirely safe when the conditions are right. The boat must be on level, solid ground. Concrete is ideal; compacted gravel is acceptable. Soft ground, slopes, or bitumen that softens in summer heat are not suitable. The trailer must be unhitched or, if the tow vehicle stays connected, the vehicle must be in park with wheel chocks front and rear on the trailer tyres. No exceptions.
Timber is your best friend for protecting gelcoat during this process. Never place a jack or support stand directly against a fibreglass hull. A flat hardwood block, at minimum 200mm x 200mm, spreads the load across the contact area and prevents point loading that cracks gelcoat or stresses the hull laminate beneath it. Cut the block to fit the hull’s curve where possible, or use a folded section of carpet between the timber and the hull surface for additional protection.
Jacking Techniques for Keel Roller Access
A hydraulic trolley jack positioned under the trailer’s main chassis rail, not the hull, is the correct starting point. Place a timber spreader block between the jack saddle and the chassis to prevent the jack from slipping under load. Lift only enough to clear the roller you’re removing, typically 10 to 20mm of clearance. Lifting higher than necessary increases instability and puts unnecessary stress on the hull where it contacts other rollers still under load.
Blocking and Secondary Supports
Never work with your hands near roller hardware while the hull is supported by a jack alone. Jacks fail. Hydraulic seals leak. The jack is a lifting tool, not a holding tool. Once the hull is raised to the correct height, place solid timber baulks or rated safety stands under the trailer frame on both sides of the jack before removing any hardware. This is non-negotiable.
- Before jacking: Chock all four trailer wheels, confirm level ground, and disconnect the winch strap so the hull can’t be pulled forward.
- During lifting: Keep the lift minimal, 10 to 20mm clearance above the roller being removed.
- Before removing hardware: Place secondary timber supports or safety stands under the frame. Test stability by pushing the hull gently from the side before committing both hands to the work.
- Throughout the job: Check that adjacent rollers are still seated correctly and the hull hasn’t shifted position.
Wobble rollers along the hull sides are generally accessible without jacking, but the same stability checks apply. Confirm the hull is sitting evenly before removing lateral roller hardware. A boat that’s shifted even slightly to one side can roll unexpectedly when a side roller bracket is freed. Slow down, check the setup, then proceed. The few minutes spent confirming stability are worth considerably more than the cost of repairing a hull that’s come off its supports mid-job.
The Process for Replacing Trailer Rollers
With your hull properly supported and your replacement hardware confirmed, you can work through the actual swap with confidence. Knowing how to replace boat trailer rollers efficiently comes down to a clear order of operations. Skip steps or rush the sequence, and you create new problems while solving the original one.
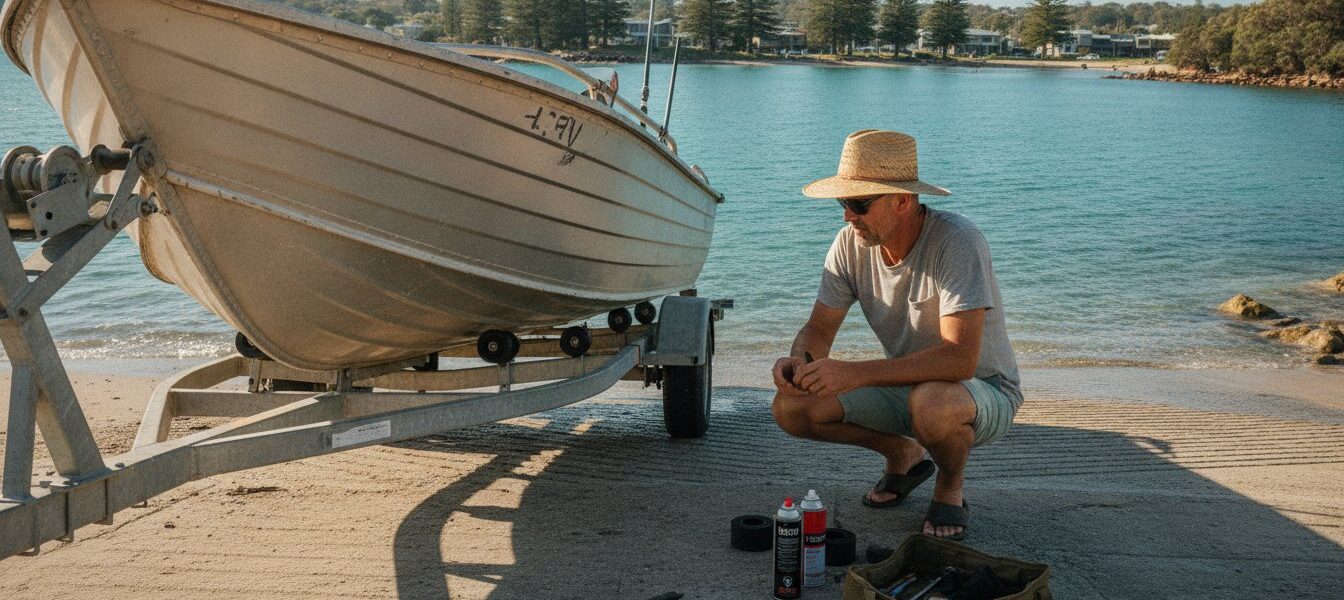
Gather your tools before you touch anything. You’ll need a pair of long-nose pliers for split pin removal, a hammer, a drift punch sized to your pin diameter, penetrating lubricant, and a wire brush for bracket cleaning. Have your new rollers, galvanised pins, and fresh split pins within reach before the old hardware comes out. Working with an empty bracket while hunting for parts is how rollers get dropped and brackets get damaged.
Start by straightening and pulling the old split pin with your long-nose pliers. Bent split pins can be stubborn, so grip the legs firmly and rotate slightly before pulling straight through. Once the split pin is clear, attempt to slide the roller pin out by hand. If it moves freely, clean the bracket bore with a wire brush, inspect the bracket walls for cracking or deformation, and proceed to fitting the new roller. A cracked bracket needs replacement before any new roller goes in. No roller will sit correctly in a structurally compromised mount.
Dealing with Seized or Rusted Pins
Seized pins are the most common obstacle in this job. Apply penetrating lubricant directly to both ends of the pin where it contacts the bracket, then wait a minimum of fifteen minutes before attempting removal. Don’t skip the wait. Drive the pin out using your drift punch and hammer, working from one end with steady, controlled strikes rather than one heavy blow. If the pin still won’t shift after a second application and wait period, heat from a gas torch applied briefly to the bracket body, not the pin itself, expands the metal around the pin and breaks the corrosion bond. Keep heat away from the trailer frame’s galvanising where possible.
When a pin is too far gone to drive out, cut it. A hacksaw blade works in tight spaces. An angle grinder is faster but requires a steady hand to avoid cutting into the bracket bore. Protect the trailer frame with a folded rag or sheet metal offcut before grinding. Damaging the frame while removing a seized pin is an avoidable outcome.
Installing and Securing the New Roller
Slide the new roller into the bracket and confirm it sits centred before inserting the pin. A roller sitting off-centre in the bracket will bind under load. Push the galvanised pin through by hand until it’s fully seated and protrudes evenly on both sides. Insert a fresh split pin through the hole at the pin’s end, then bend each leg back in opposite directions, flat against the pin shaft. This bend-back technique locks the split pin in place and eliminates the protruding legs that snag ropes, straps, and hands during launching.
- Spin test immediately: Once secured, spin the new roller by hand. It should rotate freely with no binding or wobble.
- Check lateral movement: Push the roller sideways on the pin. Minimal movement is acceptable; noticeable slop means the pin diameter doesn’t match the bore.
- Confirm split pin legs are flat: Any leg protruding more than a few millimetres above the pin shaft needs to be bent down before the boat goes back on.
Work through every roller position systematically, one at a time, before lowering the hull back onto the trailer. Replacing rollers piecemeal across multiple sessions means the hull spends time on mismatched support, which creates uneven loading. Do the full set in a single session where possible.
For galvanised pins, split pins, wobble rollers, and keel rollers built to handle salt exposure and Australian UV conditions, the boat trailer parts range has the hardware you need to complete the job correctly the first time.
Optimising Roller Performance and Longevity
Fitting new rollers is the midpoint, not the finish line. How you adjust, test, and maintain those rollers after installation determines whether they last a season or several years. This is where most guides stop, and where most trailer owners lose the gains they just made.
Start with roller height. Every keel roller needs to carry a share of the hull’s weight, not just the two or three closest to the bow. If a roller sits even a few millimetres too low, the hull bridges across it and the load transfers entirely to adjacent rollers. That concentrated pressure accelerates wear on those rollers and creates stress points along the hull’s spine. Adjust bracket height until the hull contacts each keel roller evenly along its full length. A straight edge laid along the keel line reveals gaps quickly. Close every gap before the boat goes back in the water.
Post-installation, load the hull fully onto the trailer and spin each accessible roller by hand from the side. A roller that turns freely unloaded but binds under the hull’s weight has a bracket alignment issue, not a roller defect. Correct the bracket angle before assuming the roller is faulty.
On lubrication: leave marine rollers dry. Grease on a roller bore attracts salt crystals, grit, and sand, which form a grinding paste that accelerates pin wear faster than running clean. The exception is a light application of marine-grade grease on the pin shaft during installation only, to ease future removal. Once the pin is seated and the split pin is in, wipe any excess off completely.
Wash-down after every salt-water use is non-negotiable. Flush fresh water directly into the bracket bores from both ends of each pin. Salt crystallises inside the bore during drying, and those crystals are what seize pins solid over time. Two minutes with a hose at each roller position extends the service life of the entire assembly significantly.
Aligning Wobble Rollers for Retrieval
Wobble roller brackets are adjustable for a reason. Each roller should make firm, even contact with the hull’s strake line on both sides simultaneously. Back the boat onto the trailer slowly and watch where the hull settles. If it consistently sits two or three centimetres off-centre, the wobble rollers on the low side are carrying more load than they should. Adjust the bracket angle on the high side inward until contact is equal across both strakes. Uneven pressure points show up as accelerated wear on one side of the roller’s crown. Catch that pattern early and correct the bracket angle before the roller material breaks down.
Maintenance Schedule for Marine Rollers
Quarterly inspections keep small problems from becoming expensive ones. Every three months, spin every roller by hand, check for lateral pin slop, and look for surface cracking along the roller crown. Replace split pins every two years as a preventative measure regardless of visible condition. A split pin that’s been in a salt-water environment for two years has done its job. It costs almost nothing to replace proactively, and considerably more to deal with if a roller pin walks out mid-retrieval.
- After every salt-water use: Flush bracket bores with fresh water from both ends of each pin.
- Quarterly: Spin-test all rollers, check pin slop, inspect rubber or polyurethane for cracking.
- Every two years: Replace all split pins as a scheduled preventative measure.
- At any sign of flat spots or seized rotation: Replace the roller and pin assembly immediately, not at the next service.
Understanding how to replace boat trailer rollers is only useful if the replacement hardware lasts. Pairing correct installation technique with a consistent maintenance schedule is what separates a trailer that performs reliably from one that causes problems at the ramp. For a broader look at keeping your trailer in working order across all its systems, the essential boat trailer parts guide covers the full scope of marine trailer care. And when you need keel rollers, wobble rollers, or galvanised hardware built for Australian salt-water conditions, the boat trailer parts range has the components to back up the work you’ve just done.
Get Back on the Water with Confidence
Knowing how to replace boat trailer rollers correctly means your hull is protected from the moment it leaves the ramp to the moment it returns. The work you’ve done here covers everything that matters: spotting worn and seized components early, choosing the right roller material for your hull, supporting the boat safely before any hardware comes off, and maintaining what you’ve fitted so it lasts.
Three things make the difference between a roller replacement that holds up and one that fails at the ramp. Match the roller material to your hull. Never work under an unsupported load. Flush the bracket bores after every salt-water use. Get those right, and you won’t be back here doing this job again any time soon.
For heavy-duty galvanised hardware and marine-grade rollers built for Australian conditions, Superior Trailer Parts is an Australian-owned specialist with nationwide shipping on every component. Shop boat trailer rollers and galvanised hardware and get the right parts delivered to your door.
The ramp is waiting. Get it done.
Frequently Asked Questions
Can I replace boat trailer rollers without removing the boat?
Yes, in most cases you can replace rollers with the boat on the trailer, provided you support the hull correctly first. Jack the trailer frame, not the hull, place timber blocks under the chassis as secondary supports, and only then remove the roller hardware. Work one roller at a time so the hull always has adequate contact points. Wobble rollers along the hull sides are often accessible without any jacking at all.
Which is better for a fibreglass boat: rubber or polyurethane rollers?
Polyurethane is the right choice for fibreglass hulls. It holds its shape under sustained load, resists UV degradation better than rubber, and won’t transfer marks onto gelcoat surfaces. Rubber is the correct option for aluminium hulls, where the softer compound protects painted surfaces from abrasion during transport. Using rubber rollers on fibreglass isn’t dangerous, but they’ll degrade faster in Australian sun and may leave transfer marks along the hull’s contact line.
Do I need to grease the pins on my trailer rollers?
A light application of marine-grade grease on the pin shaft during installation is worthwhile, purely to ease future removal. Once the pin is seated and the split pin is secured, wipe off any excess completely. Don’t grease roller bores as a maintenance practice. Grease in a salt-water environment attracts grit and crystallised salt, which forms an abrasive paste that accelerates pin wear faster than running clean hardware would.
How many rollers should be supporting my boat?
There’s no universal number. It depends on your boat’s length, hull profile, and the trailer’s design. What matters is that every keel roller makes even contact along the hull’s spine, with no roller sitting low enough that the hull bridges across it. A straight edge laid along the keel line reveals gaps quickly. If some rollers aren’t carrying load, adjust bracket heights until weight is distributed evenly across the full set.
How do I know if my roller brackets need replacing too?
Inspect the bracket bore first. If the hole where the pin sits has worn oval rather than round, the bracket can no longer hold the roller in the correct position under load. Check the bracket walls for cracking, particularly around the mounting bolt holes where stress concentrates. A bracket that’s bent out of alignment won’t seat a new roller correctly regardless of how good the roller itself is. When in doubt, replace the bracket alongside the roller rather than fitting new hardware into a compromised mount.
What size split pins do I need for standard boat trailer rollers?
Split pin size must match the diameter of the roller pin exactly. Standard marine roller pins vary in diameter depending on the roller type and bracket design, so measure your existing pin before ordering replacements rather than guessing. Using an undersized split pin in a marine application is a genuine failure point. The pin can work loose under load and allow the roller pin to walk out during retrieval. Always confirm the bore diameter of your specific roller before sourcing hardware.
Why are my new rollers making a squeaking noise?
Squeaking from new rollers is almost always caused by the roller material flexing against the pin shaft under load. It’s common during the first few launch and retrieve cycles and typically settles as the roller seats itself. If the noise persists beyond the first few uses, check that the pin is the correct diameter for the bore. A slightly undersized pin allows the roller to shift and flex, which generates noise and accelerates wear on both the pin and the bracket.
How often should boat trailer rollers be replaced?
There’s no fixed interval because service life depends on usage frequency, UV exposure, and how well the trailer is maintained after salt-water use. Inspect rollers quarterly: spin each one by hand, check for cracking along the crown, and test for lateral pin slop. Knowing how to replace boat trailer rollers matters less than catching the signs early. Surface crazing, flat spots, or any roller that won’t spin freely under load are all immediate replacement triggers, regardless of how recently the rollers were fitted.