A trailer’s lighting system is only as reliable as its weakest connection. Most boat owners and transport operators have faced the frustration of flickering LEDs or total circuit failure after just one season in salt water. It’s a common problem caused by corrosion and poor sealing. Getting the wiring trailer clearance lights correct from the start is about more than just visibility. It’s about ensuring your rig stays on the road without constant electrical troubleshooting. You’ve likely struggled with confusing wire colour codes or lights that fail at the worst possible moment.
You’ll learn how to correctly wire, mount, and maintain your clearance lights to ensure ADR compliance and long-term durability on Australian roads. We provide the technical specifications needed to understand the brown wire circuit and create moisture-sealed connections that last for years. This breakdown covers everything from mounting positions for trailers over 2.1 metres wide to the essential earth wire requirements. We’ll move quickly through the installation process so you can get back to work with a fully functional, reliable lighting system.
Key Takeaways
- Identify ADR-compliant placement for front, rear, and side markers based on your trailer’s specific width and length.
- Use tinned copper multi-strand wire and heat-shrink connectors to prevent corrosion and electrical failure in harsh environments.
- Master the correct sequence for wiring trailer clearance lights to create a reliable circuit from the 7-pin plug to every marker lamp.
- Learn to troubleshoot flickering or dim lights by testing resistance and verifying the integrity of the earth circuit.
- Select submersible LED units with high IP ratings and UV-stabilised lenses for maximum longevity on boat and jet ski trailers.
Understanding Trailer Clearance Light Requirements and ADR Standards
Clearance lights serve a single, critical purpose: they indicate the maximum width of your trailer to other road users. These aren’t optional accessories for larger rigs. If your trailer exceeds 2.1 metres in width, ADR 13/00 mandates the installation of front and rear clearance lamps. Properly wiring trailer clearance lights ensures these safety markers remain functional throughout the life of the vehicle, even when subjected to salt water or heavy vibrations. Technical specifications for Trailer electrical components vary depending on dimensions, so understanding the legal placement is your first step toward compliance.
Visibility is paramount for road legality. ADR standards require specific horizontal and vertical angles of light distribution. This means the light must be visible from 80 degrees outwards and 5 degrees inwards. If the chassis or load blocks these angles, you’re at risk of a defect notice. Whether you’re building a new flatbed or maintaining boat trailer parts, you must adhere to height and width restrictions to ensure the trailer’s footprint is clearly defined at night.
Front vs Rear Clearance Light Rules
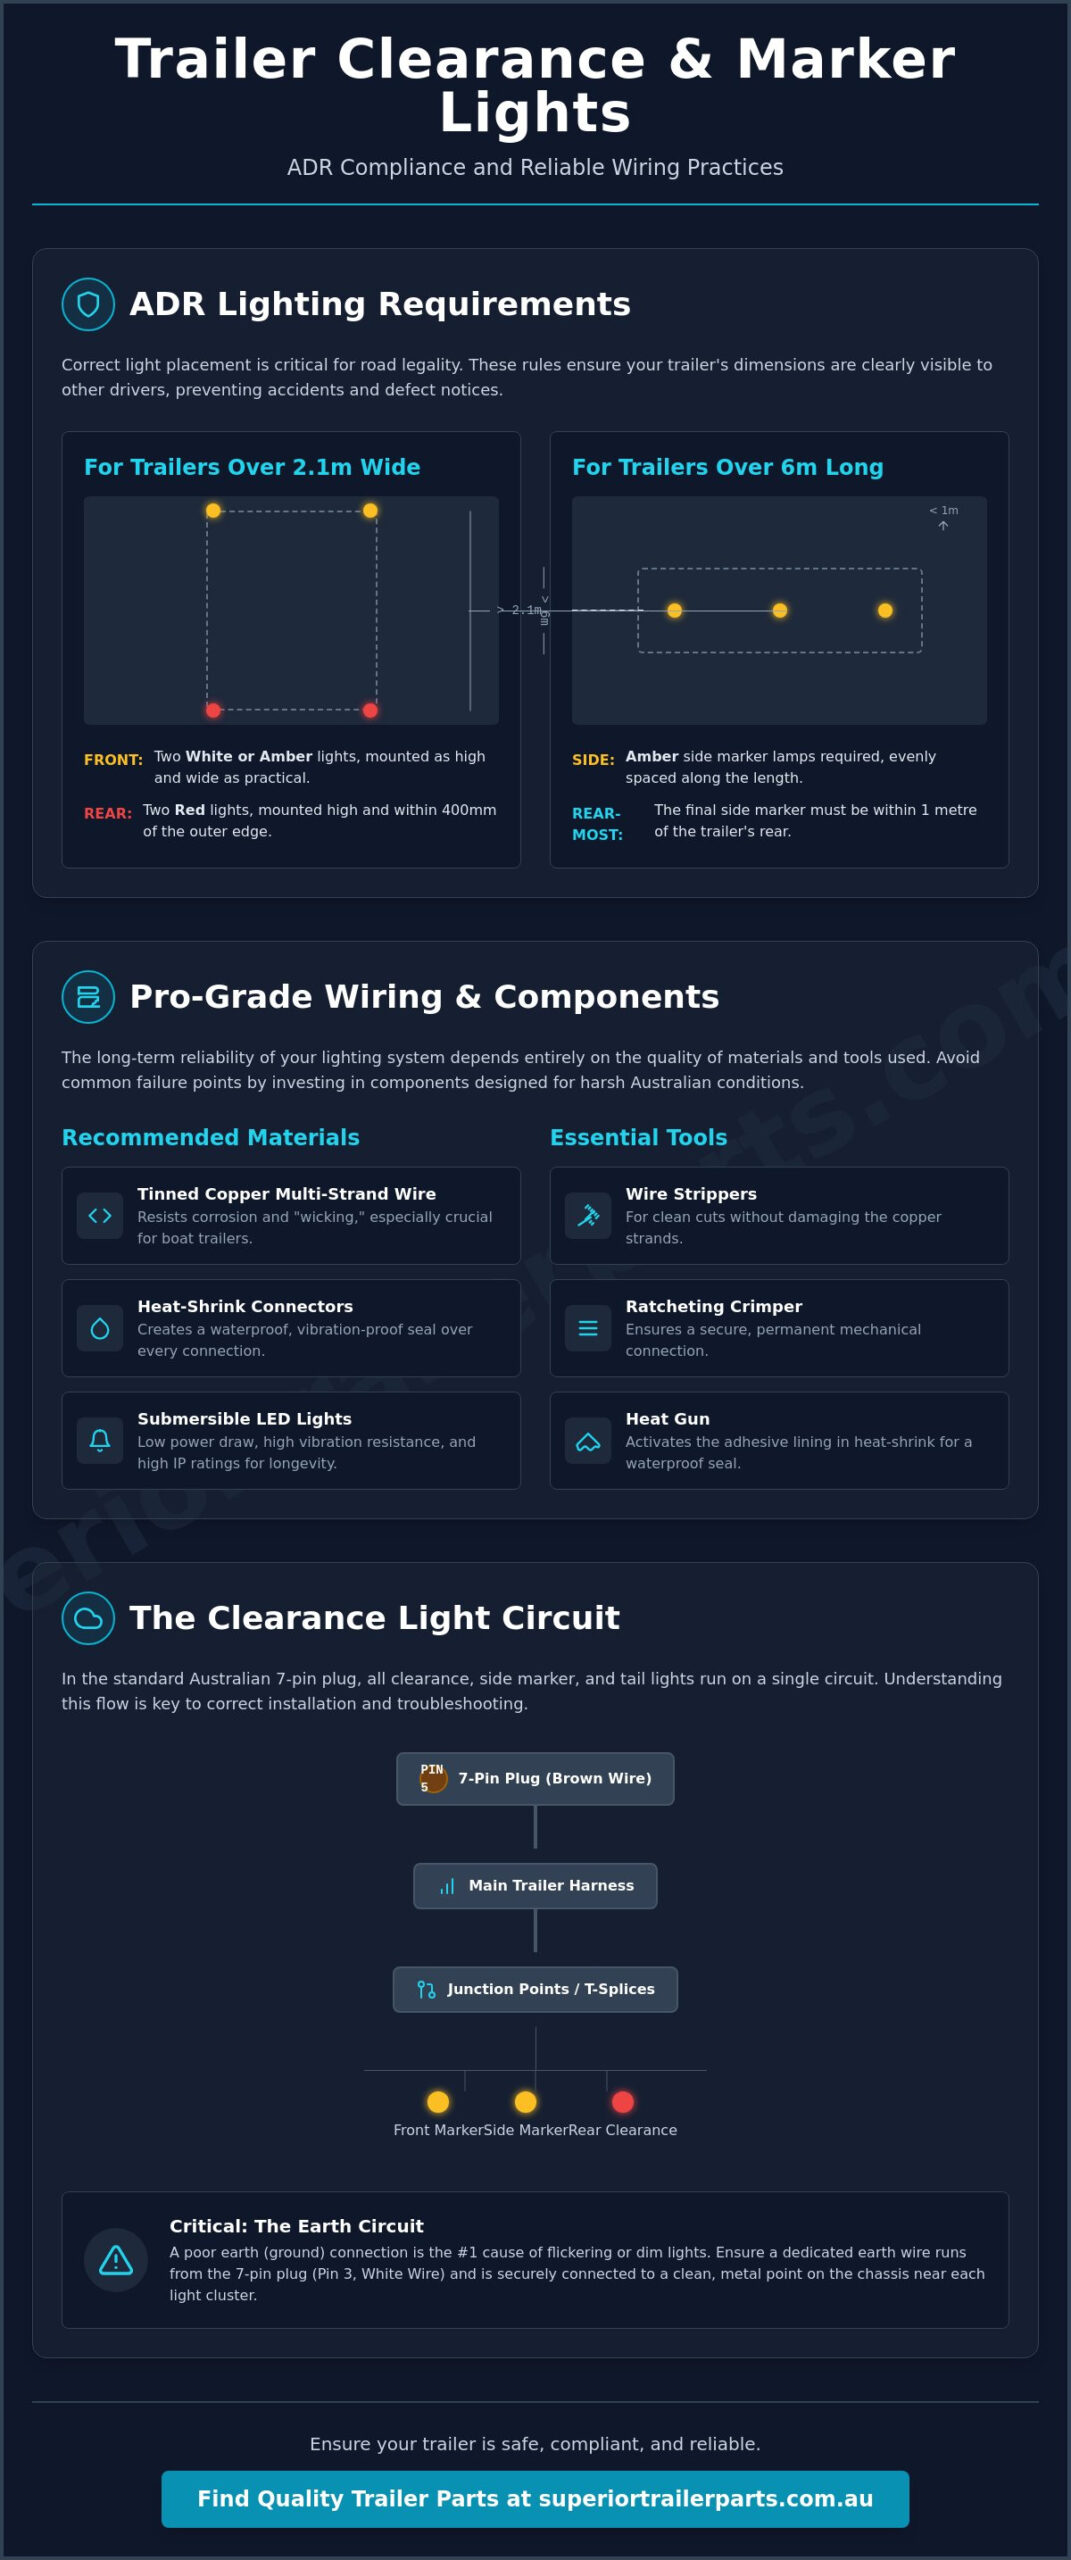
The rules for trailers over 2.1 metres wide are strict regarding colour and position. You must fit two white or amber lamps to the front and two red lamps to the rear. These lights must be mounted as high as practical to the top outer edges of the trailer. This height helps drivers behind or in front of you gauge the scale of your load from a distance. Key placement rules include:
- Rear Clearance: Must be mounted no more than 400mm from the outer edge of the trailer.
- Front Clearance: Required for any trailer wider than 2.1m, though front markers are also mandatory for trailers over 1.8m wide.
- Orientation: Rear lights must show red to the rear, while front lights show white or amber forward.
Side Marker Lamps for Long Trailers
Trailer length is just as important as width. Any trailer exceeding 6 metres in length, including the drawbar, requires amber side marker lamps. These are typically mounted along the side of the chassis to outline the trailer’s profile for vehicles merging or overtaking. For efficiency, most builders integrate these side markers into the main clearance circuit. This allows all marker and clearance lights to activate simultaneously when the tow vehicle’s park lights are switched on. You should space these markers evenly along the trailer length, ensuring the rear-most side marker is positioned within 1 metre of the back of the trailer.
Essential Tools and Wiring Components for Installation
Professional results start with the right toolkit. When you’re wiring trailer clearance lights, you need tools that create permanent, vibration-resistant connections. Industrial environments demand more than just basic hand tools. You’ll need high-quality wire strippers, a ratcheting crimper, and a heat gun for sealing connections. A multimeter is also essential for verifying the circuit before you finish the job. Cheap electrical tape and hand-twisted wires won’t survive the corrugated roads or boat ramps common across Australia.
Material selection is the next priority for longevity. Standard copper wire eventually turns green and brittle when exposed to moisture. Tinned copper multi-strand wire is the industry recommendation because it resists “wicking” corrosion. This is especially critical for boat trailer parts where salt water exposure is a constant threat. Modern LED units are now the standard for these applications. They offer significantly lower current draw and higher vibration resistance than old incandescent bulbs. All components and installation methods should align with the standards found in Vehicle Standards Bulletin 1 (VSB 1), which dictates how electrical systems must be secured and protected on small trailers.
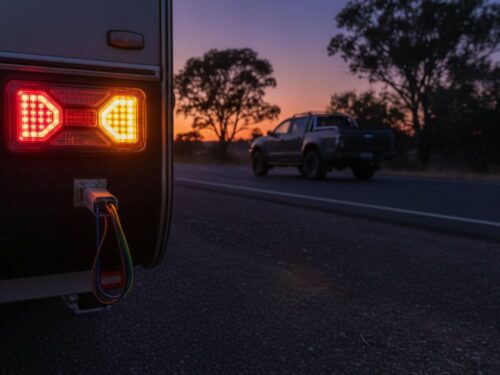
In the Australian standard 7-pin plug configuration, the brown wire is the dedicated circuit for tail, licence plate, and clearance lights. This single circuit usually powers every marker lamp on the rig. Identifying this wire early prevents confusion when tapping into the main harness. Reliable systems rely on a clean, consistent power supply from this circuit to every lamp on the chassis.
Choosing the Right Wire Gauge
Voltage drop is a real threat on long trailers. If the wire is too thin, your LEDs won’t receive the required power to stay bright. Use 2mm or 3mm automotive-grade wire for standard runs. Twin-core cable is often the best choice for these installations. It simplifies routing by keeping the power and earth wires together in one protective sheath, which reduces the risk of snagging during transit.
Connectors and Moisture Protection
Avoid “Scotchlok” or T-tap connectors. These pierce the insulation and invite moisture directly into the copper core, leading to rapid failure. Heat-shrink butt connectors are the professional choice for Australian conditions. They provide a mechanical bond and a watertight seal in one step. Once connected, run your wiring through corrugated split tubing. This protects the insulation from road debris and sharp chassis edges that can cause shorts over time.
Step-by-Step Guide to Wiring Trailer Clearance Lights
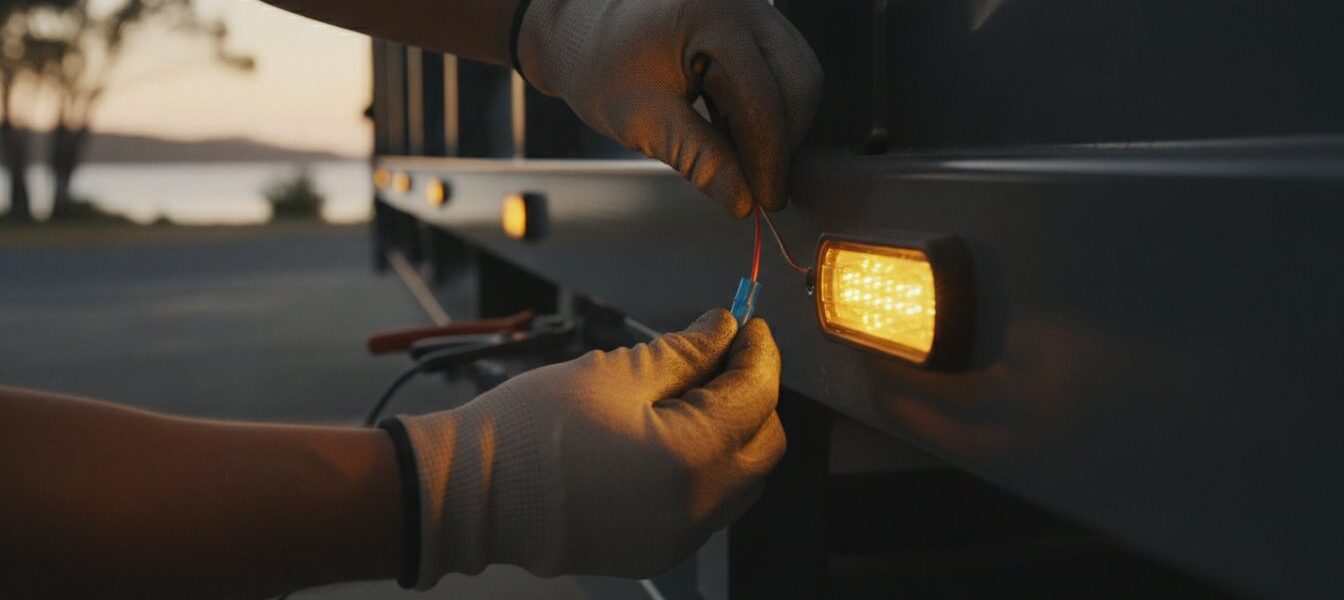
Safety is your first priority. Disconnect the trailer from the tow vehicle before starting any electrical work. This prevents accidental shorts that could damage the vehicle’s ECU or blow fuses. Starting at the 7-pin plug, route the main brown wire through the internal chassis rail or along the frame. Use P-clips or cable ties every 600mm to secure the wire and prevent sagging. This primary line carries power for all your marker and tail lamps.
Position your lights according to the ADR standards discussed earlier. Mark the mounting holes and drill with care, ensuring you deburr the edges to prevent wire chafing. When wiring trailer clearance lights, you must tap into the main brown circuit at each marker location. Strip a small section of the brown wire’s insulation, splice the light’s positive lead, and seal the joint. Every light also requires a reliable earth. You can either run a dedicated white earth wire back to the plug or secure the earth lead directly to the trailer frame using a self-tapping screw and a star washer for a bite into the metal.
Parallel Wiring vs Series Wiring
Clearance lights must be wired in parallel. This means every lamp has its own direct path to the 12V power source and a path to the earth. In a parallel circuit, if one LED fails, the rest of the markers stay illuminated. If you were to wire them in series, a single blown bulb would break the entire circuit, leaving your trailer dark. Think of it as “daisy-chaining” where the main brown wire acts as a backbone, and each marker light “plugs in” along the length of the chassis to maintain consistent voltage.
Making Waterproof Connections
Moisture is the primary cause of electrical failure in boat trailer parts and heavy-duty rigs. Use a ratcheting crimper to secure heat-shrink butt terminals. Once crimped, apply heat until the internal adhesive flows out the ends of the sleeve. This creates a permanent, airtight seal. If your lights use replaceable bulbs rather than sealed units, apply a small amount of dielectric grease to the sockets to prevent green death corrosion. Always incorporate a drip loop, which is a small downward curve in the wire just before it enters the light housing, to ensure gravity pulls water away from the entry point rather than into it.
Troubleshooting Common Wiring Faults and Voltage Drop
Dim or flickering lights are clear indicators of high resistance within your electrical circuit. When wiring trailer clearance lights, a common failure point is the connection to the 7-pin plug. Salt, dust, and moisture infiltrate the pins, creating a layer of oxidation that restricts current flow. Use a multimeter to check for 12V at the mounting point of the failing light. If the reading is significantly lower than the battery voltage at the tow vehicle, you are dealing with voltage drop. This is particularly prevalent on tandem axle trailers with numerous markers, where the cumulative length of the wire increases resistance.
Check for physical damage first. Corroded pins in the trailer plug often cause intermittent power delivery. If your lights work while stationary but flicker on the move, the plug is likely the culprit. Clean the pins with a small wire brush or replace the plug entirely if the brass is pitted. For trailers with extensive lighting setups, ensure the wire gauge is sufficient for the total current draw. Undersized wire will generate heat and drop voltage before reaching the rear markers, resulting in poor visibility and potential ADR non-compliance.
Solving Earthing Problems
Relying on the trailer hitch for an earth is a frequent mistake. While the ball and coupling are metal, they provide a poor electrical path due to grease, paint, and constant movement. This leads to lights that flicker as you drive over bumps or turn corners. The professional solution is running a dedicated white earth wire from every lamp back to the 7-pin plug. This creates a closed loop that doesn’t depend on mechanical contact between the vehicle and the trailer.
If you must earth to the frame, choose a protected area. Clean the metal back to a shiny finish using a wire wheel before attaching the terminal. Once the connection is tight, spray the area with a zinc-rich primer to prevent rust from insulating the contact point. This maintains a low-resistance path for years, even in coastal environments where corrosion is aggressive.
Testing the Circuit
Isolate the trailer from the tow vehicle to determine where the fault lies. Connect a spare 12V battery directly to the trailer plug to power the circuits independently. This confirms if the problem is in the trailer or the vehicle’s own wiring. Check the length of the chassis for short circuits. Wires often rub against sharp metal edges or get pinched near moving components like suspension hangers. If the trailer works perfectly with an external battery, the issue is likely the car’s socket. You can use trailer plug adapters to quickly verify that the vehicle socket is outputting the correct signals to the brown wire circuit. If you are struggling to get a clean signal, contact us for expert technical advice on your specific rig.
Selecting Durable LED Clearance Lights for Australian Conditions
Why LED Submersible Tail Lights are Critical
Traditional incandescent bulbs act like a vacuum. When a hot bulb is submerged in cold water during launching, the internal air contracts and sucks water through the seals. This leads to immediate corrosion and electrical faults in the wiring. LED Submersible Tail Lights solve this problem because they generate minimal heat and are solid-state. They also offer superior vibration resistance. This is essential when towing on corrugated inland roads where filament bulbs would frequently shatter. High-quality boat trailer parts should always include sealed LED markers to prevent trailer-side electrical issues.
Matching Lights to Trailer Type
The type of rig you operate determines your lighting needs. For heavy duty single axle box trailers, compact amber and red markers provide the necessary visibility without being easily snagged in tight loading zones. Larger welded galvanised tandem trailers require a more comprehensive setup, often including additional side markers to outline the longer chassis profile. On jet ski trailers, clearance lights are often integrated into the mudguards or rear frame. These require low-profile units that can withstand high-pressure water spray and repeated submersion.
Hardware and Mounting
Use stainless steel fasteners for all mounting points. Zinc-plated screws will eventually rust, leaving unsightly streaks on your galvanised chassis. “Click-in” brackets are a practical choice for fleet operators. They allow you to replace a damaged light unit in seconds without re-drilling the frame or cutting into the main harness. ADR compliance requires clearance lights to be visible from 45 degrees above and below the horizontal plane. This ensures your trailer’s dimensions remain clear to other drivers, regardless of their vehicle’s height or following distance. Proper mounting ensures your rig stays road-legal and safe during night hauls.
Build a Lighting System That Lasts
We are an Australian owned and operated specialist providing hardware designed for the toughest conditions. Our team offers expert technical support for DIY builders and fleet managers alike. With nationwide shipping on all electrical components, you can source reliable parts regardless of your location. Shop our range of ADR-approved trailer lights and wiring components to secure your next project. Take the guesswork out of your electrical work and get back to towing with a system you can trust.
Frequently Asked Questions
What colour wire is for clearance lights on a trailer?
The brown wire is the standard colour for clearance lights in Australia. Under the standard 7-pin wiring configuration, Pin 7 uses a brown wire to supply power to the tail lights, licence plate lamp, and all clearance markers. When you’re wiring trailer clearance lights, always verify this circuit at the plug before tapping into the harness. This ensures you don’t accidentally cross-wire with the indicator or brake circuits.
Do all trailers in Australia need clearance lights?
Clearance lights are only mandatory for trailers that exceed specific width requirements. If your trailer is wider than 2.1 metres, you must fit front and rear clearance lamps to indicate its overall footprint. For trailers between 1.8 metres and 2.1 metres wide, front marker lights are required. Rear clearance lights remain optional for these mid-sized trailers unless they are needed to define the extreme edges during night operation.
Can I wire my clearance lights directly to the tail light circuit?
Yes, wiring your clearance markers into the tail light circuit is the correct installation method. Both systems operate simultaneously when the tow vehicle’s park lights are switched on. Since modern LED markers have a very low current draw, adding them to the existing brown wire circuit won’t overload the system. This remains true for both standard 12V and 24V setups used across Australia.
Why do my trailer clearance lights flicker when I drive?
Flickering is almost always caused by a failing earth connection or corrosion within the 7-pin plug. Road vibrations cause loose wires to bounce, which momentarily breaks the electrical circuit. If the flickering occurs across all markers, the fault is likely in the main plug or a loose coupling. If only one light flickers, the issue is usually a loose terminal or a poor ground point at that specific lamp housing.
How many clearance lights are required on a boat trailer?
A boat trailer over 2.1 metres wide requires four clearance lights: two at the front and two at the rear. Front lights must be white or amber, while rear lights must be red. If the trailer exceeds 6 metres in total length including the drawbar, you must also install amber side markers. These additional lights help other drivers gauge the length of your rig when you’re turning or merging on the road.
Is it better to use a dedicated earth wire or the trailer frame?
A dedicated white earth wire is the most reliable option for any trailer build. Using the trailer frame as a ground is common but often leads to corrosion at the bolt point. Rust and paint act as insulators, which eventually chokes the circuit. A continuous earth wire running back to the 7-pin plug ensures a clean, low-resistance path that isn’t affected by chassis condition or hitch grease.
What is the height requirement for mounting rear clearance lights?
Rear clearance lamps must be mounted as high as practical toward the top outer edges of the trailer. ADR standards specify they should be positioned to show the maximum width of the vehicle. They must be no further than 400mm from the trailer’s outer edge. This high-and-wide placement allows drivers behind you to quickly identify the scale of your load, especially on narrow or unlit roads.
Can I use LED clearance lights with an older incandescent tail light system?
You can use LED markers alongside incandescent tail lights without any compatibility issues. The LEDs will simply draw less power from the brown wire circuit. Keep in mind that some modern tow vehicles use sensors that expect a specific electrical load. If the total draw is too low, the vehicle might display a dashboard error. You can fix this by installing a simple load resistor or a compatible trailer plug adapter.