Ignoring a clunking sound from your undercarriage is a fast way to ruin a set of expensive tyres and compromise your road safety. Worn suspension components lead to unstable handling and unpredictable swaying at high speeds. If you’ve noticed uneven tread wear or excessive noise, it’s time to learn how to replace trailer suspension bushes before a minor maintenance issue becomes a major mechanical failure. A single degraded bush can throw out the alignment of your leaf springs, turning a routine haul into a stressful experience.
You want a trailer that tracks straight and stays quiet on the road. We agree that downtime costs money and your hardware must withstand harsh regional conditions. This guide provides the practical steps to identify worn components and select the right bush material for your specific setup. We’ll compare the durability of nylon against the resilience of poly and walk through the mechanical installation process to ensure your trailer returns to peak performance. You’ll gain the confidence to complete this job safely and restore the stability your cargo requires.
Key Takeaways
- Identify worn components early by looking for “ovalisation” in the bush hole and listening for metallic rattling or persistent squeaking.
- Select the most durable material for your needs by comparing standard nylon with heat-resistant polyurethane options.
- Follow a methodical, step-by-step process on how to replace trailer suspension bushes to eliminate sway and restore towing stability.
- Understand the specific hardware requirements for different setups, including 4 leaf slipper springs and multi-point rocker roller systems.
- Perform critical safety checks after your first 50 kilometres to ensure all shackle bolts remain correctly torqued and seated.
Recognising the Signs of Worn Trailer Suspension Bushes
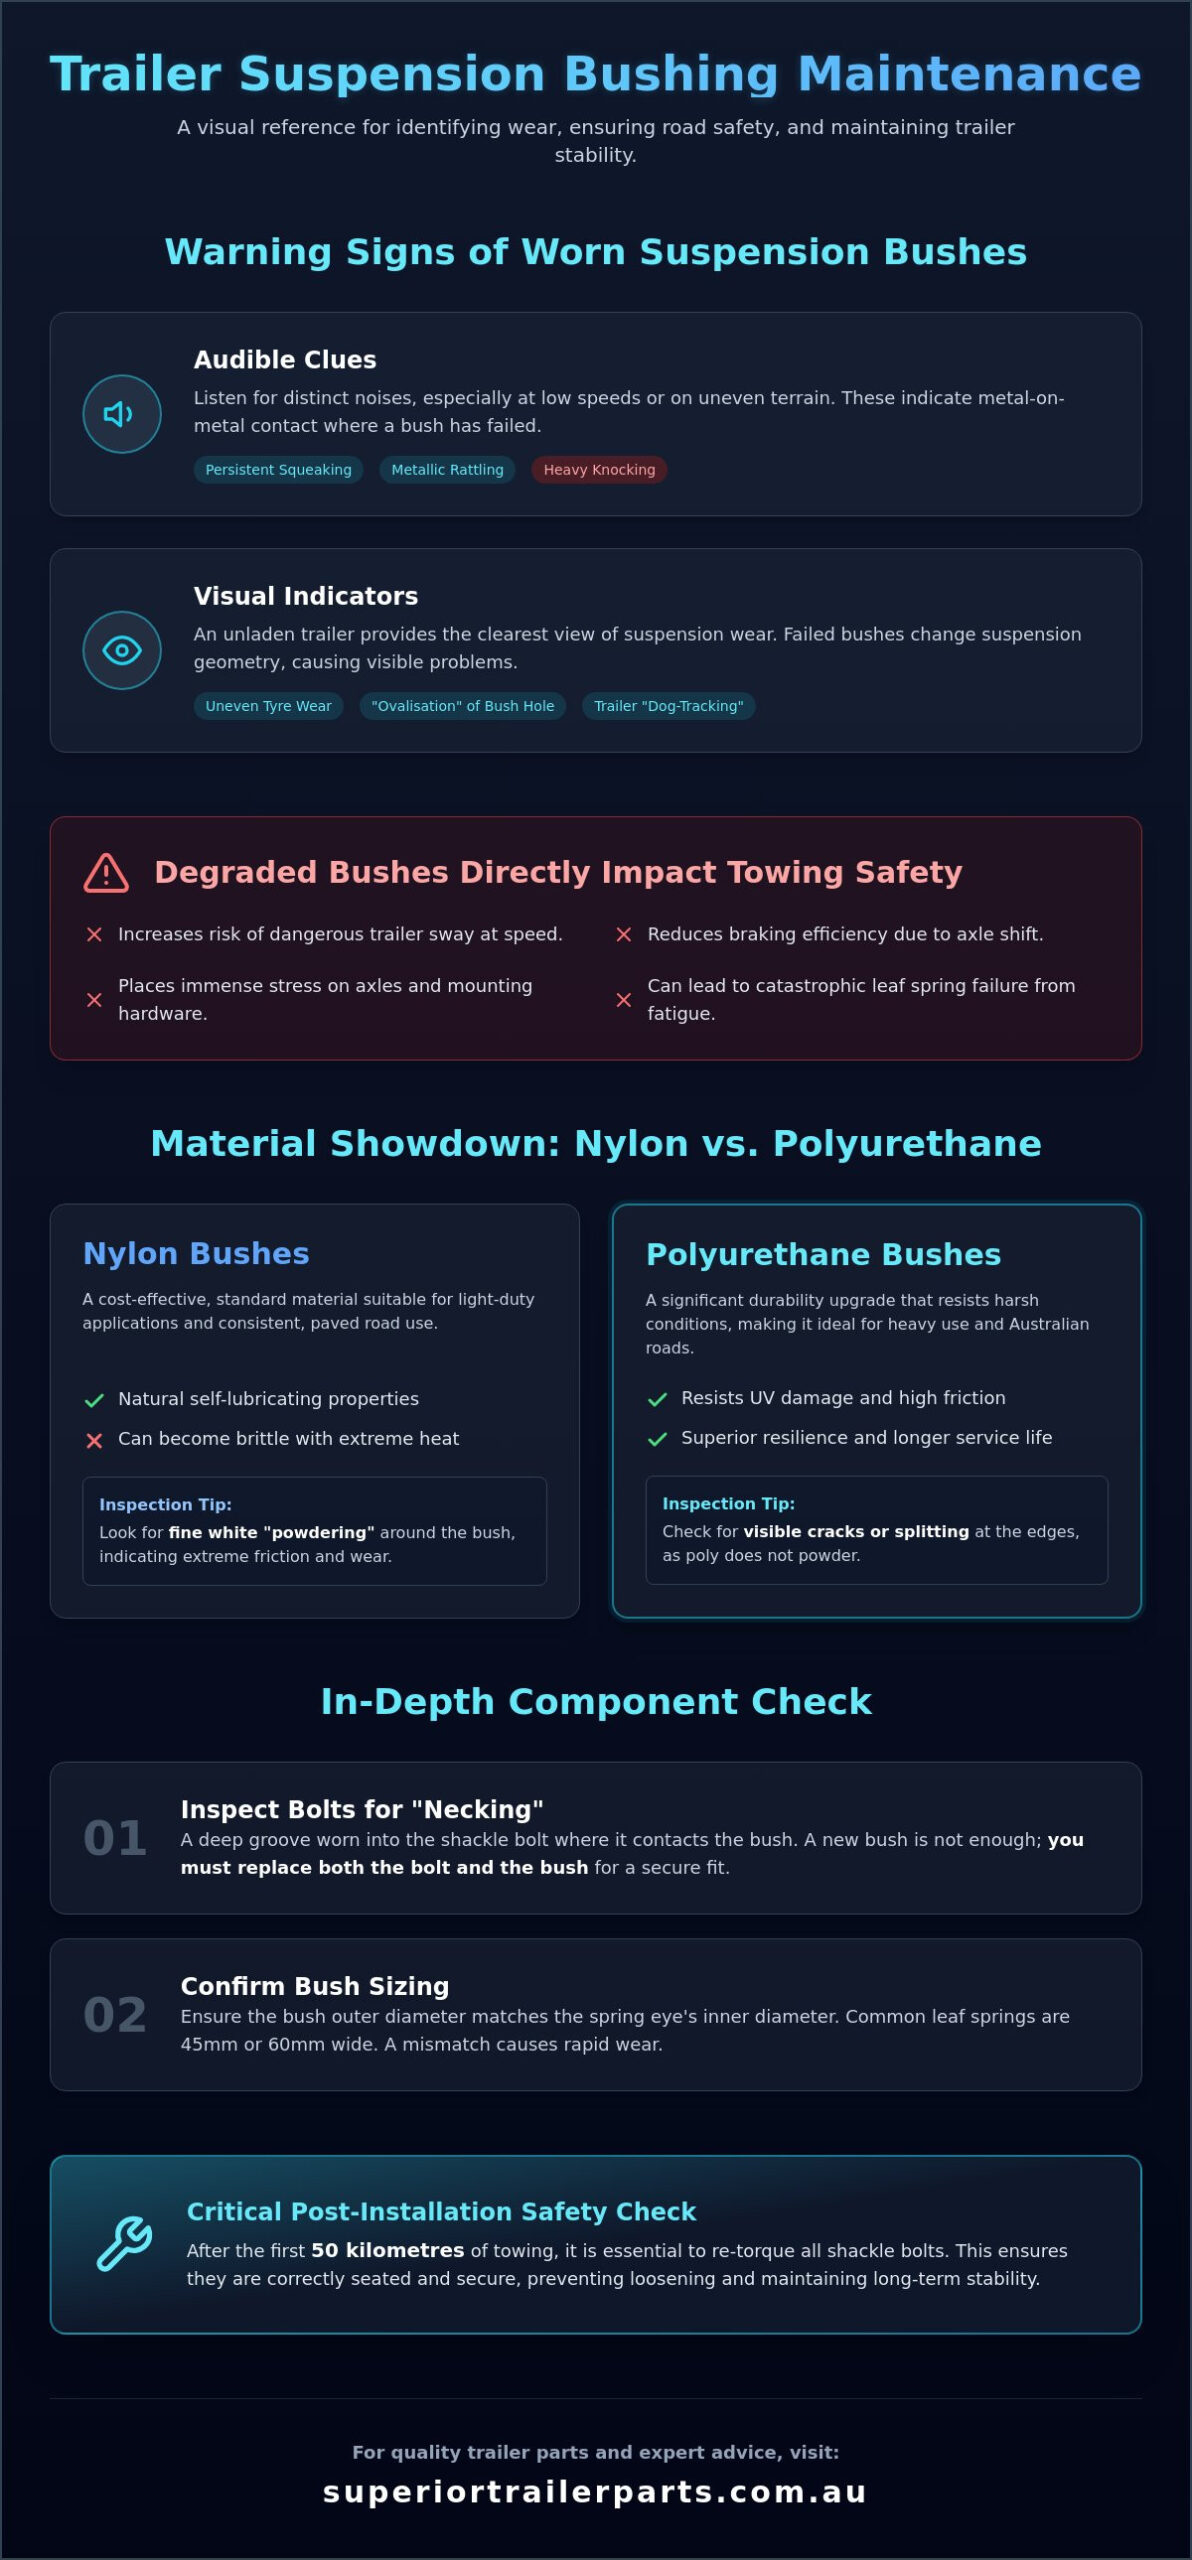
Don’t wait for a roadside breakdown to check your suspension. Trailer suspension bushes are small but critical components that act as a Bushing (isolator), absorbing road vibrations and ensuring the moving parts of your leaf springs operate smoothly. When they fail, the metal-on-metal contact creates a distinct, persistent squeaking or metallic rattling. You’ll hear it most clearly when navigating low-speed turns or driving over uneven ground. If you hear a heavy knocking sound, the bush has likely disintegrated entirely, allowing the shackle bolt to strike the spring eye directly. This metal-on-metal impact causes rapid damage to the spring itself.
Inspect your trailer while it’s unladen to get an accurate view of the wear. Look closely at the center of the spring eye. A healthy bush holds the shackle bolt perfectly centered. Wear leads to “ovalisation,” where the round hole becomes egg-shaped. This shift changes the suspension geometry and causes the trailer to “dog-track” behind the tow vehicle. You might also see “slop” or physical movement in the shackle pins if you lever the spring with a pry bar. Another red flag is uneven tyre wear on a single axle. If the tread is scrubbing off one side, it’s a sign the axle is no longer tracking straight because the bushes have failed. This misalignment forces the tyres to drag across the road surface rather than rolling freely.
The Impact of Worn Bushes on Towing Safety
Degraded bushes are more than an annoyance. They directly impact how your trailer handles at highway speeds. Excessive play in the suspension allows the trailer to wander, which increases the risk of dangerous trailer sway. It also reduces braking efficiency because the axle can shift slightly during deceleration. This movement places immense horizontal stress on your axles and mounting hardware. Left unchecked, this vibration can lead to metal fatigue and catastrophic leaf spring failure during a haul. Knowing how to replace trailer suspension bushes is a necessary skill to prevent these safety risks and keep your trailer tracking true.
Visual Inspection Checklist
Get under the trailer with a high-intensity torch to perform a thorough check. Look for these specific indicators of material failure:
- Nylon Bushes: Check for “powdering,” which is a fine white dust that indicates extreme friction and heat within the housing.
- Polyurethane Components: These don’t powder; instead, they develop visible cracks or start splitting at the edges when they’ve reached the end of their service life.
- Shackle Bolts: Inspect for “necking.” This is a deep groove worn into the bolt where it sits inside the bush.
If the bolt is grooved, a new bush won’t fix the problem. You must replace both the bolt and the bush to ensure a tight, secure fit. Professional maintenance requires checking every interface for wear to ensure the entire system remains rigid. Understanding how to replace trailer suspension bushes correctly means identifying these secondary wear points before you begin the mechanical work.
Understanding Bushing Materials and Mechanical Specifications
Selecting the correct material is the first step when learning how to replace trailer suspension bushes. Your choice affects maintenance frequency and how the trailer handles under load. Most standard trailers use nylon bushes. These are cost-effective and work well for light-duty applications. However, they can become brittle over time when exposed to extreme heat. Polyurethane (poly) bushes offer a significant upgrade. They resist UV damage and handle the high-friction environment of Australian roads better than standard plastics. For commercial or heavy-duty use, brass or sintered iron bushes provide the necessary strength to prevent crushing under massive weights.
Sizing is a critical mechanical specification. In Australia, most leaf springs are either 45mm or 60mm wide. You must match the outer diameter of the bush to the internal diameter of the spring eye. Usually, a 45mm spring eye requires a bush with an outer diameter of approximately 22.2mm. Getting this fit right ensures the suspension remains rigid and prevents the “slop” mentioned in the previous section. If the bush is too loose, it will rotate inside the spring eye and cause rapid wear to the spring steel itself.
Nylon vs. Polyurethane: Which is Right for You?
Nylon is a reliable choice for dry, paved road use where loads are consistent. It has natural self-lubricating properties that reduce the need for constant maintenance. Polyurethane is the preferred material for off-road trailers and boat trailers. It doesn’t absorb water and maintains its shape under the stress of corrugated roads. While poly bushes generally cost more upfront, their longevity in harsh conditions makes them a better value for frequent travellers. Understanding these trailer suspension basics helps you decide if a material upgrade is necessary for your specific towing needs.
Compatibility with Shackle Bolts and Pins
Your new bushes must match your shackle bolts perfectly. Most trailer shackle bolts come in 1/2 inch or 9/16 inch diameters. If there is any gap between the bolt and the bush, the suspension will rattle and wear prematurely. We recommend using greasable shackle bolts with polyurethane and brass bushes. These bolts have a grease nipple and an internal channel to deliver lubrication directly to the friction surface. If you are refurbishing a heavy-duty system, ensure you select a shackle kit that matches the load rating of your 4 leaf slipper springs or eye-to-eye setup. This compatibility ensures the hardware doesn’t bind under load. Ensuring you have the right components on hand is essential before you begin the process of how to replace trailer suspension bushes.
Comparing Slipper Springs vs. Eye-to-Eye Suspension Systems
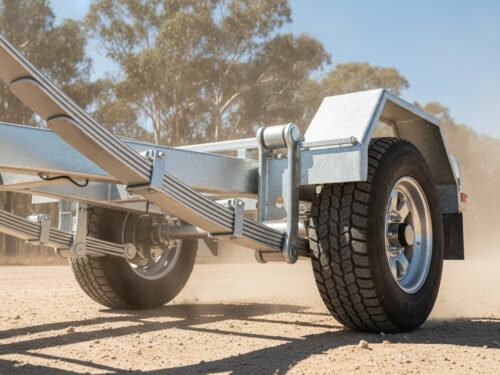
Identifying your hardware is the first step in learning how to replace trailer suspension bushes. You cannot assume every spring eye requires a bush. The suspension type determines your parts list and the complexity of the mechanical work. For example, 4 leaf slipper springs are common on light utility trailers. These springs feature a single fixed eye at the front and a flat tail at the rear. You only need one bush per spring. Conversely, eye-to-eye springs utilize bushes at both the front and rear hangers. This dual-point attachment provides a more controlled ride but doubles the number of wear points you must monitor during your routine maintenance checks.
Rocker roller systems add another layer of complexity. Found typically on tandem axle trailers, these systems use a central rocker arm to distribute weight between the axles. This rocker arm relies on a heavy-duty centre bush that handles significant rotational stress. If you’re working on a tandem setup, you’ll need to count the bushes in the spring eyes plus the bushes in the rockers. Failing to replace a single worn bush in a rocker assembly can lead to uneven suspension travel and accelerated wear on your new parts. Always confirm your suspension type before ordering replacement hardware to ensure you have the correct quantities for the job.
Slipper Spring Bushing Locations
Slipper springs are designed for simplicity and durability. The front eye is the only pivot point that requires a bush. However, the rear “slipper” tail requires its own specific inspection. While it lacks a bush, the tail slides against the internal surface of the rear hanger. Over time, friction can wear a groove into the hanger itself. When you determine how to replace trailer suspension bushes on this system, always check the rear hanger for thinning metal. Apply a heavy-duty chassis grease to the sliding tail to reduce friction and prevent the metal-on-metal grinding that leads to hanger failure.
Rocker Roller and Tandem Axle Considerations
Tandem axle trailers require a more comprehensive approach to suspension maintenance. The centre rocker bush is the heart of the system. It allows the two axles to move independently over bumps while maintaining equal load distribution. Because tandem trailers often carry heavier loads, these bushes experience higher heat and friction. We recommend replacing all bushes across the entire system at the same time. Coordinating the replacement ensures that the suspension geometry remains consistent across both axles. This proactive approach prevents the trailer from pulling to one side and ensures your braking forces remain balanced during heavy hauling.
Step-by-Step Guide to Replacing Trailer Suspension Bushes
Replacing suspension components is a straightforward mechanical task, but it requires the right sequence to avoid injury or equipment damage. Before you begin, park the trailer on a level, hard surface. Chock the wheels on the opposite side of your work area. Learning how to replace trailer suspension bushes starts with unloading the tension from the leaf springs. You must place your heavy-duty jack stands under the trailer frame, not the axle. If you support the trailer by the axle, the springs remain compressed, making it impossible to remove the shackle bolts safely. Once the frame is secure, use a floor jack to slightly raise the axle until the tension on the shackle pins is neutral.
Preparation and Critical Safety
Don’t rely on a hydraulic jack to support the trailer while you’re working underneath. Jacks can fail without warning. Always use rated jack stands. For this job, you’ll need a basic set of tools: a socket set, a heavy-duty hammer, a steel drift or punch, and a penetrating lubricant. Remove the wheels to gain clear access to the shackle hardware. Spray all bolts with lubricant at least 20 minutes before you start. This simple step saves significant time when dealing with road grime and surface rust.
Removing Stubborn or Seized Bushes
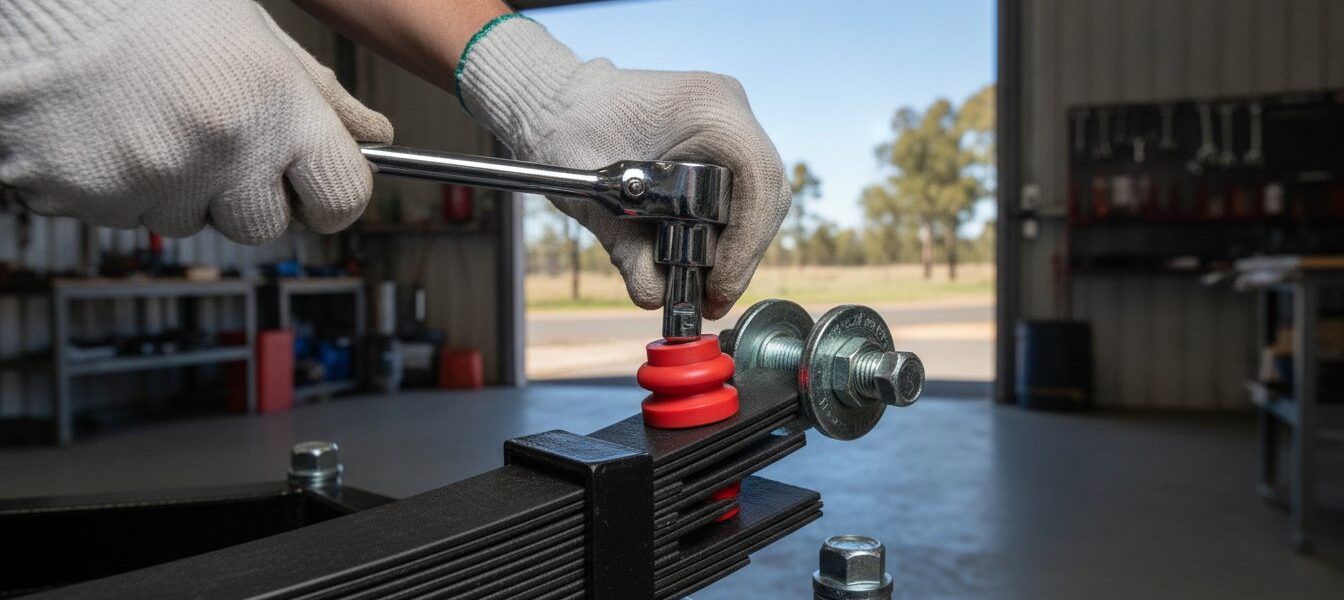
Shackle bolts often seize inside the bush due to corrosion. If the bolt won’t budge with a socket, use a hammer and drift to drive it out. Once the bolt is clear, you need to extract the old bush from the spring eye. If you don’t have a dedicated press, you can use a large G-clamp and two different-sized sockets. Place a socket slightly smaller than the bush on one side and a socket larger than the bush on the other. Tightening the clamp will press the old bush into the larger socket. For stubborn nylon bushes, you can carefully apply heat to the spring eye to soften the plastic, but avoid overheating the spring steel as this can ruin its temper. Take care not to gouge the internal surface of the eye during extraction.
Installing the New Bush and Reassembly
Clean the internal surface of the spring eye with a wire brush or emery paper to remove rust. This ensures the new bush seats flush. If you’re installing polyurethane bushes, apply a thin layer of silicone-based grease to the external surface. For standard nylon, many operators prefer to install them dry to prevent attracting road grit. Press the new bush in until the edges are flush with the spring eye. Reinstall the shackle bolts and tighten the nuts. Follow the “snug but not tight” rule; the bolts must be firm enough to prevent rattling but loose enough to allow the suspension to pivot freely. If you need high-quality replacement hardware, buy durable trailer suspension components here to ensure a reliable fit and long-term performance. Ensuring every bush is seated correctly is the final step in how to replace trailer suspension bushes for a quiet, stable tow.
Critical Post-Installation Checks and Ongoing Maintenance
The job isn’t finished once the trailer is back on its wheels. After you’ve completed the process of how to replace trailer suspension bushes, you must verify the assembly under real-world conditions. Conduct a short test drive of approximately 5 to 10 kilometres. Choose a route that includes several turns and a few minor road undulations. This allows the new bushes to seat properly within the spring eyes and hangers. You might hear minor settling noises during this initial run. This is normal as the hardware finds its natural alignment under the weight of the trailer.
Safety requires a follow-up inspection. Re-check the torque on every shackle bolt after the first 50 kilometres of towing. Road vibrations often cause new hardware to settle, which can lead to a slight loss in nut tension. Ensure the bolts remain firm but still allow the suspension to pivot as intended. If you’ve installed greasable shackle pins, apply a fresh pump of grease after this first trip. This ensures the internal channels are clear and the friction surfaces have a complete coating of lubricant to prevent early wear.
Establishing a Maintenance Schedule
Consistent inspections prevent premature component failure. We recommend quarterly visual checks for commercial or high-use trailers. For recreational users, a thorough look before every major trip is sufficient. Look for signs of “powdering” in nylon or splitting in poly materials. Keeping fresh grease in the system is the most effective way to extend the life of your hardware. Documenting these checks helps you track the service life of your trailer parts. This record allows you to predict future maintenance needs and avoid unexpected breakdowns during a haul.
When to Replace the Entire Spring
New bushes cannot fix a collapsed suspension system. If your leaf springs appear “flat” or have lost their upward arch, the steel has reached its elastic limit. Replacing bushes on a dead spring is a waste of time and money. Inspect the leaf pack for hairline cracks, heavy deep-pitting rust, or signs of metal fatigue around the centre bolt. If the pack is compromised, a full replacement is the only safe option. You can contact Superior Trailer Parts for expert advice on selecting full suspension kits that match your specific load requirements. Understanding how to replace trailer suspension bushes is a vital maintenance skill, but knowing when the entire system requires an upgrade is what ensures long-term road safety.
Restore Your Trailer’s Road Performance
Maintaining your suspension is about more than just stopping a squeak. It’s about protecting your tyres, ensuring straight tracking, and maintaining control during heavy hauls. By selecting the right materials and following a methodical installation process, you eliminate the mechanical slop that leads to dangerous trailer sway. Now that you understand how to replace trailer suspension bushes, you can handle this essential maintenance task with confidence. Consistent checks and proper lubrication will keep your hardware running smoothly for years to come.
Superior Trailer Parts has been Australian-owned and operated since 2014. We provide nationwide shipping on all suspension components and offer expert technical support for your DIY repairs. Browse Our Range of Trailer Suspension Bushes and Shackle Kits to get the high-quality hardware you need for your next project. Get your trailer back on the road with the stability and safety your cargo deserves.
Frequently Asked Questions
How often should I replace my trailer suspension bushes?
Replace your bushes every 10,000 to 20,000 kilometres or every two years depending on your usage. Trailers frequently used off-road or for heavy commercial hauling require more frequent inspections. Look for visual signs of degradation like cracking, powdering, or ovalisation during your quarterly maintenance checks to prevent axle misalignment.
Can I use standard automotive grease on my trailer bushes?
You can use standard grease, but a high-pressure lithium-based or silicone-based grease provides better protection for suspension components. Avoid petroleum-based lubricants on rubber components as they can cause the material to swell. For polyurethane bushes, always use a water-resistant lubricant to prevent the friction-based squeaking common in dry environments.
What is the difference between nylon and polyurethane bushes for trailers?
Nylon is a hard, self-lubricating plastic best suited for light-duty trailers on paved roads. Polyurethane is more resilient and offers superior vibration dampening for off-road or heavy-duty applications. While nylon is a cost-effective standard, polyurethane resists UV damage and heat better, making it a more durable choice for harsh Australian conditions.
Do I need a hydraulic press to replace trailer bushes at home?
You don’t strictly need a hydraulic press for this task. Many DIY users effectively learn how to replace trailer suspension bushes using a heavy-duty G-clamp and sockets to press the components in and out. A hammer and steel drift are also effective for removing old, seized bushes, provided you take care not to damage the spring eye.
Why is my trailer still squeaking after I replaced the bushes?
Squeaking usually indicates a lack of lubrication or shackle bolts that are over-tightened. Polyurethane bushes require a coating of grease during installation to remain quiet. If the noise persists, check your shackle bolts for “necking” or grooves. Worn bolts allow metal-on-metal contact that a new bush cannot fully isolate.
What are the most common bush sizes for Australian trailers?
Most Australian trailers use bushes designed for 45mm or 60mm wide leaf springs. A common specification for 45mm springs is an outer diameter of 22.2mm. Inner diameters are typically sized to fit 1/2 inch or 9/16 inch shackle bolts. Always use a calliper to measure your spring eye and bolt diameter before purchasing replacement parts.
Should I replace the shackle bolts at the same time as the bushes?
We recommend replacing shackle bolts whenever you replace the bushes. If a bush has failed, the bolt has likely suffered abrasive wear or surface pitting. Reusing a worn bolt inside a new bush creates a loose fit that accelerates wear. Using new, greasable shackle bolts ensures the entire pivot point remains secure and well-lubricated.