Selecting the wrong braking system for your trailer is more than a technical oversight. It is a legal risk that can lead to equipment failure on the road. Many trailer owners find Australian Design Rule (ADR) requirements and stud pattern identification confusing. You need a reliable solution that ensures your 750kg to 2,000kg GTM trailer remains compliant and safe. A high-quality 9 inch mechanical drum brake assembly provides the durability required for harsh towing conditions without the complexity of electric controllers. This setup is a practical choice for those who value mechanical simplicity and straightforward repairs.
You will learn how to select, install, and maintain these assemblies to keep your trailer roadworthy. We provide clear steps to identify the correct hub and backing plate combinations for your specific axle. This information helps you understand mechanical override systems and gives you the confidence to perform routine maintenance. We cover everything from cable geometry to shoe adjustments so your trailer meets national standards for every trip. Following these guidelines ensures your braking system performs under pressure and stays within legal limits on Australian roads.
Key Takeaways
- Understand why mechanical drum brakes are the standard requirement for trailers in the 750kg to 2000kg GTM range.
- Identify the core components of a 9 inch mechanical drum brake assembly, including side-specific backing plates and hub drums.
- Learn how override coupling systems provide reliable stopping power without the need for an electronic in-car controller.
- Gain practical insights on mounting backing plates to axle flanges and routing cables through pulley systems for maximum efficiency.
- Ensure long-term durability by performing routine inspections on high-friction shoes and internal springs to maintain road compliance.
Understanding 9 Inch Mechanical Drum Brakes for Australian Trailers
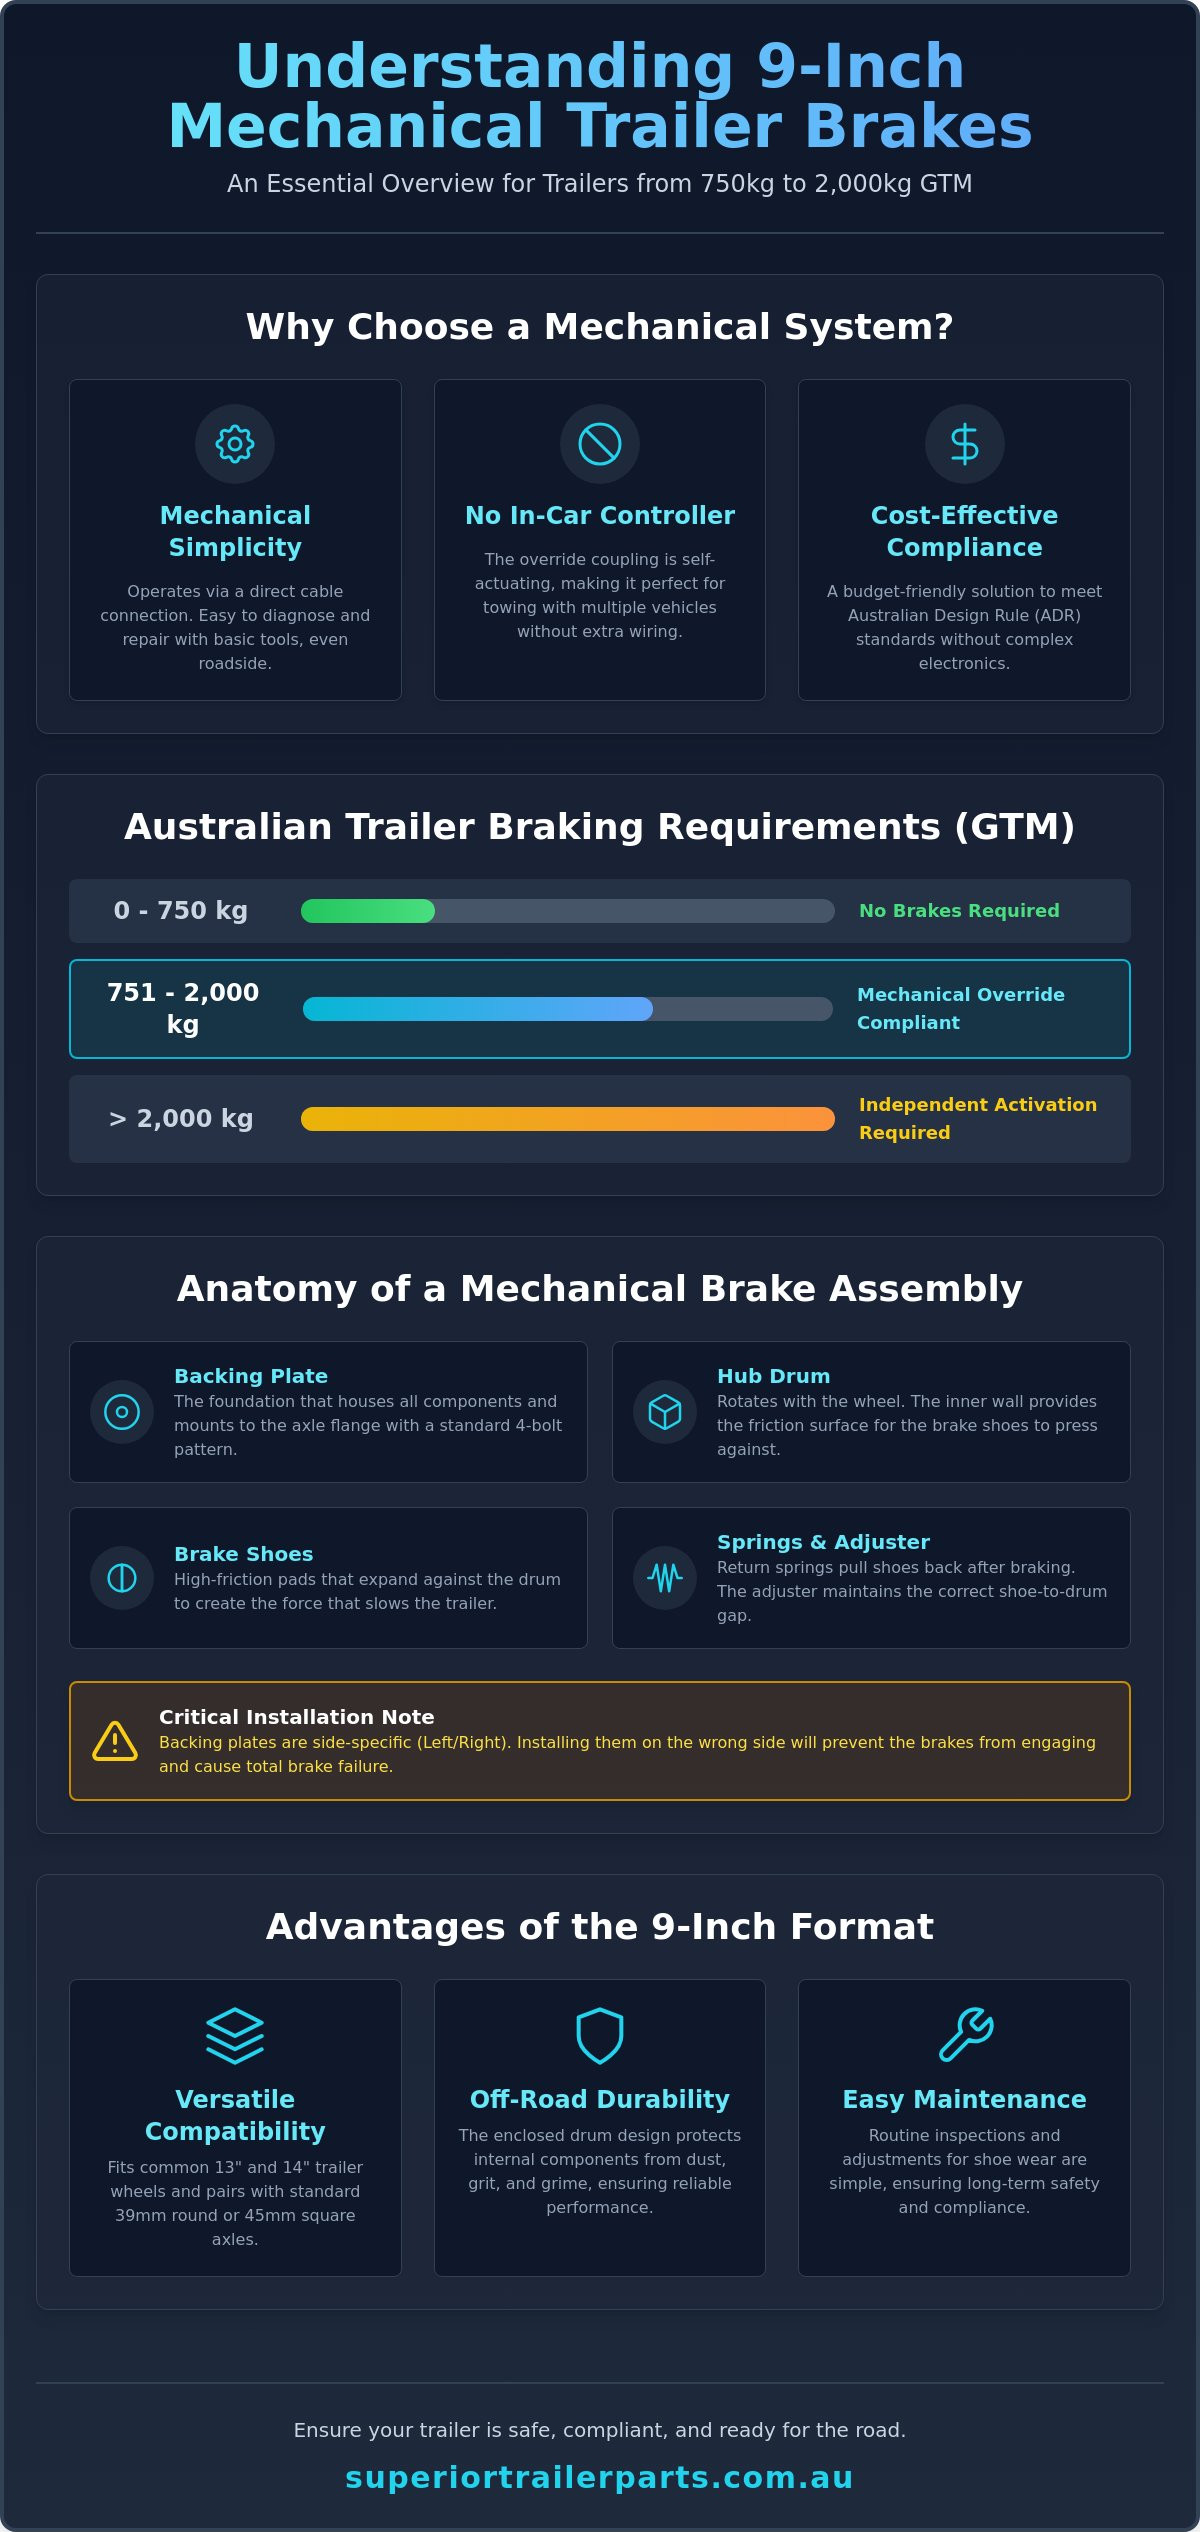
Mechanical drum brakes are the standard for trailers in the 750kg to 2,000kg GTM range. This category includes everything from single-axle box trailers to jet ski trailers. The system operates via an override coupling that pulls a cable during tow vehicle deceleration. This physical connection ensures the trailer slows down in proportion to the tow vehicle’s braking force. The mechanical override principle is a self-actuating system that remains independent of in-car controllers. This independence makes it a practical choice for operators who use different vehicles to tow the same trailer.
These assemblies are preferred for their simplicity and ease of roadside repair. Unlike electric or hydraulic alternatives, you can often fix a mechanical issue with basic hand tools. This reliability is vital for transport professionals working in remote areas where specialized service is unavailable. Using a 9 inch mechanical drum brake assembly provides a dependable braking solution that doesn’t rely on complex wiring or hydraulic fluid levels.
The Legal Requirements for Trailer Braking
Australian Design Rules (ADR) mandate brakes for any trailer over 750kg GTM. For most light to medium trailers, a mechanical system is the most cost-effective way to meet these standards. Mechanical override systems are legally permitted up to a 2,000kg GTM limit. If a trailer exceeds this 2,000kg threshold, regulations require independent brake activation. This usually means installing electric brakes or power-assisted hydraulic systems. Sticking to the 2,000kg limit with mechanical brakes ensures you stay within the law while avoiding the expense of electronic upgrades.
Benefits of the 9 Inch Drum Format
The 9 inch format offers a balance of stopping power and physical compatibility. Its compact size fits standard 13-inch and 14-inch trailer wheels without interference. This versatility allows it to work seamlessly with various axles, including 39mm round or 45mm square types. You’ll find that this format is the industry standard for a reason.
You will also find a lower initial purchase cost compared to disc brake conversions. This makes it the go-to option for budget-conscious builds that don’t want to sacrifice safety. The enclosed drum design offers high reliability in dusty or off-road conditions. By shielding the shoes and springs from external grit, Drum brake technology maintains consistent friction levels even on unsealed roads. This resilience ensures your braking performance doesn’t drop when the pavement ends.
Core Components of a 9 Inch Mechanical Brake Assembly
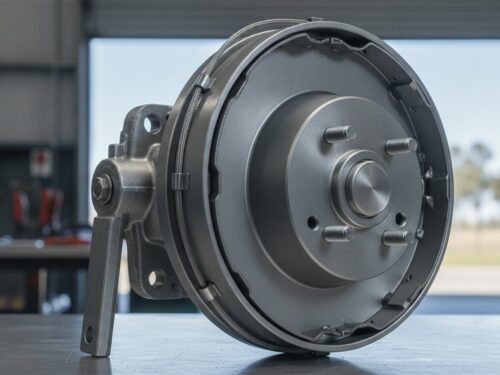
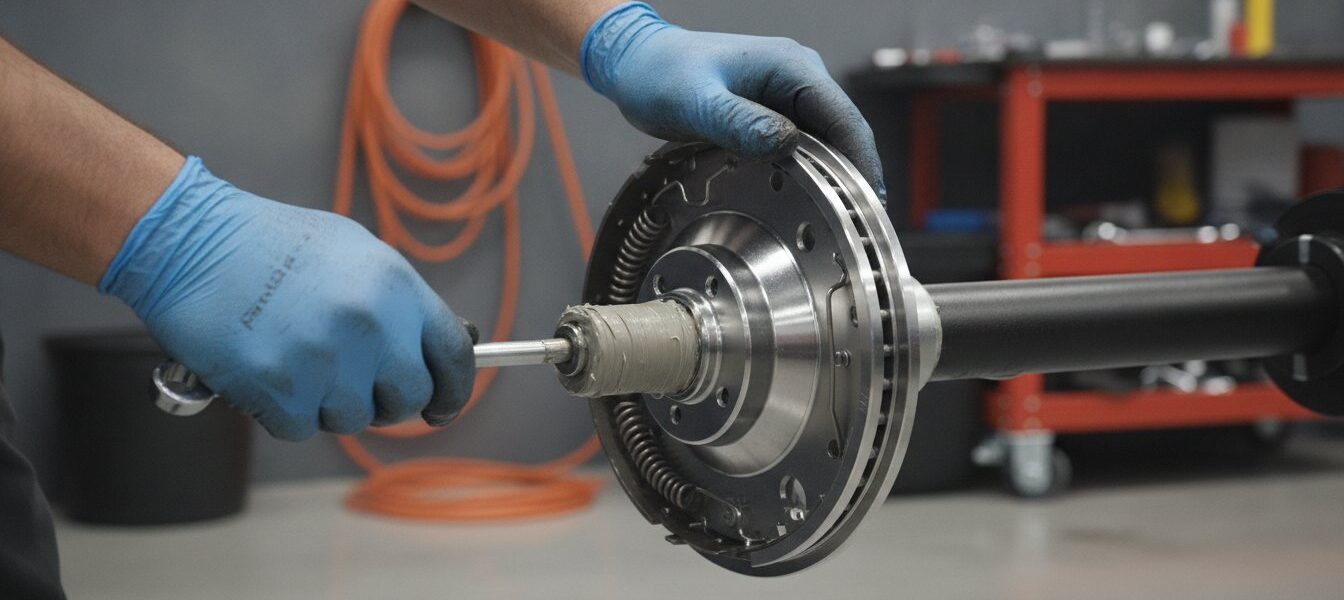
A 9 inch mechanical drum brake assembly relies on several critical parts working in unison. A full setup consists of the hub drum, the backing plate, the brake shoes, and the internal springs. You must identify the “Left” and “Right” units correctly before installation. These plates are side-specific because the mechanical lever is designed to pull in a specific direction. Installing them on the wrong side will prevent the brakes from engaging properly when the cable is pulled.
Internal hardware keeps the system functional. This includes the Core Components of a Brake Assembly like the adjuster screw, return springs, and the park brake lever. The adjuster screw allows you to maintain the correct gap between the shoe and the drum surface as the linings wear down. Return springs are essential for pulling the shoes away from the drum when you release the brake. Without them, the brakes would drag, causing excessive heat and premature wear. Check your internal hardware regularly to ensure the springs haven’t lost their tension.
Selecting the Correct Backing Plate
The backing plate is the foundation of the braking system. It houses the mechanical lever that converts cable pull into shoe expansion. When the override coupling activates, the cable pulls this lever, forcing the shoes against the inner wall of the drum. You need to choose a finish that suits your environment. Standard painted plates work well for general-purpose box trailers. If you’re building a boat trailer, choose galvanized options to prevent saltwater corrosion. Always verify the mounting hole pattern. The standard 4-bolt pattern is the Australian industry norm for these assemblies, ensuring a secure fit to the axle flange.
Stud Patterns and Hub Drum Identification
Matching the hub drum to your wheels is a common point of confusion. You must determine the PCD, or Pitch Circle Diameter. This is the diameter of the circle that passes through the center of the wheel studs. A mismatch here means your wheels won’t bolt onto the drum. Use this quick reference for common Australian patterns:
- Ford: 5 studs on a 114.3mm PCD.
- HT Holden: 5 studs on a 108mm PCD.
- HQ Holden: 5 studs on a 120.6mm PCD.
Ensure your drums are also matched to your trailer axles. Whether you use 39mm round or 45mm square axles, the inner and outer bearings must match the spindle size exactly. This ensures the hub sits correctly and the seal makes proper contact. If you’re unsure about your current setup, browse our range of trailer parts to find the exact combination for your build. Choosing the right stud pattern and axle fitment from the start prevents costly delays during the assembly process.
Mechanical vs Electric Drum Brakes: Choosing the Right System
Selecting between mechanical and electric systems depends on your trailer’s weight and intended use. A 9 inch mechanical drum brake assembly is the standard choice for many light-duty applications. One of its primary advantages is that it requires no electronic brake controller in the tow vehicle. This makes it a versatile option for trailers shared among different vehicles. Electric brakes, conversely, offer superior control for heavy tandem axle trailers and caravans. They allow the driver to manually adjust braking force from the cabin, which is essential for managing heavy loads on steep descents.
Maintenance requirements differ significantly between these two systems. With a mechanical setup, your primary task is monitoring and adjusting cable tension. Over time, cables can stretch or pulleys can become stiff, requiring simple manual adjustments. Electric systems involve more complex components like electromagnets and internal wiring. Magnets wear down through friction against the drum face and eventually require replacement. You must also check electrical connections for corrosion, as this can lead to intermittent brake failure. Mechanical systems avoid these electrical headaches entirely.
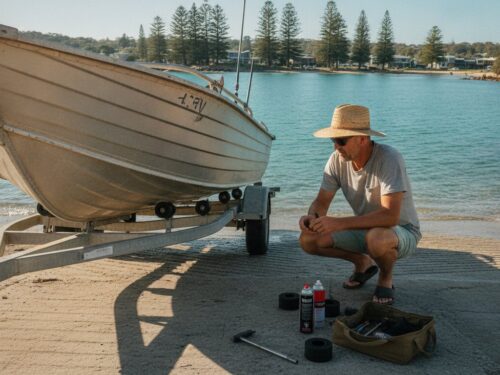
Water immersion is a critical factor for boat trailer owners. Mechanical brakes handle frequent submersion better than electric versions, especially when using galvanized backing plates. Electric magnets are highly susceptible to damage from water and salt. This often leads to electrical shorts or seized internal components. If you’re launching boats regularly, the simplicity of a mechanical system often outweighs the technical benefits of electric alternatives. It’s a grounded choice for marine environments where reliability is paramount.
When to Stick with Mechanical
Mechanical systems are ideal for rental trailers or commercial fleets. Since no in-cab controller is needed, any vehicle with a standard tow ball can safely pull the unit. They are perfect for simple box trailers and light boat trailers under 1.5 tonnes. The lower complexity means there are fewer points of failure to troubleshoot in the field. If you want a reliable solution for a light trailer, the 9 inch mechanical drum brake assembly remains the most practical path.
When to Upgrade to Electric
Upgrading becomes necessary as your load increases. It’s mandatory for trailers over 2,000kg GTM according to Australian standards. Beyond legal requirements, electric brakes are recommended for heavy loads where independent brake bias is necessary for safety. This allows you to stabilize the trailer independently of the tow vehicle if swaying occurs. This transition ensures your trailer remains safe and compliant as you move into the heavy-duty category.
Installation and Maintenance for Reliable Braking
Mounting your 9 inch mechanical drum brake assembly correctly is the first step toward road safety. Secure the backing plate to the axle flange using high-tensile bolts and locking nuts. Vibration on the road can loosen standard hardware, so locking nuts are mandatory for this application. Once the plate is fixed, route the brake cable through the pulley system to the override coupling. Ensure the cable path is clear of the suspension and frame to prevent fraying. Use galvanised pulleys to resist rust, especially on trailers exposed to the elements. A poorly routed cable will eventually snap or bind, leaving you without trailer brakes.
Adjust the brake shoes via the star wheel located at the bottom of the backing plate. Turn the wheel until the shoes lightly touch the drum. You’ll hear a slight rubbing sound when you spin the drum by hand. Back the wheel off by two or three clicks until the drum spins freely again. This process centers the shoes and ensures immediate response when the coupling is compressed. Finally, tension the main cable. You want to remove all slack without engaging the brakes while the trailer is at rest. If the cable is too tight, the brakes will overheat. If it’s too loose, your stopping distance will increase significantly.
Troubleshooting Common Issues
Brake drag is a frequent problem usually caused by over-tightened cables or seized return springs. If the drum feels hot after a short drive, check the cable tension immediately. Uneven braking typically indicates that one side is adjusted tighter than the other. You’ll notice the trailer pulling to one side during deceleration. Squealing noises are another sign of trouble. This often points to glazed shoes or debris like sand and grit trapped inside the drum. Pull the drum off and inspect the friction surfaces if noise persists.
Preventative Maintenance Checklist
- Inspect shoe thickness: Check your linings every 5,000km or before any long-distance trip. Replace them if the friction material is worn near the rivets or metal backing.
- Lubricate the coupling: Use the grease nipples on your 4 hole over-ride couplings to ensure smooth sliding action. A seized coupling won’t activate the brakes.
- Marine washout: If you’re using a boat trailer, wash out the drums with fresh water after every launch. This removes salt deposits that cause rapid corrosion of the internal springs.
Keeping your system in top condition prevents expensive roadside repairs and ensures you stay compliant with Australian standards. If you need replacement shoes, springs, or cables, browse our full range of high-quality trailer parts to find the right fit for your assembly.
Quality Brake Assemblies for Australian Conditions
Australian roads present unique challenges for towing equipment. Corrugated tracks, extreme heat, and heavy dust loads can quickly degrade inferior hardware. Superior Trailer Parts provides heavy-duty mechanical brake components designed specifically for these durability requirements. Every 9 inch mechanical drum brake assembly we supply features reinforced backing plates to resist warping under heavy braking pressure. We use high-friction shoe compounds that maintain their stopping power even after repeated use on long descents. This focus on physical resilience ensures your trailer remains safe and operational in the most demanding regional conditions.
Reliability is non-negotiable when you’re hauling a load. We offer nationwide shipping across Australia for all brake kits and replacement parts. This ensures that fleet managers and individual owners can access professional-grade hardware regardless of their location. Our products are tested to ensure your trailer remains ADR compliant, giving you peace of mind during roadside inspections. By choosing market-aligned hardware that meets national safety standards, you protect your investment and the safety of other road users.
Sourcing the Right Parts
Finding the correct combination of components is essential for a successful build. You can browse our full range of trailer parts to find complete kits that include everything needed for a single or tandem axle setup. It’s important to match your brakes with our couplings and parts for a seamless override setup. Using components designed to work together reduces the risk of mechanical binding or insufficient cable pull. Our expert team is available to provide technical support on stud patterns and axle fitment if you’re unsure about your current specifications.
Why Quality Matters for Safety
Safety shouldn’t be compromised for a lower price tag. Avoid cheap imports that may not meet the structural requirements of Australian towing. These inferior products often use thinner steel for backing plates and lower-grade springs that fail prematurely. Investing in quality shoes and drums reduces long-term maintenance costs by extending the intervals between replacements. Durable hardware pays for itself through reduced downtime and fewer repairs. For bulk trade enquiries or specific technical questions, you can contact us directly. We stand behind our products because we understand the conditions they must endure.
Secure Your Trailer with Reliable Braking Hardware
Maintaining a safe and compliant trailer requires attention to detail and high-quality hardware. You now understand how to select the correct hub and backing plate combination to match your specific axle and stud pattern. Regular maintenance, such as checking cable tension and adjusting shoe clearance, ensures your braking system performs when needed. A reliable 9 inch mechanical drum brake assembly is the backbone of any light to medium trailer setup on Australian roads.
Superior Trailer Parts is an Australian owned and operated business committed to providing hardware that meets Australian Design Rules (ADR). We offer nationwide shipping on all components to keep your projects moving without delay. Investing in durable, tested parts reduces the risk of mechanical failure and keeps your gear roadworthy. Don’t settle for inferior imports that can’t handle local towing conditions.
Shop 9 Inch Mechanical Brake Assemblies and Parts
Take the guesswork out of your next trailer build or repair. Choosing parts designed for durability gives you the confidence to tackle any journey with a secure load.
Frequently Asked Questions
How do I know if my trailer needs 9 inch mechanical brakes?
Your trailer requires a braking system if its Gross Trailer Mass (GTM) is between 750kg and 2,000kg. This is a legal requirement under Australian Design Rule 38/05. A 9 inch mechanical drum brake assembly is the industry standard for trailers in this weight range. If your GTM exceeds 2,000kg, you must upgrade to an electric or power-assisted system instead.
Can I convert my unbraked trailer to use a mechanical drum assembly?
You can convert an unbraked trailer if the axle features a standard 4-bolt mounting flange. The process involves installing backing plates, hub drums, and an override coupling. You’ll also need to route a brake cable from the coupling to the brake levers. Check that your axle, such as a 39mm round or 45mm square type, is rated for the intended load before starting the upgrade.
What is the difference between a left and right-hand backing plate?
Backing plates are side-specific because the internal mechanical lever only operates in one direction. The left plate is for the passenger side and the right plate is for the driver side. If you install them on the wrong side, the shoes won’t expand correctly when the cable pulls the lever. Always check for the “L” or “R” markings on the metal plate before you bolt them to the axle.
How often should I replace the brake shoes in a 9 inch drum?
Inspect your brake shoes every 5,000km or at least once every twelve months. Replacement intervals depend on how often you tow and the weight of your loads. You should replace the shoes when the friction material wears down to 1.5mm. Ignoring worn shoes leads to metal-on-metal contact, which destroys the inner surface of your hub drums.
Do mechanical brakes work in reverse?
Mechanical override brakes engage automatically when you reverse because the trailer pushes against the tow vehicle. This compression pulls the cable and applies the brakes. To reverse freely, you must engage the reverse lockout lever or latch on your coupling. This physical block prevents the coupling from sliding back and activating the 9 inch mechanical drum brake assembly.
What stud patterns are available for 9 inch trailer drums?
Most 9 inch drums come in the most common Australian stud patterns. These include Ford (5/114.3 PCD), HT Holden (5/108 PCD), and HQ Holden (5/120.6 PCD). You must match the Pitch Circle Diameter (PCD) of the drum to your existing wheels. Using the wrong pattern means the wheel studs won’t align with the holes in your rims.
Can I use mechanical drum brakes on a boat trailer?
Mechanical brakes are a practical choice for boat trailers because they don’t have sensitive electrical wiring. You should choose galvanized backing plates to protect the hardware from saltwater corrosion. It’s vital to flush the drums with fresh water after every ramp launch. This maintenance prevents salt from seizing the internal springs and the adjuster screw.
Why are my trailer brakes locking up when I reverse?
Brakes lock during reversing because the override coupling is compressing under the weight of the trailer. This is a normal mechanical function that applies the brakes. Ensure your reverse lockout latch is flipped into the correct position to stop the coupling from sliding. If the wheels still lock, your brake shoes are likely adjusted too tight or the return springs have failed.