You don’t need an expensive in-car controller or a complex electronic system to ensure your trailer stops safely. For many Australian trailer owners, 9 inch mechanical drum brakes offer the most reliable and cost-effective solution for staying compliant on the road. These systems provide a straightforward, cable-activated method of braking that bypasses the high entry costs and technical hurdles of electric alternatives. It is a utilitarian choice for those who value durability and performance over marketing rhetoric.
It’s common to feel confused by Australian braking regulations or frustrated by issues like cable stretching and brake fade in existing setups. You want a braking system that works without a fuss and meets strict safety standards for trailers up to 2,000kg GTM. This guide clarifies the mechanics and legal requirements of mechanical drums to ensure your trailer remains safe and legal. We will examine the essential components for a full installation and provide a step-by-step maintenance routine you can perform yourself without professional help.
Key Takeaways
- Identify why 9 inch mechanical drum brakes are the industry standard for trailers up to 2,000kg GTM on Australian roads.
- Understand how override couplings use the trailer’s momentum to trigger reliable braking without the need for expensive in-car controllers.
- Compare the cost-effectiveness and simplified installation of mechanical setups against more complex electric braking alternatives.
- Establish a routine inspection schedule to identify worn brake shoes early and avoid permanent damage to the drum surface.
- Ensure hardware compatibility by matching your braking system with the correct 39mm round or 45mm square axles for a secure fit.
Understanding 9-Inch Mechanical Drum Brakes for Trailers
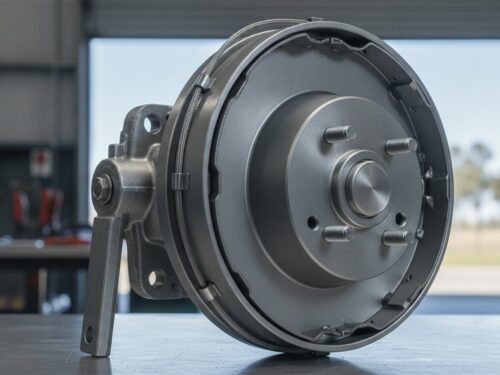
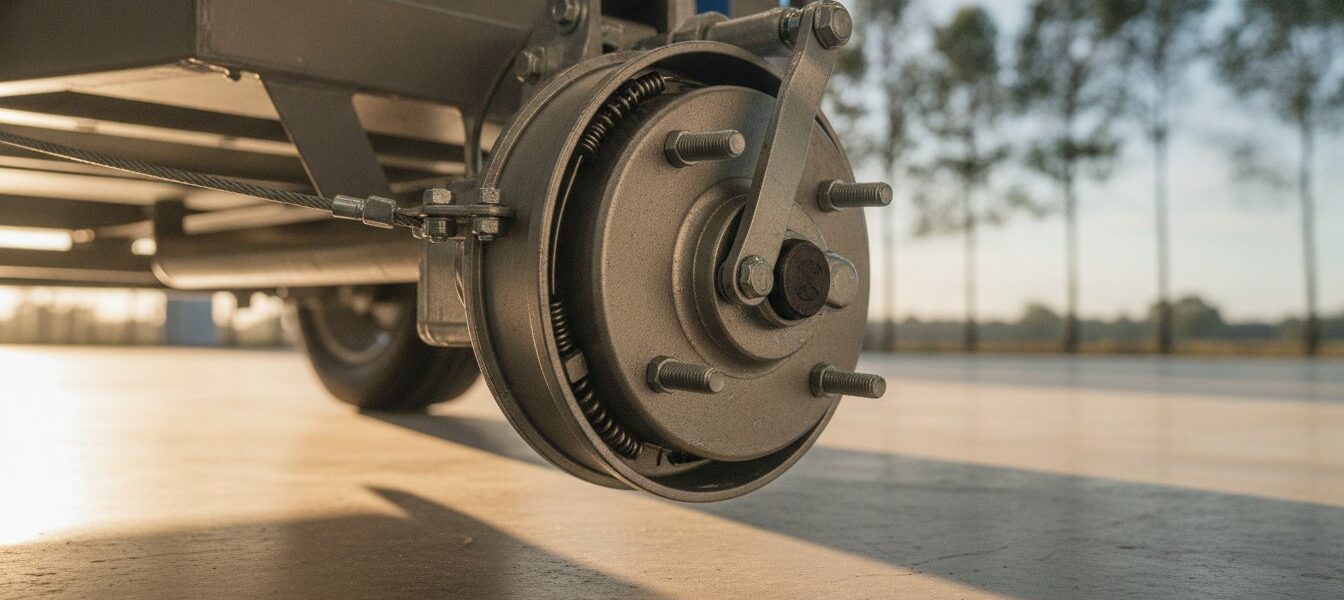
A 9 inch mechanical drum brake system is a self-contained braking unit designed specifically for trailers. It uses a cable-actuated lever to press internal brake shoes against the inner surface of a rotating drum. This mechanical friction converts kinetic energy into heat, effectively slowing the trailer. The 9-inch diameter is the industry standard for light to medium-duty trailers across Australia. This size provides a practical balance between stopping power and physical clearance. It fits most common wheel rim sizes while offering enough surface area to manage heat during standard towing conditions.
Drum Brakes remain a staple in the transport sector because their enclosed design protects internal parts from road debris and weather. In the Australian market, these systems usually function as part of a mechanical override setup. When the towing vehicle decelerates, the trailer’s forward momentum pushes against the coupling. This physical force pulls a brake cable, which then expands the shoes inside the drum. This setup is highly reliable and does not require expensive electronic controllers or complex wiring inside the towing vehicle.
Key Components of the Drum Assembly
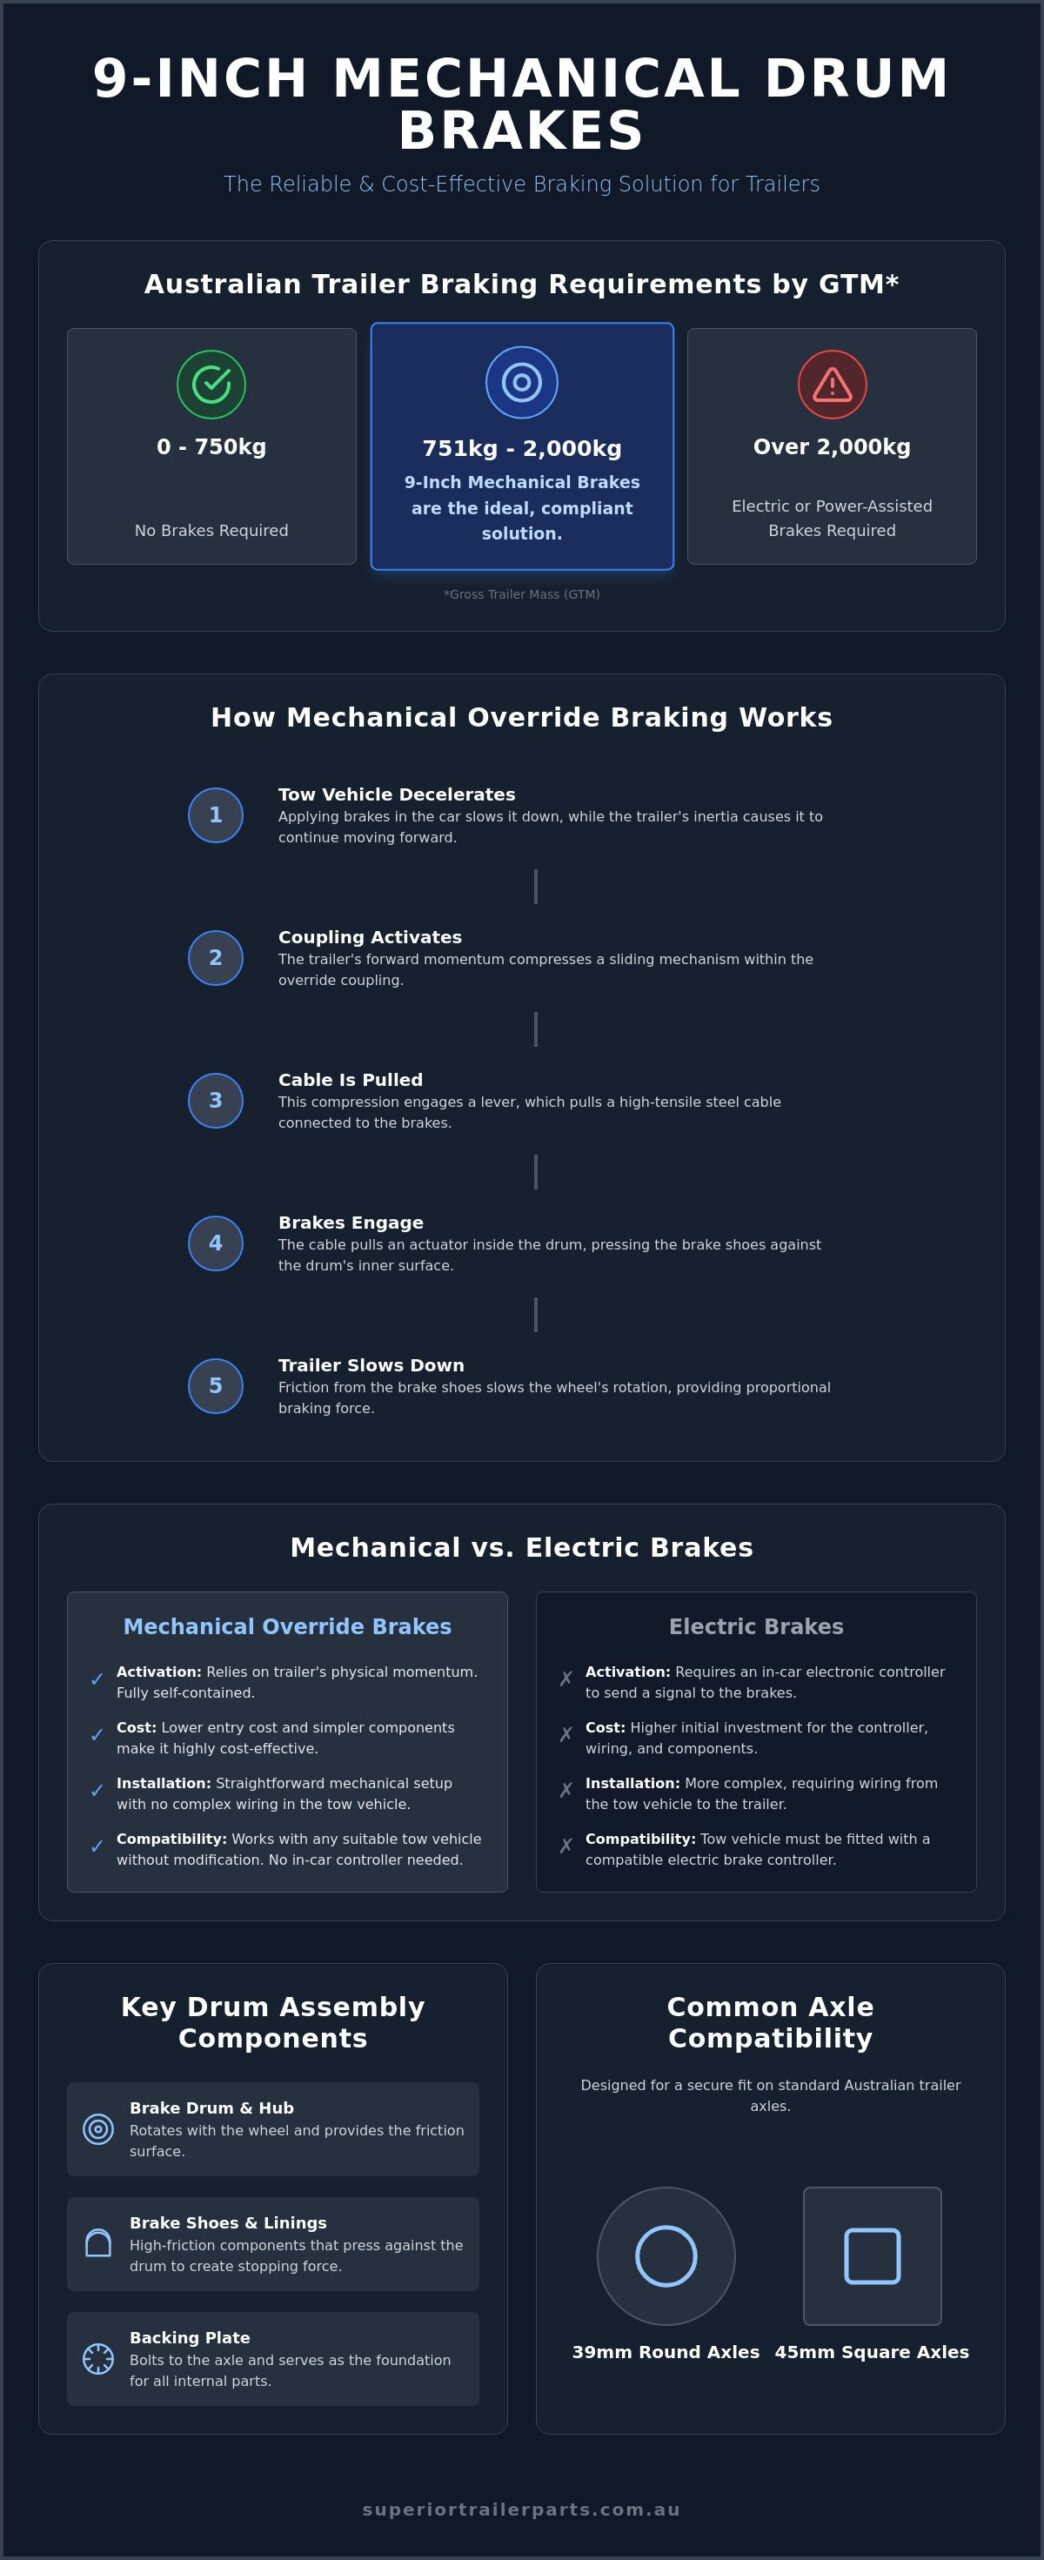
The brake drum and hub assembly serves as the primary housing for the system. It rotates with the trailer wheel and provides the friction surface for the shoes. Inside this housing, the brake shoes and linings are the sacrificial components. These linings consist of high-friction material designed to grip the drum without causing premature wear to the metal housing. The backing plate serves as the structural foundation. It bolts directly to the axle flange and holds the shoes, springs, and levers in place. A sturdy backing plate is essential for maintaining alignment and ensuring consistent braking performance over time.
Australian Compliance and Weight Ratings
Australian regulations regarding trailer weights are clear and strictly enforced. Trailers with a Gross Trailer Mass (GTM) under 750kg do not legally require a braking system. However, once the GTM exceeds this 750kg threshold, functional brakes become a legal necessity. For trailers rated between 750kg and 2,000kg, 9 inch mechanical drum brakes are a compliant and cost-effective choice. They provide the necessary stopping power without the complexity of hydraulic or electric systems.
These systems are engineered for easy integration with standard trailer axles, including 39mm round and 45mm square profiles. To ensure a safe and secure fit, installers must use compatible U-bolt kits to mount the axle to the trailer springs. Once a trailer’s GTM exceeds 2,000kg, Australian Design Rules typically mandate the use of more powerful electric or power-assisted braking systems. For most single-axle box trailers and small boat trailers, the 9-inch mechanical system is the most efficient way to stay safe and compliant on the road.
How Mechanical Override Braking Systems Work
Mechanical override systems operate on the fundamental principle of inertia. When you apply the brakes in your towing vehicle, the car slows down, but the trailer naturally wants to keep moving forward. This forward momentum creates a physical force that acts upon the trailer’s coupling. Unlike electric systems that rely on wiring and signals, 9 inch mechanical drum brakes use this physical energy to generate stopping power. It’s a self-contained process that requires no external power source from the vehicle.
The transfer of force starts at the coupling and ends at the brake shoes. As the trailer pushes against the car, it compresses a sliding shaft within the coupling housing. This movement activates a pivot lever. The lever pulls a high-tensile steel cable connected to the brake assemblies on the axle. Because the system is purely reactive, the braking force is proportional to the deceleration of the tow vehicle. Harder braking in the car results in a stronger pull on the cable, providing more friction inside the drums.
One primary advantage of this setup is the lack of an in-car electric controller. While global NHTSA brake standards and local regulations detail the complexities of electronic modules for heavier loads, mechanical systems remain the standard for simplicity. You can hitch your trailer to any vehicle with a suitable tow bar and be ready to go. If you’re looking to upgrade an old setup, you can find a reliable override coupling to match your existing hardware.
The Role of the Override Coupling
The override coupling acts as the brain of the mechanical system. It houses the sliding shaft and the trigger mechanism for the brakes. During normal forward motion, the shaft remains extended. Under deceleration, it slides inward to engage the brakes. Quality couplings include a reverse lock-out feature. This is a small lever or pin that prevents the brakes from engaging when you’re backing the trailer up a slope or over an obstacle. Without this feature, the trailer would lock its wheels as soon as the vehicle began to push it backward.
Cable Routing and Tensioning
Correct cable routing is vital for even performance across both wheels. The main cable usually runs from the coupling to a pulley or a balance bar. This bar ensures that the pull force is distributed equally to the left and right 9 inch mechanical drum brakes. If one side is tighter than the other, the trailer will pull to one side during braking. Over time, steel cables will naturally stretch. Regular adjustment at the turnbuckle or cable adjuster is necessary to maintain the correct tension. A loose cable leads to a lag in braking response, while a cable that’s too tight may cause the brakes to drag and overheat.
Mechanical vs Electric Brakes: Selecting the Right System
Choosing between mechanical and electric systems is a matter of matching the hardware to your trailer’s specific workload. While both systems aim to stop the load safely, they achieve this through very different methods. For many owners, 9 inch mechanical drum brakes represent the most straightforward path to road compliance. The initial purchase price for a mechanical kit is generally lower than a 10-inch electric equivalent. More importantly, mechanical systems eliminate the need for an in-car electric brake controller. This saves you several hundred dollars in hardware and professional installation fees.
Installation complexity is another major differentiator. A mechanical setup requires basic tools to mount the backing plates and run the cables. It’s a purely physical installation. Electric brakes require running heavy-duty wiring from the axle to the trailer plug, ensuring the ground is solid, and verifying that the magnets receive consistent voltage. If you frequently swap between different towing vehicles, mechanical brakes are the superior choice. Any vehicle with a standard tow ball can pull the trailer without needing a dedicated controller in the dash.
Maintenance demands also vary between the two. Mechanical systems rely on the physical integrity of the cable and the pivot levers. You’ll spend most of your maintenance time adjusting cable tension as the steel strands stretch over time. Electric systems involve checking the wear on the electromagnet and ensuring that the internal wiring hasn’t frayed or corroded. While federal trailer brake regulations mandate that all systems remain in peak working order, the troubleshooting process for a mechanical fault is much simpler for a DIY owner to handle.
Advantages of Mechanical Drum Systems
Mechanical systems are exceptionally reliable in remote environments. If a cable snaps, it’s a visible, physical problem that you can often fix with basic spare parts. There are no fuses to blow and no complex circuits to diagnose with a multimeter. This makes them the standard choice for standard 6×4 or 7×4 box trailers used for domestic or light commercial tasks. You get a durable, utilitarian solution that keeps long-term maintenance costs to a minimum. Because they don’t rely on the vehicle’s battery, they’re always ready to work even if the trailer has been sitting for months.
When to Upgrade to Electric Brakes
There are specific scenarios where mechanical systems are no longer sufficient. If your trailer exceeds the 2,000kg GTM threshold, Australian law requires an upgrade to electric or power-assisted brakes. Electric systems also allow for independent brake control. This means the driver can manually apply the trailer brakes from the cabin to correct a sway or help stabilize the vehicle on a steep descent. For a deeper look at these technical differences, refer to our brakes and calipers guide to determine which system fits your specific towing profile.
Maintenance and Troubleshooting for Drum Brakes
Maintenance of 9 inch mechanical drum brakes is essential for consistent stopping power. A routine inspection every 10,000 kilometres or once a year is a practical baseline for most users. If you tow in harsh conditions, such as off-road tracks or near salt water, perform these checks every six months. Start by inspecting the brake shoe linings. If the material has worn down to less than 1.6mm at the centre of the shoe, replace the shoes immediately. Thin linings lead to metal-on-metal contact, which destroys the inner drum surface and reduces braking efficiency.
Check the mechanical cable for fraying, kinks, or heavy corrosion. A stiff or rusted cable won’t release the brakes properly, leading to overheating and premature wear. Similarly, test the override slider on your coupling. It should move freely under pressure and return to its starting position without binding. A seized slider means your brakes won’t activate when the vehicle decelerates. Apply high-quality grease to the grease nipples on the coupling housing to keep the internal shaft moving smoothly. Never let lubricant touch the brake shoes or the inner drum friction surface.
Adjusting Your Mechanical Brakes
Correct adjustment ensures your brakes engage at the right moment without dragging during normal travel. Follow these steps for a reliable setup:
- Jack up the trailer and secure it on sturdy axle stands to ensure safety.
- Spin the wheel by hand to verify it rotates freely without internal noise.
- Tighten the cable adjuster at the coupling or turnbuckle until you feel a slight resistance when spinning the wheel.
- Back off the adjustment slightly until the wheel spins freely again with no audible drag.
- Check the brake backplate to ensure the lever has enough travel to expand the shoes fully when the cable is pulled.
Test the system by pulling the manual park brake lever on the coupling. The wheels should lock firmly and release without sticking. If the wheels don’t lock, the cable is likely too loose or the shoes are too far from the drum surface.
Cleaning and Degreasing the Drum
Road grime and brake dust accumulate inside the assembly over time. Remove the drum and use a dedicated brake cleaning spray to wash away debris. Inspect the internal surface for heat spots, which appear as bluish discolouration on the metal. These spots indicate the brakes have overheated, potentially warping the drum. Look for scoring or deep grooves caused by debris or worn shoes. If the scoring is shallow, a machine shop can often turn the drum to restore a flat surface. If the drum is heavily worn or exceeds its maximum wear diameter, it requires immediate replacement.
If you find worn components during your inspection, you can source high-quality trailer parts for a fast repair. Keeping a small kit of spare shoes and a backup cable is a practical strategy for long-haul trips into remote areas.
Sourcing Quality 9-Inch Brakes and Trailer Parts
Sourcing components that meet Australian safety standards is non-negotiable for road safety. When you buy 9 inch mechanical drum brakes, you need to know they’ve been tested for local conditions. Cheap imports often fail to manage the heat or fit the axle tolerances required for heavy-duty use. The durability of 9 inch mechanical drum brakes depends on the quality of the casting and the friction material. Purchasing a complete braking kit is usually more efficient than sourcing individual parts. A kit ensures that the backing plate, shoes, and drums are perfectly matched, which reduces the risk of uneven wear or installation errors.
Compatibility is the foundation of a safe trailer. Your 9-inch drums must align with your chosen axle type. These systems are designed to work seamlessly with 39mm round or 45mm square axles. To keep the assembly secure, you must use high-quality U-bolt kits that match your axle diameter and spring width. Superior Trailer Parts focuses on providing components that fit right the first time. This prevents the downtime caused by mismatched hardware and ensures your trailer remains roadworthy under load.
Customising Your Braking Setup
You must choose a hub pattern that matches your existing wheels. Common Australian patterns include Ford and HQ. Using the correct pattern ensures the wheel sits flush against the drum, which is critical for balance and bearing longevity. When building or upgrading box trailers, verify that your coupling is rated for the trailer’s maximum GTM. A 2,000kg rated coupling is standard for these mechanical systems. Using a lower-rated component will compromise your legal compliance and safety on the road.
Nationwide Shipping and Support
Transporting heavy mechanical components across the country can be a logistical challenge. We provide national shipping coverage to ensure you get the parts you need, whether you’re in a metropolitan hub or a regional area. If you’re tackling a DIY project and aren’t sure about the technical specifications, our team offers expert support to guide your selection. We understand the harsh conditions these products must endure. For professional builders or fleet managers, we handle bulk trade orders with the same focus on efficiency and reliability. You can use our contact us page to get technical advice or a quote for custom builds.
Secure Your Trailer with Reliable Braking Systems
Choosing a braking system is a matter of prioritizing long-term reliability and road compliance. For trailers with a GTM up to 2,000kg, 9 inch mechanical drum brakes offer a dependable solution that eliminates the need for complex electric controllers. This choice simplifies your installation and reduces the potential for electrical faults in harsh environments. By performing regular cable adjustments and shoe inspections, you can maintain consistent stopping power without professional intervention.
We provide hardware that’s fundamentally grounded in durability. Every component is designed to meet Australian safety standards, giving you confidence during every haul. Our team offers the expert technical support you need to ensure a perfect fit for your specific axle and hub configuration. With nationwide shipping coverage, we deliver heavy mechanical parts directly to your door. You don’t have to worry about sourcing quality parts in regional areas.
Shop 9 Inch Mechanical Drum Brakes and Trailer Parts today and keep your trailer safe on the road.
Frequently Asked Questions
Are 9-inch mechanical drum brakes legal for a 2-tonne trailer in Australia?
Yes, 9-inch mechanical drum brakes are legal for trailers with a Gross Trailer Mass (GTM) up to 2,000kg. This is the maximum capacity allowed for mechanical override systems under Australian regulations. If your trailer’s GTM exceeds this 2,000kg limit, you must upgrade to an electric or power-assisted braking system to remain compliant on the road.
How do I know if my trailer brake shoes need replacing?
You should replace your brake shoes when the friction lining thickness drops below 1.6mm at the thinnest point. Other signs of wear include audible grinding noises during deceleration or visible scoring on the inner surface of the drum. Inspect the shoes annually to ensure the lining hasn’t cracked or separated from the metal backing plate due to excessive heat.
Do I need a special brake controller for mechanical override brakes?
No, mechanical override brakes don’t require an in-car electric controller or any vehicle modifications. The system is activated by the trailer’s own momentum pushing against the coupling when the tow vehicle slows down. This physical force pulls the brake cable, making the system entirely independent of the towing vehicle’s electrical circuits.
What is the difference between 9-inch and 10-inch trailer brakes?
The primary difference is the drum diameter and the standard activation method. 9-inch systems are typically mechanical override units designed for trailers up to 2,000kg. 10-inch systems are usually electric and provide a larger friction surface area for better heat dissipation. Electric systems also allow the driver to control trailer braking manually from the dashboard.
Can I install mechanical drum brakes on a boat trailer?
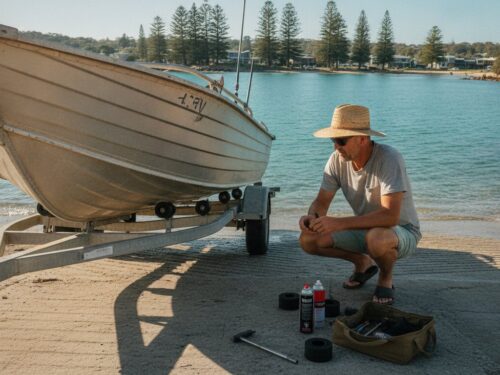
You can install them, but they’re generally less suitable for saltwater environments than galvanized disc brakes. If you use mechanical drums on a boat trailer, you must wash the internal assembly thoroughly with fresh water after every immersion. Salt buildup leads to rapid corrosion of the return springs and cables, which often causes the system to seize.
Why are my mechanical brakes grabbing or locking up?
Grabbing is often caused by a lack of lubrication on the override slider or incorrect cable tension. If the slider is dry, it may move in jerks rather than a smooth motion, causing the brakes to snap on suddenly. Check for broken internal return springs or contaminated linings, as grease on the shoes can also cause unpredictable locking.
How often should I adjust the cables on my mechanical braking system?
Adjust your cables every 10,000 kilometres or during your annual trailer service. New cables often stretch during their first few trips and require an initial adjustment to maintain correct tension. Regular checks ensure there’s no excessive slack in the system, which would otherwise cause a lag in braking response when you decelerate.
What tools are required to service 9-inch drum brakes?
You’ll need a jack and sturdy axle stands to lift the trailer safely. Basic hand tools, including a socket set, pliers, and a flat-head screwdriver, are sufficient for removing the drum and replacing shoes. A grease gun is also necessary to lubricate the grease nipples on the override coupling to keep the internal sliding shaft moving freely.