Faulty lighting accounts for approximately 15% of trailer-related defect notices during roadside inspections in Australia. A single loose connection or a mismatched wire doesn’t just cause flickering lights. It can result in on-the-spot fines exceeding $400 per non-functional light. If you’ve ever spent hours chasing a short circuit or staring at a cluster of confusing cables, you know that guesswork isn’t an option. Keeping a reliable trailer wiring diagram australia pdf in your workshop ensures your vehicle stays compliant with current Australian Design Rules (ADR).
We know that wiring a trailer is often a frustrating task. You want a functional, legal lighting system that works every time you hitch up without blowing fuses in your tow vehicle. This article provides clear, ADR-compliant wiring diagrams and standard colour codes for all common Australian plugs and sockets. We’ll cover technical layouts for standard 7-pin and high-power 12-pin setups. You will also learn how to identify the difference between these configurations to ensure your LED submersible tail lights and auxiliary systems operate at peak performance.
Key Takeaways
- Learn how Australian Design Rules (ADR) govern trailer lighting to ensure your vehicle remains road-legal and compliant.
- Identify the physical differences between 7-pin flat, 7-pin round, and 12-pin flat plugs to select the correct hardware for your towing needs.
- Access a clear trailer wiring diagram australia pdf to master the standard seven-wire colour map, including the critical Pin 3 White earth return.
- Master professional installation techniques like wire tinning and securing frame-mounted earth connections to prevent flickering lights or blown fuses.
- Understand why combining tinned copper wiring with LED submersible tail lights provides the best protection against corrosion in harsh Australian conditions.
Standardising Trailer Wiring for Australian Road Safety
Safety on Australian roads depends on clear communication between vehicles. When you hit the brakes or flick your indicator, the drivers behind you rely on your trailer lights to react instantly. Faulty wiring isn’t just a nuisance; it’s a primary cause for roadside defect notices and safety hazards. Maintaining your system according to established Australian trailer connector standards ensures your setup remains safe and predictable for all road users. If you have specific questions about hardware compatibility or technical specifications, reach out through the Superior Trailer Parts contact page for expert advice.
Understanding ADR Compliance and Legal Requirements
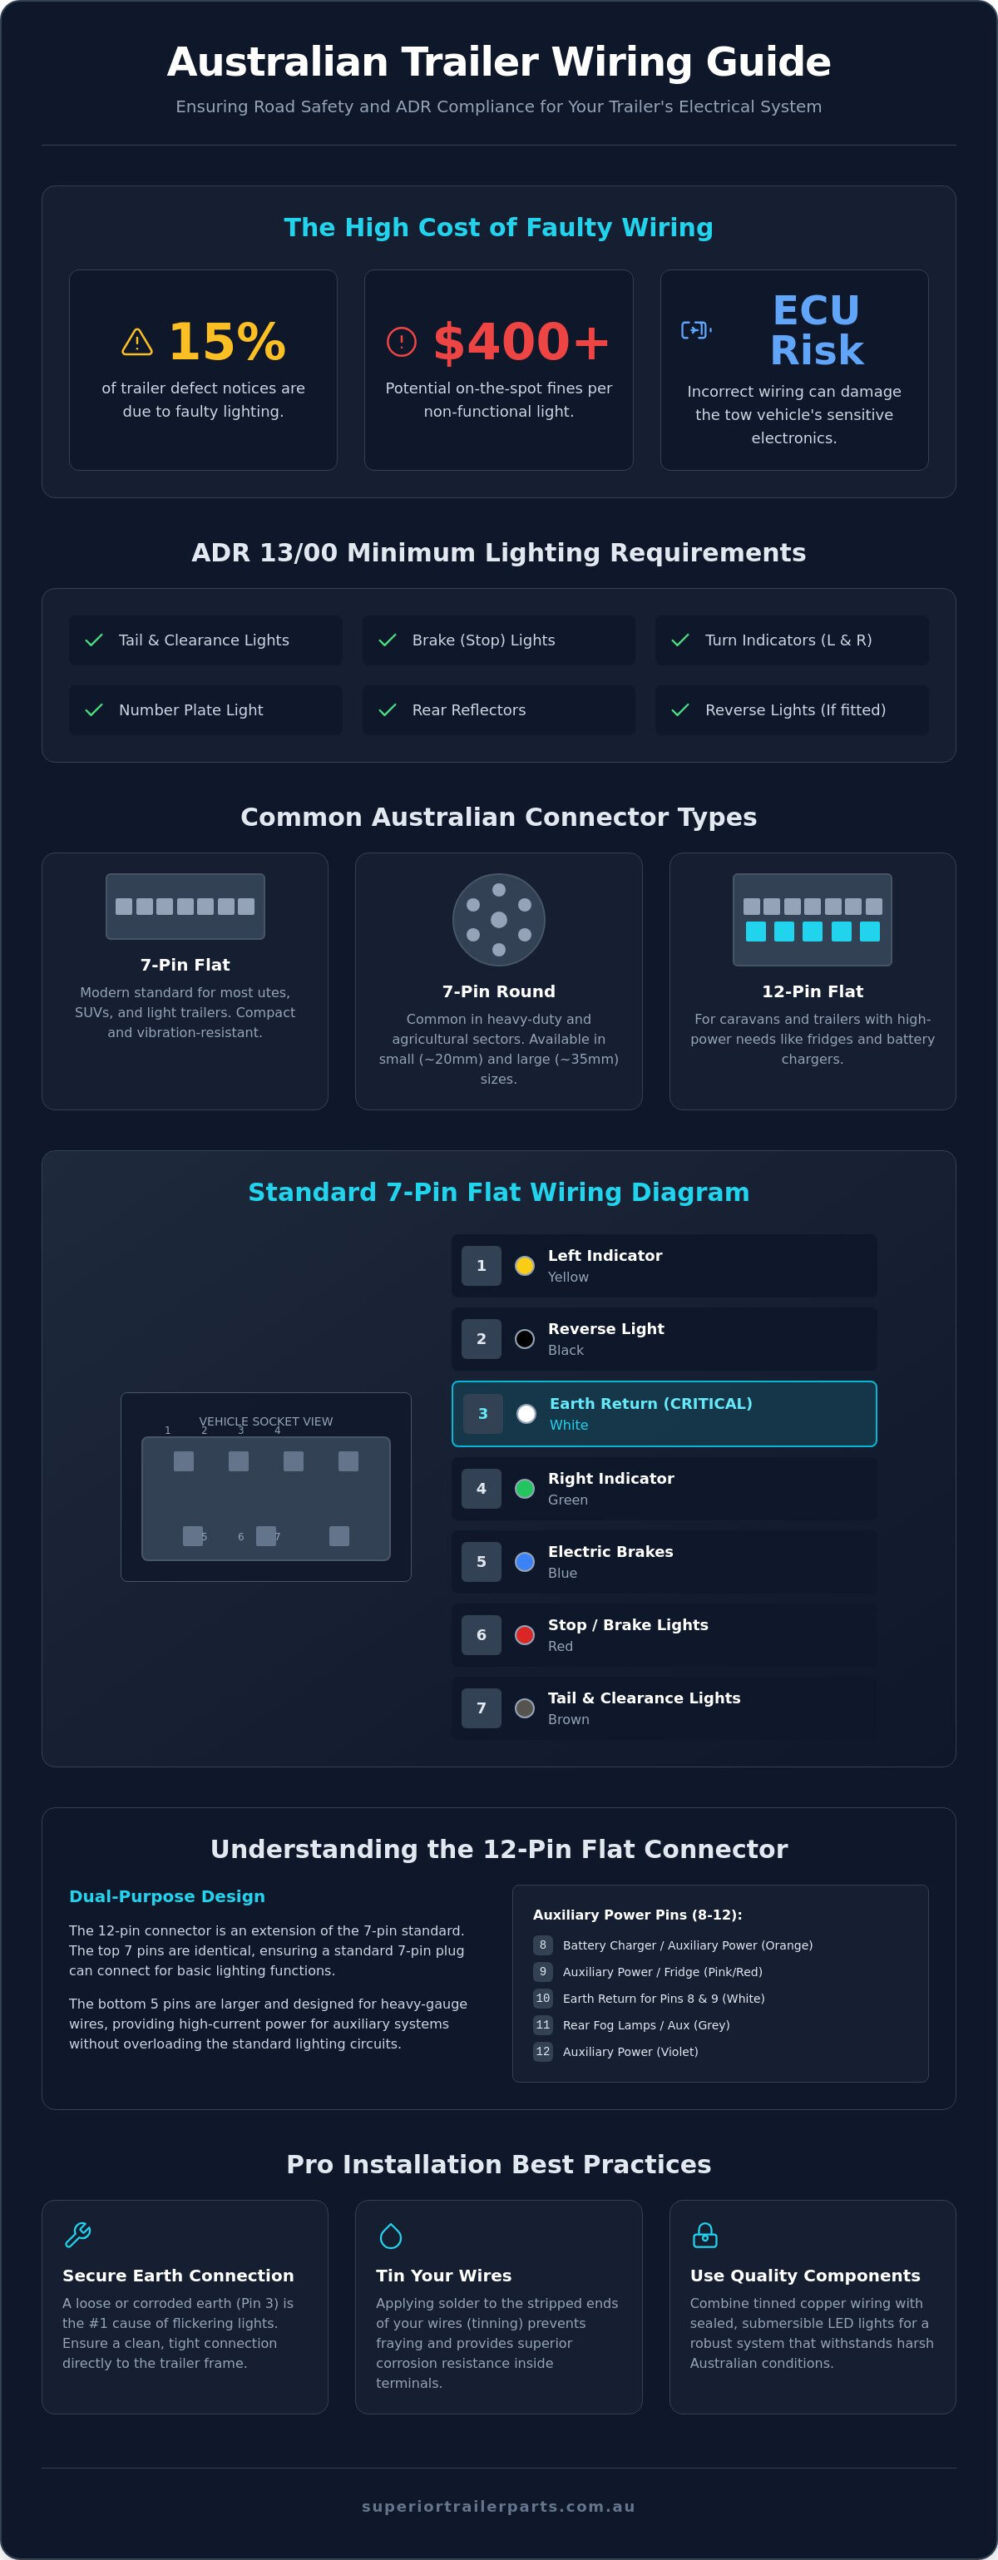
The Australian Design Rules (ADR) mandate specific lighting configurations for every trailer on the road. ADR 13/00 dictates the installation of lighting and light-signalling devices. You must have functioning tail lights, brake lights, and turn indicators. Beyond these basics, your trailer requires rear reflectors and a dedicated number plate light that remains visible at night. Near enough wiring often leads to dim bulbs or flickering, which fails road registration requirements and compromises safety. Police can issue significant fines for even a single non-functional light. Referencing a correct trailer wiring diagram australia pdf helps you verify that every pin meets these legal benchmarks before you leave the driveway.
Why a Standardised Wiring Diagram Matters
Modern tow vehicles are sophisticated machines. Most late-model utes and SUVs use complex Engine Control Units (ECUs) to manage lighting circuits and safety systems. If you wire a trailer incorrectly, you risk sending an electrical surge back into the vehicle computer. This leads to expensive repairs that far outweigh the cost of a new plug or socket. Standardisation ensures any vehicle can hitch up to any trailer without blowing fuses or causing dashboard error codes. A consistent wiring map also simplifies troubleshooting. When you know exactly which pin controls which function, you can identify a broken wire or a corroded terminal in minutes. Keeping a printed trailer wiring diagram australia pdf in your workshop provides a reliable baseline for every repair job.
- Prevents electrical feedback to sensitive tow vehicle electronics.
- Ensures universal compatibility across different vehicle fleets.
- Reduces the risk of roadside fines and insurance claim denials.
- Simplifies the installation of high-quality LED submersible tail lights.
Identifying Australian Trailer Plug and Socket Types
Australia uses several connector styles, but three dominate the market. You’ll likely encounter the 7-pin flat, 7-pin round, or the high-capacity 12-pin flat. Most light trailers and box trailers use the standard 7-pin configurations. However, modern caravans with heavy electrical demands have shifted the industry toward 12-pin setups. Identifying your hardware correctly is the first step before consulting a trailer wiring diagram australia pdf for installation or repair work.
7-Pin Flat vs. 7-Pin Round Plugs
7-pin flat plugs are the go-to for most modern Australian utes and SUVs. They offer a compact design that resists vibration well and features a slim profile. 7-pin round plugs are still prevalent in the heavy-duty and agricultural sectors. You’ll find two distinct sizes: the “small” round (Type A) and the “large” round (Type B). Small round plugs are about 20mm in diameter, whereas large round plugs are roughly 35mm. It’s easy to get these confused when ordering parts. Always measure the diameter of your existing socket before buying a replacement. Most manufacturers mold the pin numbers into the plastic face of the plug. This makes it easier to follow a trailer wiring diagram australia pdf during a rebuild or terminal replacement.
When to Use a 12-Pin Flat Connector
Caravans have changed the way we think about trailer plugs. Older 7-pin systems couldn’t safely carry the current needed for modern 12V fridges or DC-to-DC chargers. The 12-pin flat connector solves this problem. It uses a standard 7-pin flat layout on the top row and adds five high-capacity pins on the bottom. These larger pins are designed for heavy-gauge automotive wire. This allows for high-amperage power transfer without excessive voltage drop or heat buildup. It’s a clever design because a standard 7-pin flat plug will still fit into the top half of a 12-pin socket. This means you don’t need a separate adapter to tow your basic box trailer with a caravan-ready vehicle.
Mismatched setups are a common headache in the workshop. You might own a boat trailer with a round plug but a tow vehicle with a flat socket. High-quality trailer plug adapters provide a fast fix without cutting into your wiring loom. These adapters are essential for anyone who switches between different trailers regularly. For a more permanent fix, consider installing a dedicated socket that matches your primary trailer. You can find a wide selection of durable, weather-resistant trailer plug adapters and sockets at Superior Trailer Parts to keep your fleet operational and safe on the road.
The Australian Standard Trailer Wiring Colour Code
Consistency is the backbone of trailer safety. Australia uses a standardised colour-coding system to ensure that every vehicle and trailer combination works without conflict. Stick to this code. Deviating from the standard creates a maintenance nightmare for future owners and can lead to dangerous lighting failures on the road. Whether you’re building a new box trailer or refurbishing an old boat trailer, keeping a trailer wiring diagram australia pdf on hand ensures you don’t cross your circuits. Most electrical faults stem from technicians ignoring these established maps.
7-Pin Wiring Map: Pin by Pin Breakdown
The standard 7-pin layout is the foundation for almost all light trailers in Australia. Each pin has a dedicated function and a corresponding wire colour. Follow this sequence exactly to maintain ADR compliance:
- Pin 1 (Yellow): Left-hand turn signal.
- Pin 2 (Black): Reversing lights or auxiliary power.
- Pin 3 (White): Earth return. This must be a solid, clean connection.
- Pin 4 (Green): Right-hand turn signal.
- Pin 5 (Blue): Service brakes (electric brake control).
- Pin 6 (Red): Stop lamps (brake lights).
- Pin 7 (Brown): Tail lamps, clearance lights, and side markers.
Never rely solely on the wire colour if you’re working on an older or imported trailer. Manufacturers in the US or Europe often use different schemes that don’t align with Australian standards. Always test each circuit with a multimeter or a dedicated circuit tester before finalising your connections. Pin 3 is the most critical point in the entire plug. A weak earth connection is the primary cause of flickering lights and dim bulbs. Ensure the white wire is secured to a clean metal surface on the trailer frame to provide a reliable return path for the current.
12-Pin Auxiliary Wiring (Pins 8-12)
12-pin connectors use the same top row as a 7-pin flat plug but add five larger pins on the bottom. These additional terminals handle high-current applications. Pin 8 (Orange) and Pin 9 (Pink) are frequently used for battery charging and fridge power. It’s common practice to use Pin 10 for a permanent power supply to the trailer’s internal systems. Because these pins carry more amperage, you must use a heavier wire gauge than the standard 2.5mm or 3mm automotive wire used for signal lights. Using undersized wire for these auxiliary functions causes heat buildup and voltage drop, which can damage your equipment.
High-quality lighting components deserve a high-quality installation. When installing LED submersible tail lights, the wiring requirements are strict. LEDs draw significantly less power than traditional bulbs, but they are far more sensitive to poor earthing. If your earth connection is compromised, your LEDs may glow faintly or fail to activate entirely. Referencing your trailer wiring diagram australia pdf during the install helps you isolate the earth and signal wires correctly. This ensures your submersible lights remain waterproof and functional even after repeated launchings at the boat ramp.
Installation Procedures and Troubleshooting Common Failures
Having a trailer wiring diagram australia pdf is only half the battle. The physical installation requires precision to ensure the electrical connection survives the harsh Australian environment. Most failures occur at the terminals due to poor preparation or environmental exposure. If you want a system that lasts, you must focus on the quality of your connections and the integrity of your earth return path. A reliable circuit starts with clean wire and ends with a secure, weather-resistant housing.
Wiring a New Trailer Plug Correctly
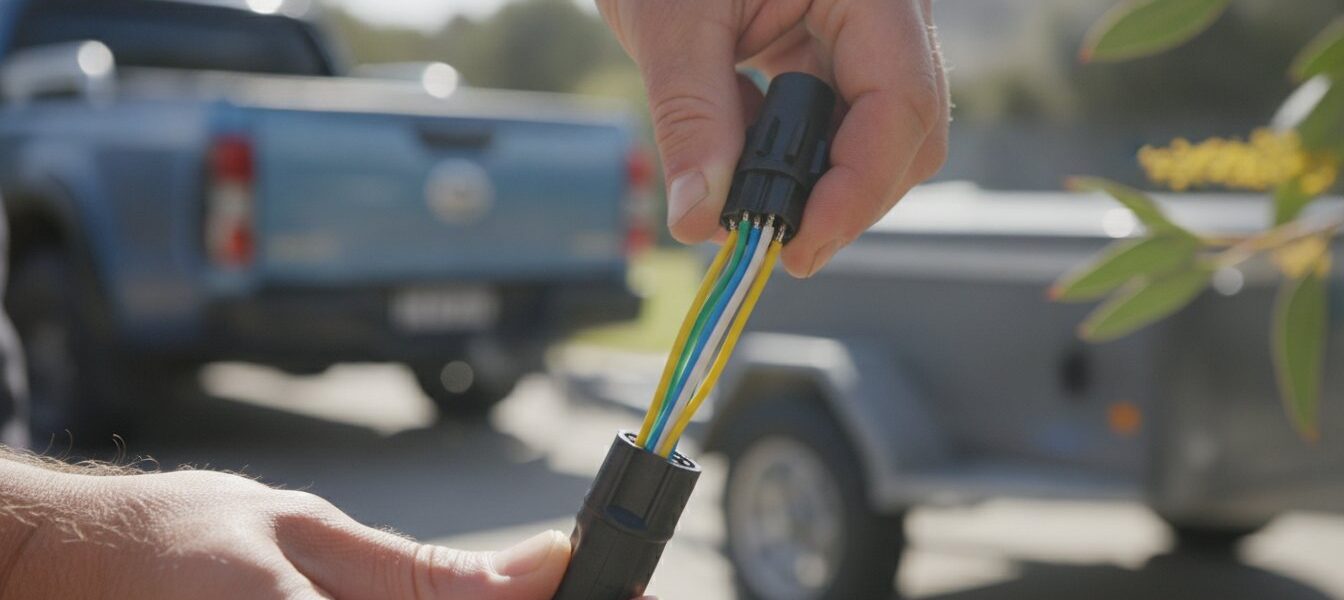
Start by sliding the outer housing onto the cable before you strip any wires. It is a simple step that is often missed, forcing you to disconnect every terminal once you realise the mistake. Strip approximately 10mm of insulation from each wire. If you have a soldering iron, tin the ends of the copper strands. This prevents ‘whiskers’, or stray copper strands, from touching adjacent pins and causing a short circuit. Insert the wires into the terminals according to your trailer wiring diagram australia pdf and tighten the screws firmly. Finally, tighten the cable gland at the back of the plug. This creates a weather-resistant seal that prevents water ingress and provides strain relief for the internal connections.
Testing and Troubleshooting Your Setup
Verification is critical before you hit the road. Use a multimeter to check for 12V power at the vehicle socket before you plug in the trailer. If you don’t have a second person to help, use a portable battery or jumper leads to power individual pins on the trailer side. This ‘solo test’ helps isolate whether a problem lies with the vehicle or the trailer. It saves time by identifying the source of the fault before you start pulling apart the wrong component.
If your lights dim when you hit the brakes, you likely have a voltage drop issue. This often points back to Pin 3. A ‘bad ground’ is easy to spot; it’s the reason your indicators might flash weakly when the brake lights are on. This happens because the current is trying to find a path to earth through the wrong circuit. Clean the earth terminal and ensure it has a solid metal-to-metal connection with the trailer frame. Check for green corrosion inside the socket regularly. Applying a small amount of dielectric grease to the pins can prevent moisture from reaching the copper terminals. For replacement components that meet these rigorous standards, you can find durable trailer plugs and sockets at Superior Trailer Parts.
- Slide the plug housing onto the cable first to avoid rework.
- Tin wire ends to prevent short circuits from stray strands.
- Use a multimeter to verify vehicle-side power before connecting.
- Clean the Pin 3 earth connection to prevent dimming or flickering lights.
Essential Components for a Reliable Electrical Setup
A correct wiring layout is the foundation of a safe trailer, but the hardware you choose determines how long that system remains functional. Even if you follow a trailer wiring diagram australia pdf to the letter, low-quality components will fail under the pressure of Australian road conditions. Heat, vibration, and moisture are constant threats to your electrical loom. Investing in heavy-duty parts reduces the frequency of repairs and ensures your trailer stays road-legal for years to come.
Why LED Submersible Lights are the Standard
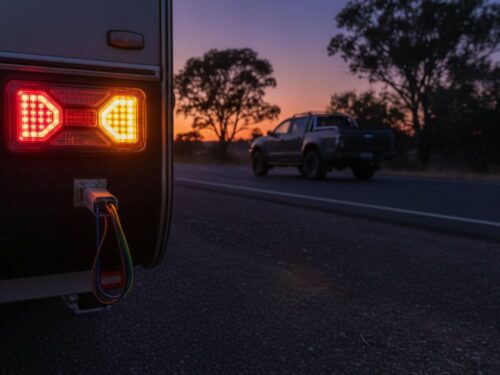
Incandescent bulbs are increasingly obsolete in the transport industry. LED lights offer superior reliability because they have no fragile filaments to break during transit. They also draw significantly less current than traditional bulbs. This reduces the electrical load on your vehicle’s alternator and prevents the wiring from overheating. For boat owners, the waterproof rating of your lighting is critical. Saltwater is highly conductive and corrosive. Using LED submersible tail lights ensures that your internal circuitry remains dry even during deep launches. If you’re refurbishing a marine setup, browse our range of boat trailer parts to find ADR-compliant lighting solutions that handle harsh coastal environments.
Marine environments also benefit from tinned copper wiring. Standard copper wire is prone to “green rot,” where oxidation travels up the cable under the insulation. Tinned copper features a thin layer of tin over each strand, providing a barrier against corrosion. It’s a standard requirement for any trailer that enters the water regularly. Combining tinned wire with sealed LED units creates a nearly bulletproof electrical system.
Choosing High-Quality Plugs and Sockets
The physical housing of your plug matters just as much as the internal wiring. Cheap plastic connectors often crack when exposed to UV radiation or accidental impacts. Heavy-duty metal or reinforced nylon housings provide the durability needed for professional use. Ensure your chosen hardware features brass terminals. Brass offers excellent conductivity and resists the surface oxidation that causes flickering lights. Before you set off on a long-distance tow, perform a final check of your connections. Verify that the cable gland is tight and that the plug is seated firmly in the socket.
If you’re looking for a complete towing solution, Superior Trailer Parts box trailers feature robust wiring looms designed to withstand heavy-duty use. These looms are routed through the chassis to protect them from road debris and stone chips. For those performing their own maintenance or builds, you can find every necessary accessory in our trailer parts shop. From high-capacity plugs to trailer plug adapters, we provide the hardware required to keep your electrical system compliant and reliable. Download your trailer wiring diagram australia pdf and ensure you have the right components before starting your next project.
Maintain Safety Standards on Every Journey
A reliable electrical system is the first line of defense for any towing setup. By adhering to the Australian Design Rules and using the correct pinout configurations, you prevent expensive damage to your tow vehicle’s sensitive electronics. Whether you’re managing a 7-pin box trailer or a 12-pin caravan, consistency in your colour coding is vital. Keep your trailer wiring diagram australia pdf accessible in the workshop to ensure every repair meets standard specifications. Correct wiring doesn’t just prevent fines; it keeps everyone on the road safer.
Superior Trailer Parts is Australian owned and operated, providing the heavy-duty components you need to stay on the road. We offer nationwide shipping on all electrical components and provide expert technical support for your specific installation questions. High-quality wiring deserves high-quality hardware to withstand harsh regional conditions. Browse ADR-Compliant Trailer Plugs and Wiring Accessories today to secure your lighting system. Proper preparation today means a hassle-free tow tomorrow. Safe travels on the road ahead.
Frequently Asked Questions
What is the standard trailer wiring colour code in Australia?
The Australian standard uses Yellow for the left indicator, Black for reverse, White for earth, Green for the right indicator, Blue for service brakes, Red for stop lights, and Brown for tail lights. Sticking to this specific colour map ensures your trailer is compatible with any tow vehicle in the country. It also simplifies future maintenance by providing a predictable layout for every technician.
Why are my trailer lights not working even though the plug is connected?
Terminal corrosion or a weak earth connection at Pin 3 are the most common causes of total light failure. Inspect the white wire for a solid metal-to-metal connection on the trailer frame. You should also check the tow vehicle’s fuses to ensure no circuits have tripped. If the connection is secure but lights still fail, use a multimeter to verify power at the vehicle socket.
Can I plug a 7-pin trailer into a 12-pin car socket?
You can plug a standard 7-pin flat plug directly into a 12-pin flat vehicle socket. The 12-pin socket is designed with a top row that matches the 7-pin layout exactly. This allows you to tow basic trailers without needing an adapter. If your vehicle has a round socket and your trailer is flat, you’ll need to use one of our trailer plug adapters to bridge the connection.
What gauge wire should I use for 12-pin trailer wiring?
Standard signal circuits typically use 2.5mm or 3mm automotive wire, but auxiliary pins 8 through 12 require 5mm or 6mm wire. These high-capacity pins handle heavy-current loads like refrigerators and battery chargers. Refer to a trailer wiring diagram australia pdf to ensure you’re using the correct gauge for each specific terminal. Using undersized wire for auxiliary power causes voltage drop and heat buildup.
How do I wire a round 7-pin trailer plug?
Wiring a round 7-pin plug involves matching the standard colour code to the numbered terminals inside the housing. Check the molded numbers on the terminal face rather than guessing the position based on the layout. Ensure the cable gland is tight to prevent moisture from corroding the brass pins. A secure seal is essential for durability in dusty or wet Australian conditions.
What does the blue wire do on a trailer plug?
The blue wire is dedicated to the service brakes or electric brake system. It carries the variable voltage signal from your vehicle’s brake controller to the trailer’s braking units. This circuit is essential for any trailer with a Gross Trailer Mass (GTM) exceeding 750kg. Proper installation of this wire is a critical safety requirement for heavy-duty towing.
Is it legal to wire my own trailer in Australia?
It is legal to perform your own trailer wiring as long as the final installation meets Australian Design Rules (ADR). Your lights must be positioned correctly and function without flickering or dimming. Non-compliant wiring can lead to defect notices and may void your insurance in the event of an accident. Always verify your work against a trailer wiring diagram australia pdf to maintain legal compliance.
Why do my trailer indicators flash too fast?
Fast-flashing indicators often occur after upgrading to LED submersible tail lights. The vehicle’s flasher relay detects the lower power draw of LEDs and assumes a bulb has failed. Installing a load resistor or an LED-compatible flasher unit usually resolves this hyper-flashing issue immediately. This is a common adjustment when transitioning from traditional incandescent bulbs to modern LED systems.