A flickering trailer light is rarely the result of a snapped wire. In most cases, these intermittent failures are caused by a loss of continuity through vibration-induced ground loss or poor terminal tension. It’s a frustrating problem that often disappears when the vehicle is stationary, only to return the moment you hit corrugated roads or highway speeds. Fixing flickering trailer lights requires a systematic approach to identify whether the fault lies within the vehicle’s socket or the trailer’s wiring harness.
You likely know the stress of checking your mirrors and seeing a dark tail light, wondering if a highway patrol officer is about to pull you over. It’s a common pain for Australian towers who deal with harsh road conditions and salt air corrosion. This professional diagnostic framework will help you resolve these lighting inconsistencies once and for all. We’ll walk through the process of identifying a bad ground, testing circuit continuity, and deciding when to repair a connection versus replacing a component. By the end of this guide, you’ll have the technical knowledge to ensure your setup remains visible and compliant for every long-distance haul.
Key Takeaways
- Understand how road vibration exposes weak mechanical connections and leads to rapid electrical continuity loss.
- Learn why the ground wire is responsible for 80% of failures and how to eliminate the “floating ground” effect.
- Identify common wear points in Australian 7-pin plugs, specifically how to diagnose and repair pin spread in male connectors.
- Discover the process for fixing flickering trailer lights by tracing harness chafing and inspecting LED circuit integrity.
- Establish a proactive maintenance schedule for your trailer parts to prevent intermittent faults during long-distance hauls.
Identifying the Root Causes of Flickering Trailer Lights
Flickering is a cycle of rapid electrical failure. It occurs when continuity is lost and restored in quick succession. This is rarely a complete circuit break. Instead, it is a mechanical failure at a connection point. Road vibration acts as a persistent stress test on your wiring. A loose terminal might maintain contact while the trailer is stationary but lose it repeatedly as you move. This is a common issue for Australian drivers tackling corrugated tracks or uneven highway surfaces.
You must distinguish between random flickering and rhythmic flashing. Random flickering usually points to a physical fault like a loose wire or a failing ground. Rhythmic patterns often indicate a modern vehicle’s CAN bus system. These systems pulse current to check for bulb integrity. If you have installed LED units without a load resistor, the car may struggle to detect the circuit. Understanding these automotive lighting standards helps you identify whether the system is functioning as designed or failing due to a hardware fault.
Isolating the Problem: Vehicle vs. Trailer
Don’t waste time dismantling the trailer if the vehicle socket is the culprit. The fastest way to isolate the fault is to connect the trailer to a different tow vehicle. If the flickering stops, the issue lies in your car’s wiring or plug. If you don’t have a second vehicle, use a multimeter or a dedicated circuit tester. Be wary of “ghost” voltages. A digital meter might show 12V at the pin, but that voltage can vanish the moment you apply a load. Always test the circuit while the lights are switched on. This reveals how the system performs under actual operating conditions. If the vehicle socket tests clean, you can focus your efforts on the trailer-side harness.
The Impact of Corrosion on Electrical Resistance
Corrosion is the primary enemy of stable trailer lighting. In Australia, salt air and road grime lead to the formation of green copper oxide on exposed terminals. This oxidation creates high electrical resistance. Resistance generates heat and prevents the current from reaching the light unit consistently. Submersible lights on boat trailers are especially vulnerable. Even “sealed” units can suffer from capillary action. This is where water is sucked up through the wire insulation over time. Fixing flickering trailer lights often starts with stripping back wires until you find clean, bright copper. Dull or blackened wire will never provide a reliable connection. Investing in quality trailer parts and using dielectric grease can help seal out moisture and prevent this resistance from building up in the first place.
The Ground Wire: Solving the Most Common Failure Point
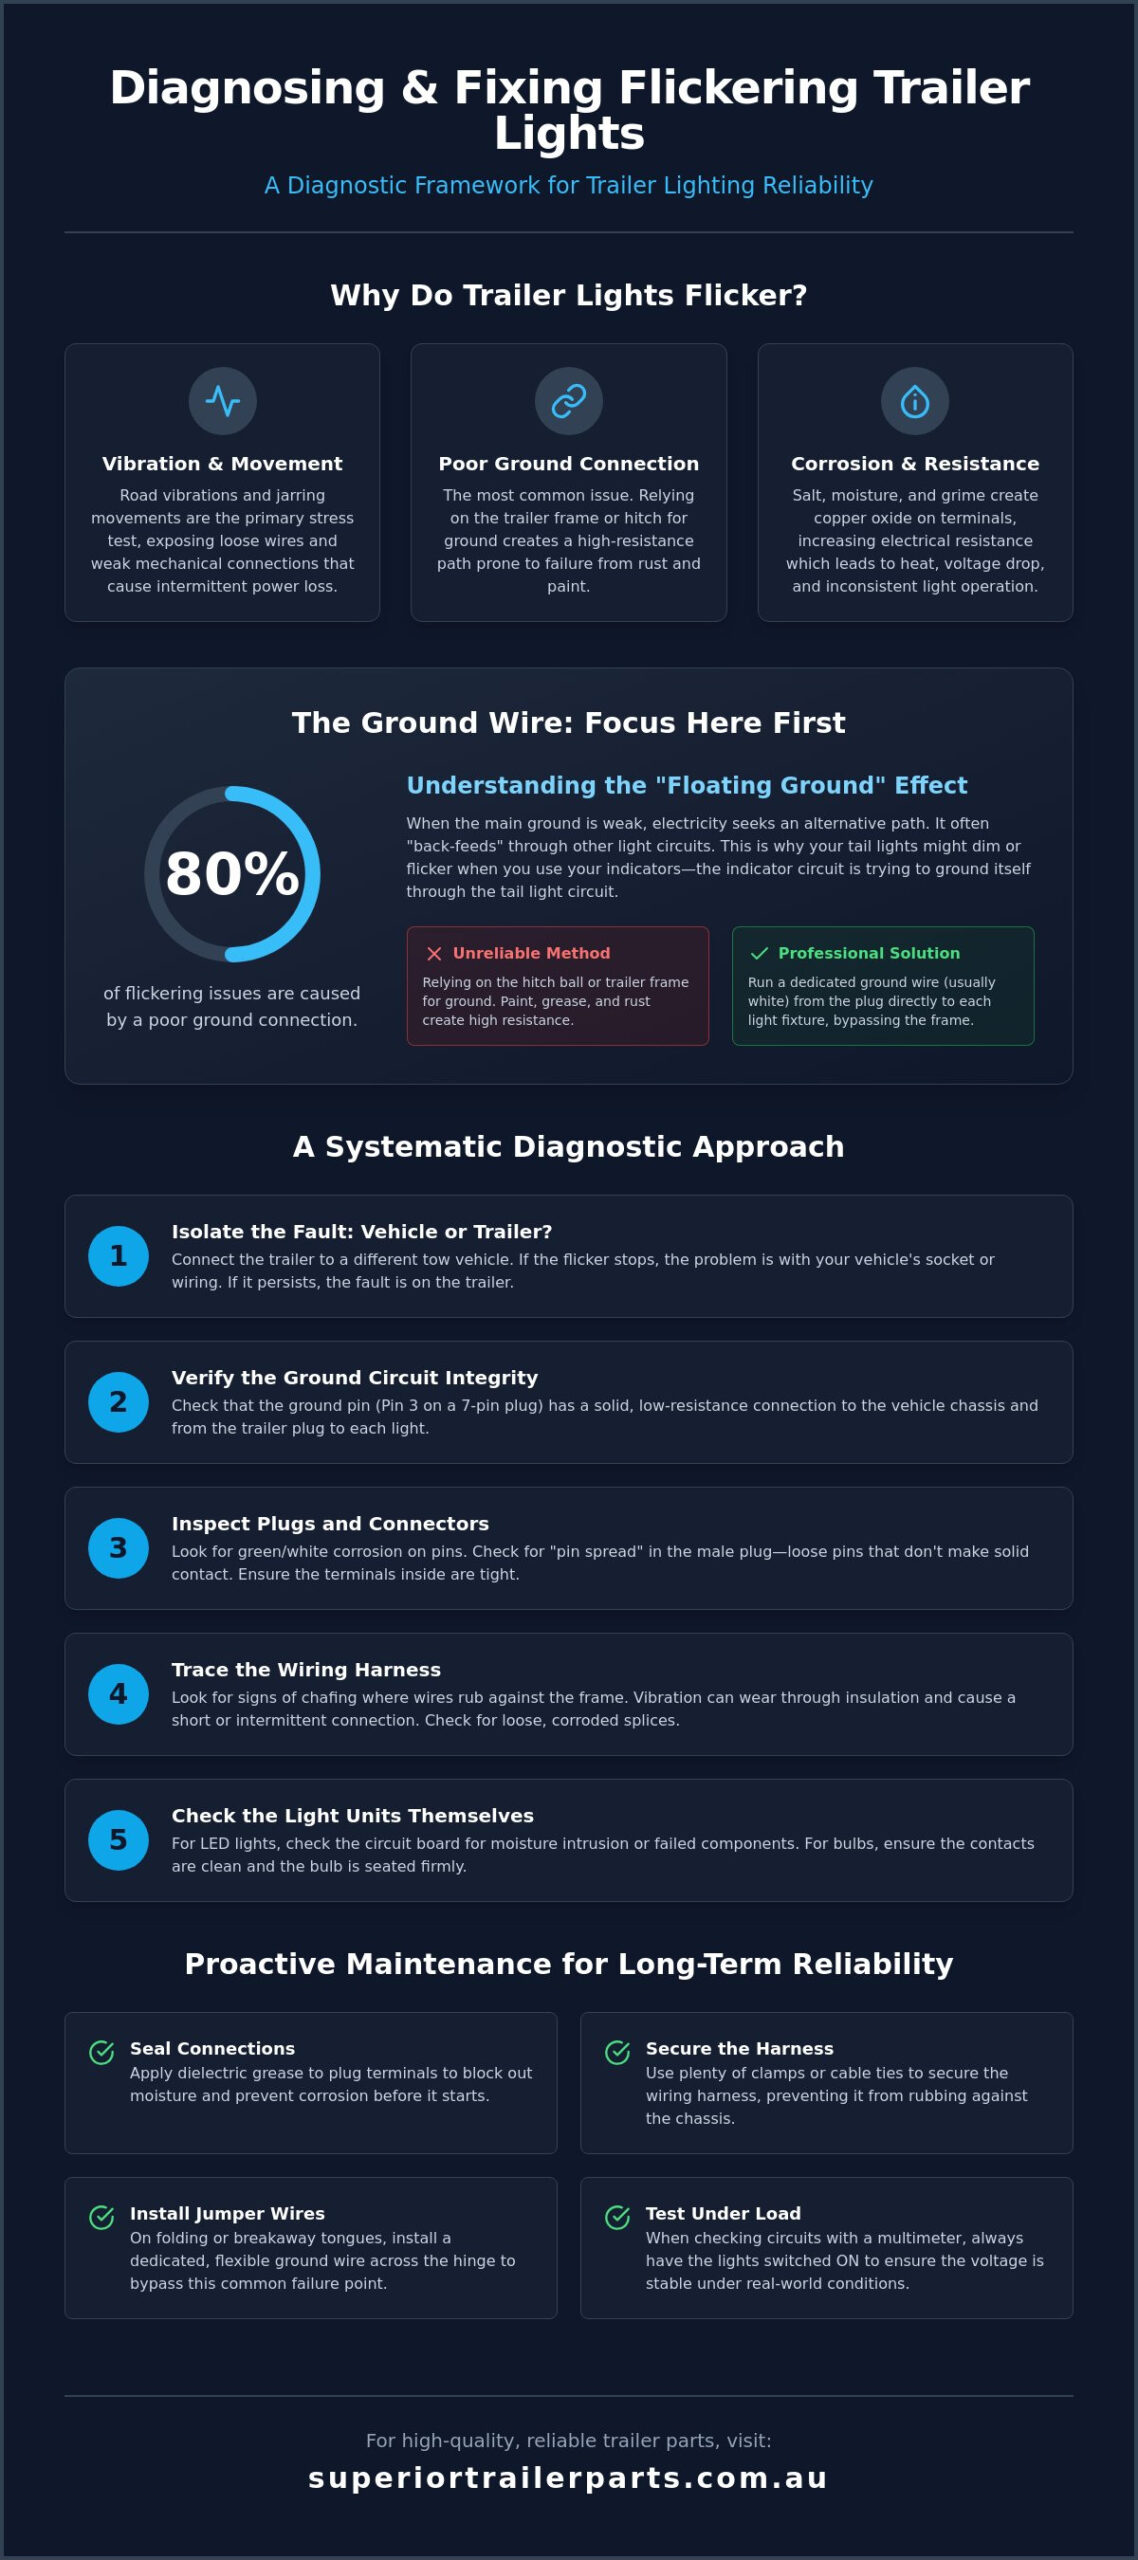
Industry data indicates that over 80% of flickering issues stem from a poor ground connection. Many owners rely on the hitch ball or the trailer frame to complete the electrical circuit. This is a mistake. Grease, rust, and paint create high resistance. A hitch ball is a moving part; it cannot provide the stable electrical path needed for modern LED systems. If you’re fixing flickering trailer lights, start by verifying the integrity of the earth circuit before replacing expensive components.
You might notice your tail lights dim or flicker specifically when you activate your indicators. This is known as the “floating ground” effect. When the primary ground connection is weak, the current seeks an alternative path back to the vehicle. It often back-feeds through other light circuits. This results in erratic behavior that is difficult to diagnose if you only look at the positive wires. A dedicated ground path is the only way to ensure the system operates at the correct voltage.
The most reliable solution is a dedicated “white wire” ground circuit. Instead of grounding each light to the nearest point on the frame, run a continuous ground wire from the trailer plug directly to each light unit. This bypasses the chassis entirely. It eliminates the risk of rust-induced failure at multiple points along the trailer length. This method is standard practice for professional fleet setups where downtime must be avoided.
Fixing Ground Issues on Folding or Breakaway Tongues
Mechanical hinges on folding tongues are notorious for electrical failure. The grease used to lubricate the hinge acts as an insulator. Over time, rust further degrades the contact between the two metal surfaces. To fix this, install a flexible jumper wire across the hinge point. Use a high-strand count wire to handle the repeated bending. Secure ground lugs to the galvanised frame using stainless steel bolts. Ensure you scrape away the galvanised coating at the contact point to reveal bare metal before attaching the lug. For those needing to replace corroded components, sourcing high-quality trailer parts ensures your repairs last through harsh Australian conditions.
Cleaning and Reseating Earth Terminals
If your ground is connected to the frame, regular maintenance is mandatory. Use a wire brush or 80-grit sandpaper to restore a bright metal-to-metal connection. Once the terminal is tight, apply a layer of dielectric grease. This won’t conduct electricity itself, but it seals the connection against oxygen and moisture to prevent future oxidation. If a ground screw feels loose, it has likely stripped the pilot hole. Don’t try to over-tighten it. Drill a new pilot hole nearby in a fresh section of the frame to ensure a biting grip and a solid connection.
Inspecting Plugs and Connectors for Intermittent Contact
The interface between your vehicle and trailer is a high-vibration zone. Australian 7-pin flat and 7-pin round plugs are the national standards, but they are prone to mechanical wear over thousands of kilometres. In many cases, fixing flickering trailer lights is as simple as addressing “pin spread.” This occurs when the split male pins on the trailer plug compress over time, losing their spring tension. When you hit a bump, the pin momentarily loses contact with the female terminal, causing a rapid flicker. It’s a physical failure that a multimeter won’t always catch while the vehicle is parked.
Look inside the plug housing for signs of internal wire fatigue. This often occurs where the copper wire meets the terminal screw. Constant tugging and road vibration can snap individual strands of wire. This reduces the current-carrying capacity and causes the light to flicker as the remaining strands struggle under load. Check for frayed wires or loose screws that might be making intermittent contact with adjacent terminals. Always verify your connections against the standard trailer plug wiring pinout to ensure no wires have crossed or loosened during transit.
Restoring Pin Tension in 7-Pin Connectors
You can often fix a loose connection without buying new parts. Use a small flat-head screwdriver to gently spread the gap in each male pin. You only need a fraction of a millimetre to restore a firm friction fit. Test the fit by plugging it into the vehicle socket; it should require a noticeable amount of force to seat. Check the vehicle-side female socket for collapsed springs or recessed terminals. If the pins are severely corroded or the plastic housing is cracked, stop trying to repair it. A high-quality replacement plug is a low-cost way to ensure long-term reliability on the road.
Managing Trailer Plug Adapters and Extensions
Adapters are a frequent source of voltage drop and flickering. Every additional connection point increases electrical resistance and the potential for a loose fit. If you must use an adapter, secure it to the vehicle socket with a zip tie or a heavy-duty clip. This prevents the weight of the cable from pulling the adapter loose on corrugated roads. The professional solution is to hard-wire a matching plug to your trailer. This removes the adapter entirely and creates a more robust, stable setup for long-distance towing.
Troubleshooting Wiring Harnesses and LED Unit Failures
Flickering presents differently depending on the light technology used. Traditional incandescent bulbs usually flicker because a filament is near the end of its life or the socket tabs have lost their spring. LEDs are more complex. They rely on internal driver circuits that require a stable voltage threshold to operate. If a connection is weak, the voltage drops, the driver shuts down, and then it restarts instantly when contact is restored. This creates a rapid, strobe-like effect that is distinct from the duller pulsing of an old-school bulb. Fixing flickering trailer lights on a modern trailer usually means hunting for high resistance in the harness rather than checking for a loose bulb.
Internal wire corrosion, often called “black wire disease,” is a silent killer of electrical systems. This happens when moisture enters the wire sheath through a small nick or a poor splice. The copper oxidises and turns black under the insulation, significantly increasing resistance. You might have 12V at the plug but only 9V at the light. This voltage drop causes the LED units to flicker as they struggle to stay powered. If you find blackened copper when stripping a wire, you must cut back to clean, bright metal to restore a reliable circuit.
Locating Hidden Shorts and Chafed Wires
Wiring harnesses face constant friction against the trailer frame. Common rub points include axle crossings, frame entry holes, and spring hangers. Over time, the insulation wears through, causing the wire to intermittently short against the metal chassis. To find these breaks, use a circuit tester to segment the harness. Test the signal at the plug, then at the first junction box, and finally at the light unit. This process of elimination narrows down the section of cable that needs replacement. Avoid using “Scotchlok” or T-tap connectors for repairs. These connectors pierce the wire insulation and almost guarantee future corrosion issues. Use heat-shrink solder sleeves or crimp connectors with adhesive heat-shrink tubing instead.
Internal Failures in Sealed LED Units
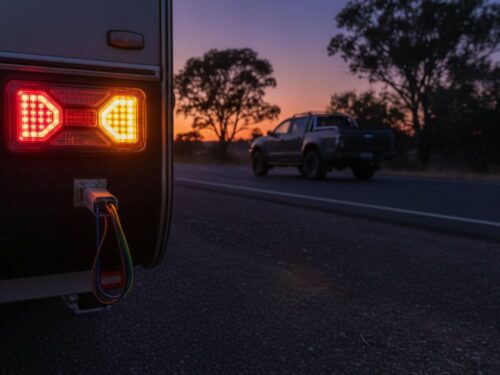
Even a sealed unit can fail if it is subjected to extreme vibration or poor manufacturing. Internal circuit boards can develop hairline cracks in the solder joints. When this happens, you might notice only a portion of the LED bank is flickering. This is a clear sign of an internal hardware fault. Because modern LED units are potted and sealed for weatherproofing, they are non-serviceable. If the internal board is failing, the unit must be replaced. For boat trailers, upgrading to high-quality LED submersible tail lights is the most effective way to prevent moisture-induced flickering. These units are designed to withstand the pressure of being submerged and the harshness of salt-air environments.
Ensure your lighting system is robust enough for the long haul. Browse our range of durable LED submersible tail lights to secure your trailer’s visibility.
Professional Maintenance for Long-Term Reliability
Reactive repairs are a temporary fix. Long-term reliability requires a routine inspection schedule for all trailer parts. Check your wiring every six months or before every major trip. Look for signs of fatigue, brittle insulation, or loose terminals. Proactive care is the most effective method for fixing flickering trailer lights permanently. If you find yourself constantly repairing the same circuit, consider a full harness replacement using tinned-copper marine-grade wire. Tinned copper resists the internal corrosion mentioned earlier; it provides a service life that far exceeds standard automotive cable in harsh Australian environments.
Cable Management and Protection Strategies
Exposed wires are vulnerable to road debris and UV damage. Use split-conduit or braided sleeving to shield the harness from physical impact. Secure the conduit with UV-rated cable ties to prevent sagging. A sagging harness can snag on road hazards or melt against hot components. When routing wires near the axle, ensure there is enough slack for suspension travel but not enough to cause entanglement. Proper cable management reduces the mechanical stress on your connections. This prevents the vibration-induced failures that lead to flickering on the highway. Use rubber grommets whenever a wire passes through a hole in the metal frame to prevent the edges from cutting the insulation.
Upgrading to Submersible LED Technology
Modern LED units offer superior durability for both boat trailers and heavy-duty box trailers. Sealed LED units are impervious to moisture and dust ingress. They eliminate the need for traditional bulb sockets. These sockets are a primary source of high resistance and intermittent contact. Hard-wiring your lamps instead of using plug-in bulb systems removes another common failure point. LEDs also draw significantly less current. This reduces the total load on your vehicle’s electrical system and helps prevent voltage drop issues. If you need assistance choosing the right wiring kit or components for your setup, contact us for technical advice. We can help you identify the hardware required for a stable and compliant lighting system that stands up to the rigours of long-distance towing.
Securing Your Trailer’s Electrical Integrity
We are an Australian-owned and operated business providing heavy-duty hardware designed for the harshest regional conditions. Whether you need to replace a corroded harness or upgrade to submersible lighting, we offer nationwide shipping on all electrical components to get your setup back in peak condition. Browse our range of reliable LED trailer lights and wiring components to find professional-grade solutions that last. Safe towing starts with equipment you can trust. Get your trailer road-ready today.
Frequently Asked Questions
Why do my trailer lights only flicker when I hit a bump?
Flickering on bumps is almost always a physical continuity issue. Road vibration causes loose terminal screws or pins that have lost their spring tension to lose contact momentarily. Inspect the plug for pin spread or look for sections of the wiring harness that may be chafing against the trailer frame.
Is it illegal to drive with flickering trailer lights in Australia?
Yes, operating a trailer with intermittent lighting is a violation of Australian vehicle standards. All lighting must remain steadily illuminated to ensure visibility and safety for other road users. Police can issue fines or defect notices if your trailer lighting fails to meet these compliance requirements while in transit.
How do I know if the flickering is caused by my car or my trailer?
Testing with a secondary tow vehicle is the fastest diagnostic method. If the flickering stops, the fault lies within the original vehicle’s socket or internal wiring. If the flickering continues with a different car, you should focus on fixing flickering trailer lights by inspecting the trailer-side harness and ground points.
Can a bad ground cause only one light to flicker?
Individual light flickering occurs when a unit has a dedicated local ground that has corroded. While many modern trailers use a common ground wire, some setups ground each lamp directly to the chassis. A loose mounting bolt or rust at the lamp base will cause a single-point failure even if the rest of the system is stable.
What is the best way to clean corroded trailer plug pins?
Use a dedicated terminal cleaning tool or 80-grit sandpaper to restore the metal surface to a bright finish. You must remove all green copper oxide to ensure low electrical resistance. Apply electrical contact cleaner to flush out any remaining debris and salt residue before reassembling the plug housing.
Why do my LED trailer lights flicker even when the car is off?
Modern car computers often send low-voltage pulses to monitor the circuit for blown bulbs. This is common in vehicles with CAN bus systems. LEDs are highly efficient and can trigger a quick strobe or faint glow from these tiny pulses of energy, even when the ignition is turned off.
Should I use WD-40 or dielectric grease on my trailer plug?
Always choose dielectric grease for electrical connections. Dielectric grease is specifically engineered to seal out moisture and oxygen, preventing corrosion in salt-air environments. Multi-purpose lubricants like WD-40 are solvents that can degrade plastic components and wash away much faster than a heavy-duty grease.
Do I need a special module for LED trailer lights on a modern car?
Vehicles with bulb-failure sensors or CAN bus electronics often require a load resistor or an LED-compatible module. This hardware mimics the electrical draw of a standard incandescent bulb. Without it, the vehicle’s computer may not detect the trailer, leading to rapid indicator flashing or persistent flickering issues.