Trailer drop incidents and lighting failures are significant safety risks that have recently doubled in frequency across the country. Dealing with common trailer wiring problems is a standard part of trailer ownership, yet it often leads to deep frustration when lights flicker or fail right before a long haul. You might worry about expensive fines for non-functional indicators or feel confused by a complex wiring diagram. These electrical faults demand a systematic approach rather than guesswork.
It’s vital to ensure your equipment remains compliant with current Australian Design Rules to avoid safety hazards on the road. This guide provides the practical steps needed to identify, diagnose, and resolve the most frequent electrical issues to keep your rig road-legal. We will show you how to quickly find the fault and restore full function to your lights and brakes. You will also learn how to prevent future corrosion issues by using durable components like LED submersible tail lights and high-quality trailer plug adapters.
Key Takeaways
- Learn to distinguish between total circuit failure and intermittent flickering to pinpoint the source of electrical faults quickly.
- Identify why a poor ground connection is the root cause of most common trailer wiring problems and how to secure the white wire to the chassis.
- Diagnose issues with 10-inch electric drum brakes by checking for magnet wear and potential wiring shorts within the assembly.
- Maintain electrical reliability by cleaning connector pins according to Australian standards and removing road grime that causes oxidation.
- Implement long-term solutions such as installing LED submersible tail lights and using soldered connections to resist environmental damage.
Identifying Symptoms of Trailer Electrical System Failures
Trailers operate in punishing environments. Constant vibration from rough road surfaces and extreme heat from braking systems act as the primary enemies of your electrical setup. These forces cause physical stress on every connection point and wire run. Over time, environmental exposure leads to rapid copper oxidation. This green crust on your wires increases electrical resistance. It is a leading cause of common trailer wiring problems. You must recognise these signs early to prevent a total system failure on the highway.
Copper wiring is highly susceptible to moisture. When water penetrates the insulation or sits in a connector, it begins a chemical reaction. This oxidation reduces the wire’s ability to carry current. Eventually, the wire becomes brittle and snaps. Vibration accelerates this process by shaking loose connections that have already been weakened by corrosion. Regular inspections of your wiring harness can reveal these issues before they result in a roadside emergency.
Flickering and Dimming Light Issues
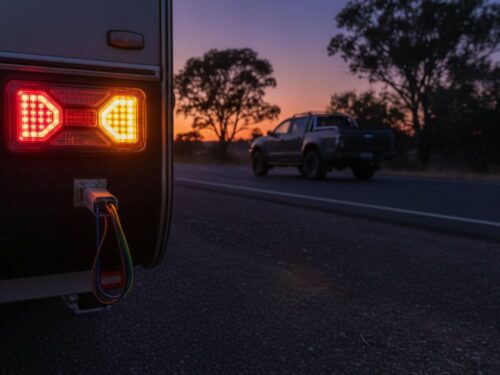
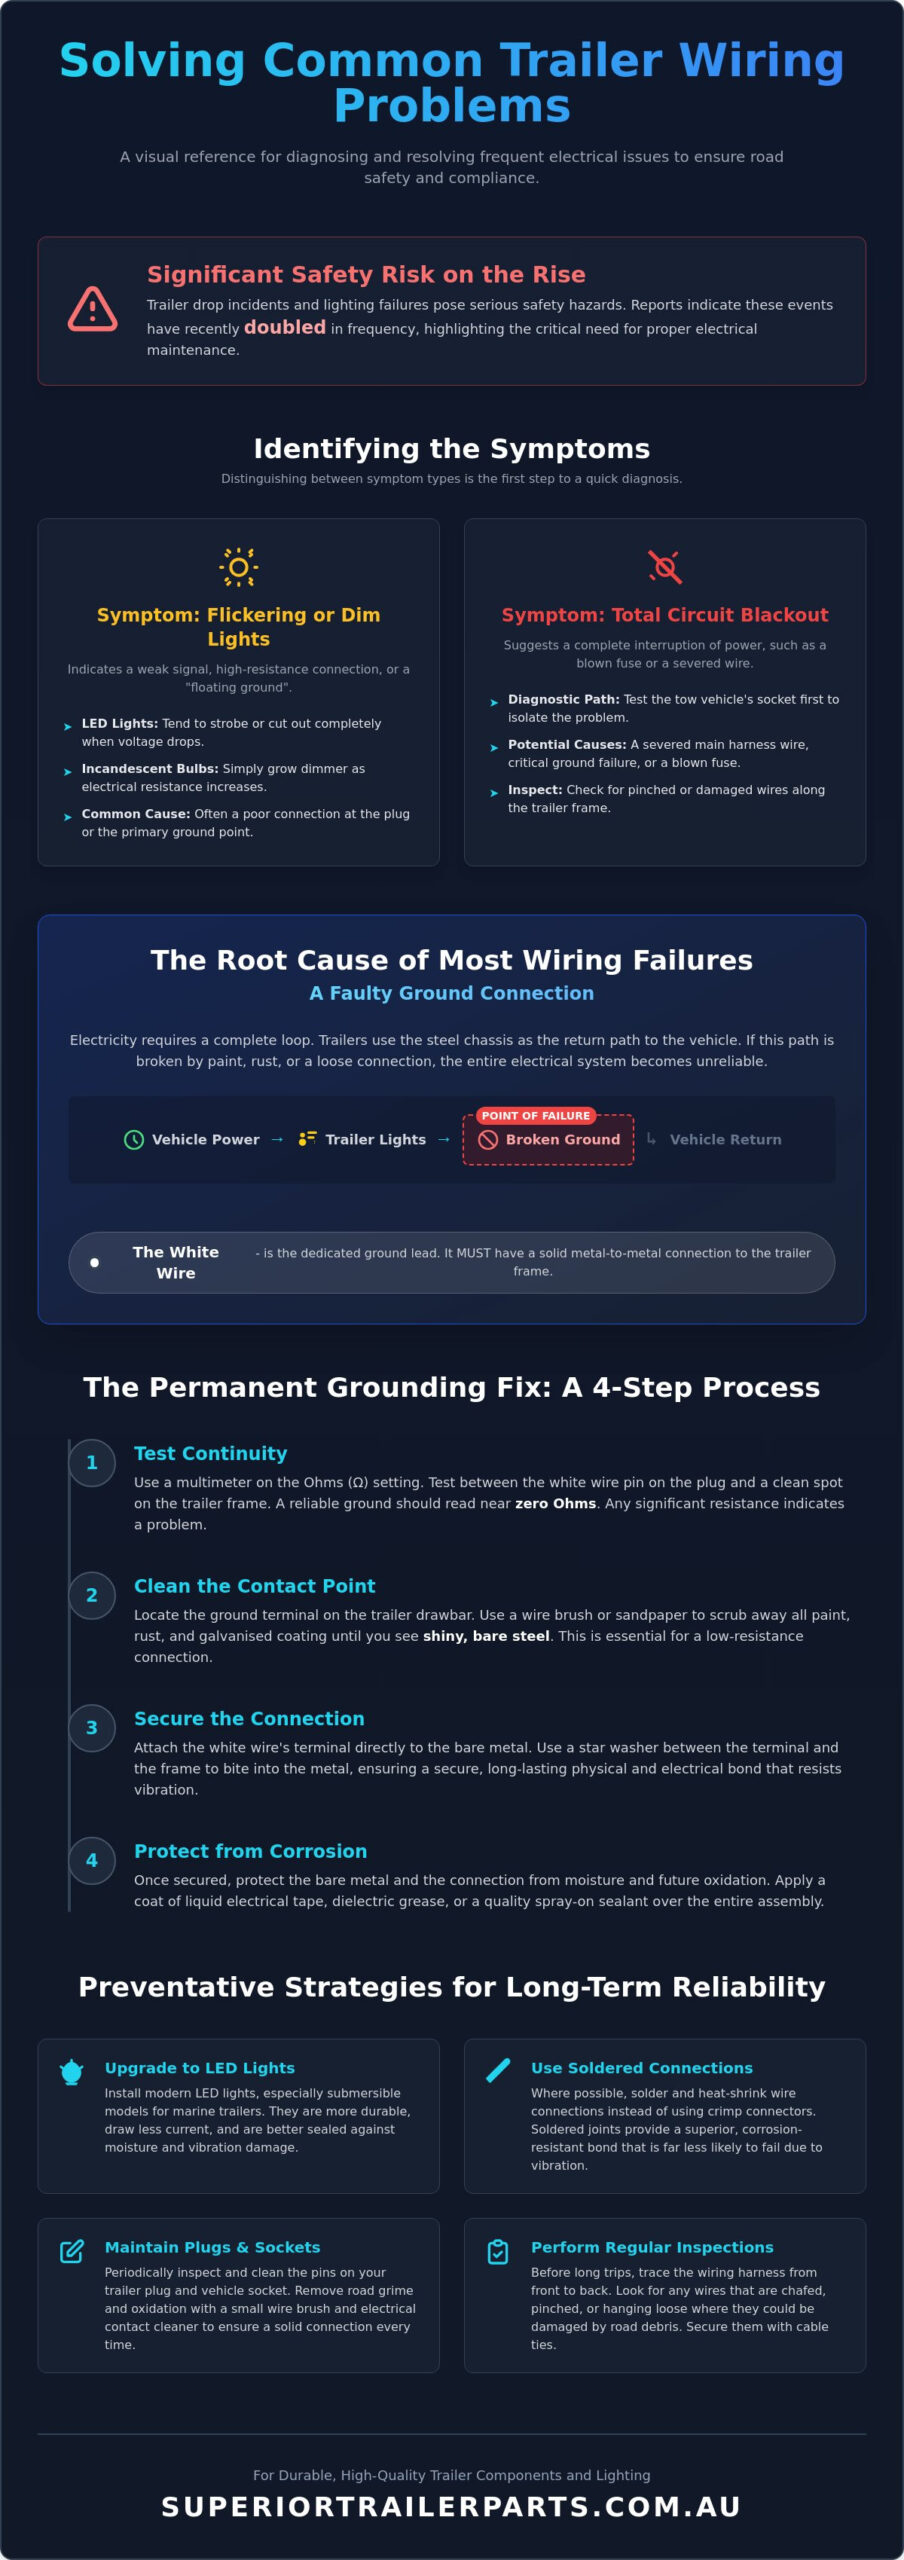
Flickering lights usually indicate a weak signal or a high-resistance connection. This often happens at the plug or a ground point. LED lights behave differently than traditional incandescent bulbs during a failure. LEDs require a specific voltage to illuminate. If the voltage drops below a certain threshold, they will cut out entirely or strobe. Incandescent bulbs simply get dimmer as the resistance increases. Modern tow vehicles often experience the “phantom blinker” effect. This happens when the vehicle computer fails to detect the low current draw of LED lights, triggering a bulb-out warning on your dashboard. Upgrading to high-quality LED submersible tail lights can mitigate some of these issues, especially in marine environments where moisture is constant.
Total Circuit Blackouts
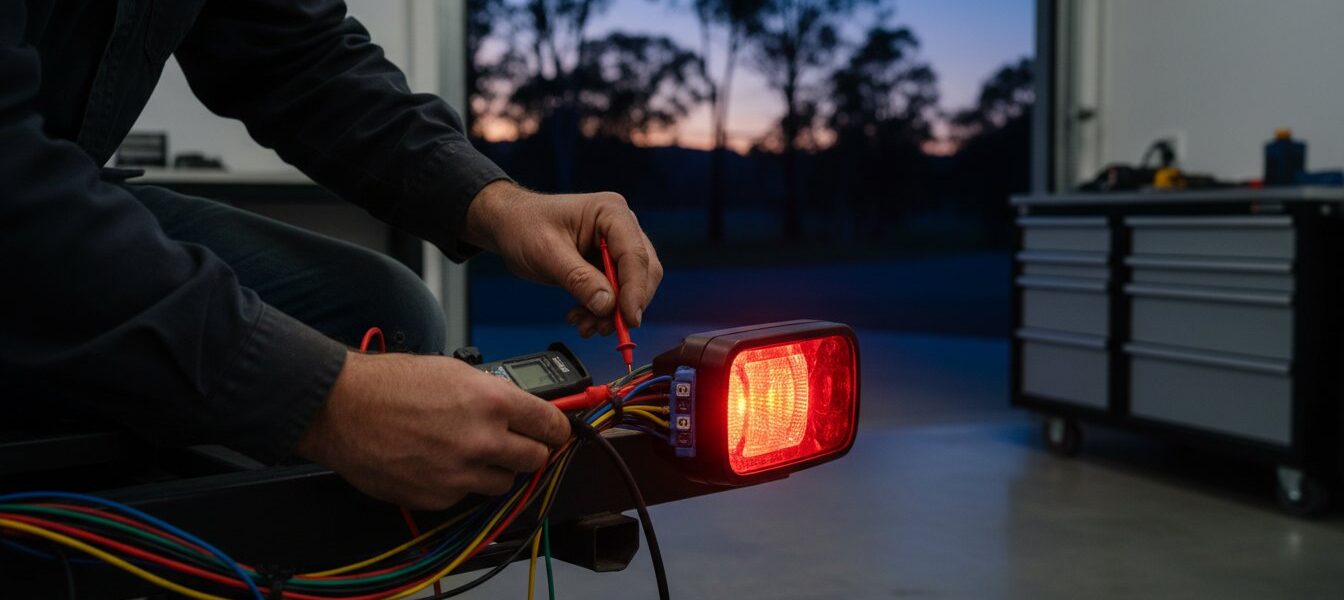
A total circuit blackout requires a different diagnostic path. You must determine if you have a blown fuse or a severed wire. Before you tear apart the trailer harness, test the output of the tow vehicle. Use a multimeter or a circuit tester to verify that power is reaching the socket. Adhering to Trailer connector standards ensures that you are testing the correct pins for each function. If the vehicle side is functional, the issue likely resides in the main wiring harness or a critical ground failure. Check for pinched wires along the frame. Road debris often strikes the underside of the trailer, which can sever a wire instantly. A system-wide failure is rarely a single bulb issue; it usually points to the main power feed or the primary ground connection at the drawbar.
The Ground Connection: Solving the Most Common Wiring Fault
Electricity travels in a loop. It leaves the battery, powers the light, and must return to the source to complete the circuit. Trailers typically use the steel chassis as this return path. This method reduces the amount of copper wire needed, but it introduces a major point of failure. If the return path is interrupted, the current will seek any available route. This often results in back-feeding through other circuits. You might notice the tail lights dimming when you hit the indicator. This confusion is a hallmark of common trailer wiring problems and almost always points to a faulty ground.
The white wire in your plug is the dedicated ground lead. It must have a solid, permanent connection to the trailer frame. Locate where this wire attaches to the drawbar. Manufacturers often bolt this terminal over paint or galvanised coating. These surfaces are insulators and block the flow of electricity. Rust is an even worse offender. Even a small amount of surface oxidation can increase resistance enough to cause system-wide failures. You must establish a clean, metal-to-metal contact point to ensure reliability.
Testing Ground Continuity
Set your multimeter to the ohms (Ω) setting to verify ground integrity. Place one probe on the white wire terminal inside the plug and the other on a clean section of the trailer frame. The reading should be near zero. Any significant resistance indicates a bottleneck in the circuit. A “floating ground” occurs when the connection is weak, causing current to jump between different light assemblies. This leads to erratic behavior across the entire system. Never rely on the tow ball to provide a ground connection. Grease, paint, and moving parts in the hitch assembly create intermittent contact. This makes the lights flicker every time the trailer bounces or turns.
Permanent Grounding Fixes
Establishing a good ground is only half the job; you must also protect it. Use a wire brush or sandpaper to scrub the frame until you see shiny steel. Secure the ground terminal using a stainless steel bolt and a star washer. The star washer bites into the metal to maintain contact despite constant road vibration. Apply a liberal coat of dielectric grease over the finished connection. This grease doesn’t conduct electricity, but it seals the terminal from moisture and oxygen to prevent future corrosion. For trailers with high-draw components, such as those using heavy-duty axles and electric brakes, consider running a dedicated ground wire to each light. This bypasses the frame entirely and provides the most reliable electrical return path available.
Troubleshooting Electric Brakes and Auxiliary Power
Electric braking systems demand a higher current than standard lighting circuits. This makes them more susceptible to common trailer wiring problems. Weak braking or intermittent lock-ups often point to physical wiring issues rather than controller failure. Check the path from the in-cab controller to the magnets inside the drum assembly. Any resistance in this line will directly impact your stopping power and road safety.
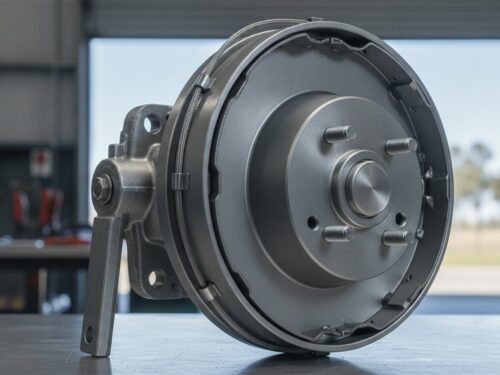
Faults in 10 inch electric drum brakes usually stem from magnet wear or wiring shorts. Inspect the magnet surface for uneven contact or exposed copper coils. If the magnet is intact, test for a short to ground. Shorts frequently occur where the wire enters the brake backing plate. A perished grommet allows the wire to chafe against sharp metal. This causes random engagement or total failure. Replace damaged grommets immediately to protect the circuit.
Brake Signal Loss and Weak Braking
Voltage drop is a frequent cause of poor brake performance. Long cable runs on tandem axle trailers lose significant power if the wire gauge is too thin. Use a minimum of 4mm or 5mm automotive cable for brake feeds to ensure the signal remains strong. Inspect the connection points at the axle. These wires are exposed to road debris and constant suspension movement. Use heat-shrink tubing to seal all joins against moisture. If the blue wire signal from your controller is weak at the plug, the brakes won’t reach full capacity regardless of the gain settings.
Auxiliary and Battery Charge Faults
Auxiliary circuits usually operate through the black wire or pin 2. These lines power internal lights or charge batteries. If the battery isn’t charging, inspect the Anderson plug for melting or loose terminals. High-draw components can overheat a standard connector quickly. Address these common trailer wiring problems by installing dedicated circuit breakers. These provide better protection than standard fuses for high-load auxiliary circuits. A circuit breaker handles momentary surges without failing. Ensure your auxiliary ground is just as strong as the power feed to maintain a reliable charge rate.
Australian Standard Plugs and Connector Maintenance
Australian trailer plugs must meet specific regulatory standards to ensure road safety. For trailers under 3.5 tonnes, connectors should comply with AS 2513 or AS 4177.5. Heavier trailers over 3.5 tonnes require compliance with AS 4735. Understanding the correct trailer plug wiring layout is essential for every owner. Most common trailer wiring problems start at this primary connection point. Road grime and salt spray cause rapid oxidation on the brass pins. This buildup increases electrical resistance and leads to flickering lights or total signal loss.
Cleaning the pins is a basic maintenance task that prevents major failures. Use a dedicated electrical contact cleaner to dissolve grease and dirt. If the pins are physically damaged or spread, they won’t maintain a firm connection. You can use a small screwdriver to gently spread the male pins or tighten the female sockets to restore contact. Internal wire detachment is another frequent issue. Constant vibration can loosen the small grub screws holding the wires in place. Open the plug housing regularly to ensure every wire is seated firmly in its terminal. A single loose wire can short across other pins, causing erratic light behavior.
Using trailer plug adapters can sometimes introduce signal interference. Every extra join in a circuit creates a potential point of failure. If you must use an adapter to connect a 7-pin trailer to a 12-pin vehicle, ensure it’s a high-quality unit with sealed connections. Low-grade adapters allow moisture to bridge the pins. This often causes the indicators to flash when you step on the brakes or causes the vehicle’s computer to throw error codes. Refer to Trailer connector standards for pinout verification if you suspect a wiring mismatch.
7-Pin vs 12-Pin Troubleshooting
Connector Repair and Replacement
When corrosion takes hold, it often travels up the copper core under the insulation. Strip the wire back until you find clean, bright copper before re-terminating the connection. If the wire is black or green several inches up, the entire harness section may need replacing. Always tighten the cable gland at the rear of the plug. This seal is your primary defense against water entry. If the housing is cracked or the pins are severely pitted, don’t waste time cleaning them. Replace the plug to ensure a reliable connection for the long term.
If your electrical connectors show signs of permanent damage, view our selection of trailer plug adapters and wiring components to get back on the road safely.
Preventative Strategies for Long-Term Reliability
Solving common trailer wiring problems requires more than just temporary fixes. You must build resilience into the system from the start. Standard crimp connectors often fail because they allow moisture to enter the wire strands. Use solder and heat-shrink tubing for every join instead. Solder creates a permanent mechanical and electrical bond that won’t vibrate loose. Adhesive-lined heat-shrink tubing then seals the connection against the elements. This combination is the most effective way to stop internal copper oxidation before it starts.
Marine and Boat Trailer Specifics
Salt water is exceptionally destructive to electrical systems. It accelerates electrolysis and can ruin a standard harness in a single season. Upgrading to LED submersible tail lights is essential for any trailer entering the water. These units are vacuum-sealed or potted in resin to keep out brine. Use tinned copper wire for marine applications. The tin coating prevents the copper from turning green when exposed to salt air. Seal every junction box with a high-quality silicone sealant to provide an extra layer of defense against constant submersion.
Securing the Harness
Vibration causes wires to rub against sharp metal edges. This is particularly common where wires pass through the axle or the trailer frame. Install rubber grommets at every entry and exit point. If a grommet isn’t available, wrap the wire in several layers of heavy-duty electrical tape or use a section of rubber hose as a buffer. This prevents the insulation from wearing through and causing a short circuit against the chassis.
Establish a regular inspection schedule to catch issues early. High-use trailers require more frequent checks to combat the effects of constant road vibration. A five-minute pre-tow electrical audit can prevent roadside breakdowns and expensive fines. Check every light function while the trailer is hitched to the vehicle. Wiggle the plug in the socket to ensure the connection is stable and doesn’t flicker. Look for any sagging wires or loose fasteners along the frame. Proactive maintenance is the only way to eliminate common trailer wiring problems and keep your equipment road-legal. This systematic approach ensures your trailer remains a reliable tool rather than a source of constant frustration.
Maintain Your Trailer for the Long Haul
Reliable electrical performance starts with a systematic diagnostic approach. You’ve learned that most common trailer wiring problems stem from poor ground connections and environmental corrosion. Fixing these issues requires clean metal contact and sealed connections rather than temporary patches. Upgrading to submersible LED lights and using tinned copper wire provides the resilience needed for harsh Australian conditions. Regular inspections of your 7-pin or 12-pin connectors ensure you remain road-legal and safe during every trip.
Don’t wait for a total circuit failure to address your wiring needs. We provide heavy-duty components designed specifically to endure the local climate. As an Australian-owned and operated specialist, we understand the durability required for industrial and marine transport. We offer nationwide shipping on all components to get your rig back in service quickly. Our inventory includes everything from plug adapters to submersible lighting kits.
Browse our range of high-quality trailer electrical parts to find the right solution for your next repair. Keep your connections tight and your lights bright to ensure a hassle-free towing experience.
Frequently Asked Questions
Why do my trailer lights work intermittently when I am driving?
Intermittent operation is usually caused by a loose connection or a weak ground that loses contact during road vibration. Check the white ground wire at the drawbar and the pins inside the plug for security. Road movement shakes poorly secured wires, which causes the circuit to break and reset. Ensure all grub screws in the plug are tight and terminals are free from debris.
How do I know if my trailer wiring problem is in the car or the trailer?
Test the vehicle’s trailer socket with a multimeter or a circuit tester to isolate the source of the fault. If the vehicle socket shows the correct voltage for each pin, the issue resides within the trailer’s harness or light assemblies. This is the most efficient way to narrow down common trailer wiring problems without dismantling functional equipment on the wrong vehicle.
What is the most common cause of trailer brakes not engaging?
A severed or pinched blue signal wire is the most frequent cause of total brake engagement failure. Inspect the wiring where it runs along the trailer frame and enters the backing plate. Chafing against the chassis or a failed connection at the axle will prevent the electrical signal from reaching the magnets. Check for physical damage from road debris strike.
Can I mix LED and incandescent lights on the same trailer wiring?
You can mix these light types, but it often triggers issues with the vehicle’s bulb-out detection system. Modern vehicles expect a specific current draw that LEDs do not provide. This mismatch can cause rapid flashing or dashboard error codes. You might need to install a load resistor or use a dedicated LED-compatible flasher unit to stabilise the circuit’s electrical load.
Why do my trailer lights dim when I press the brake pedal?
Dimming lights indicate a high-resistance ground connection that cannot handle the increased current load of the brake lights. When the brake circuit engages, it starves the other lights of power because the return path is restricted. Clean the primary ground terminal and ensure it has a solid metal-to-metal connection to the trailer frame. Remove any paint or rust blocking the contact.
How do I fix a trailer plug that has green corrosion on the pins?
Use an electrical contact cleaner and a small wire brush to scrub the oxidation from the brass pins. If the corrosion has reached the internal terminals, strip the wires back to clean copper and re-terminate them. Apply a liberal coat of dielectric grease after cleaning. This seals the pins from moisture and oxygen to prevent the green crust from returning to the connector.
What wire colour is the ground in Australian trailer wiring?
The white wire is the designated ground or earth lead in the Australian standard wiring configuration. It must be connected to pin 3 in both 7-pin and 12-pin plug layouts. This wire provides the essential return path for every other electrical circuit on the trailer. Without a functional white wire, your lights will seek a ground through the tow ball, causing flickering.
Is it legal to drive with one non-functional trailer light?
It is illegal to tow a trailer if any required light is not functioning correctly. Australian Design Rule 13/00 mandates that all trailer lights must mirror the tow vehicle’s signals without any delay. A single failed bulb or indicator can result in a fine and poses a safety risk. Always conduct a pre-drive check to ensure every light is operational before entering traffic.