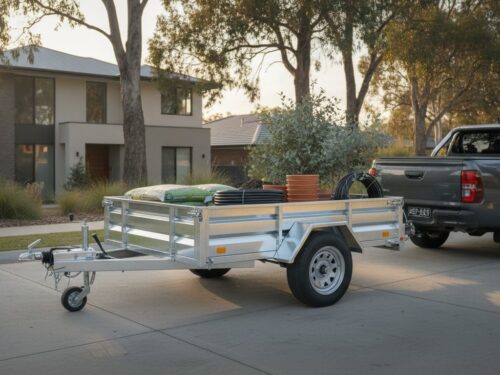
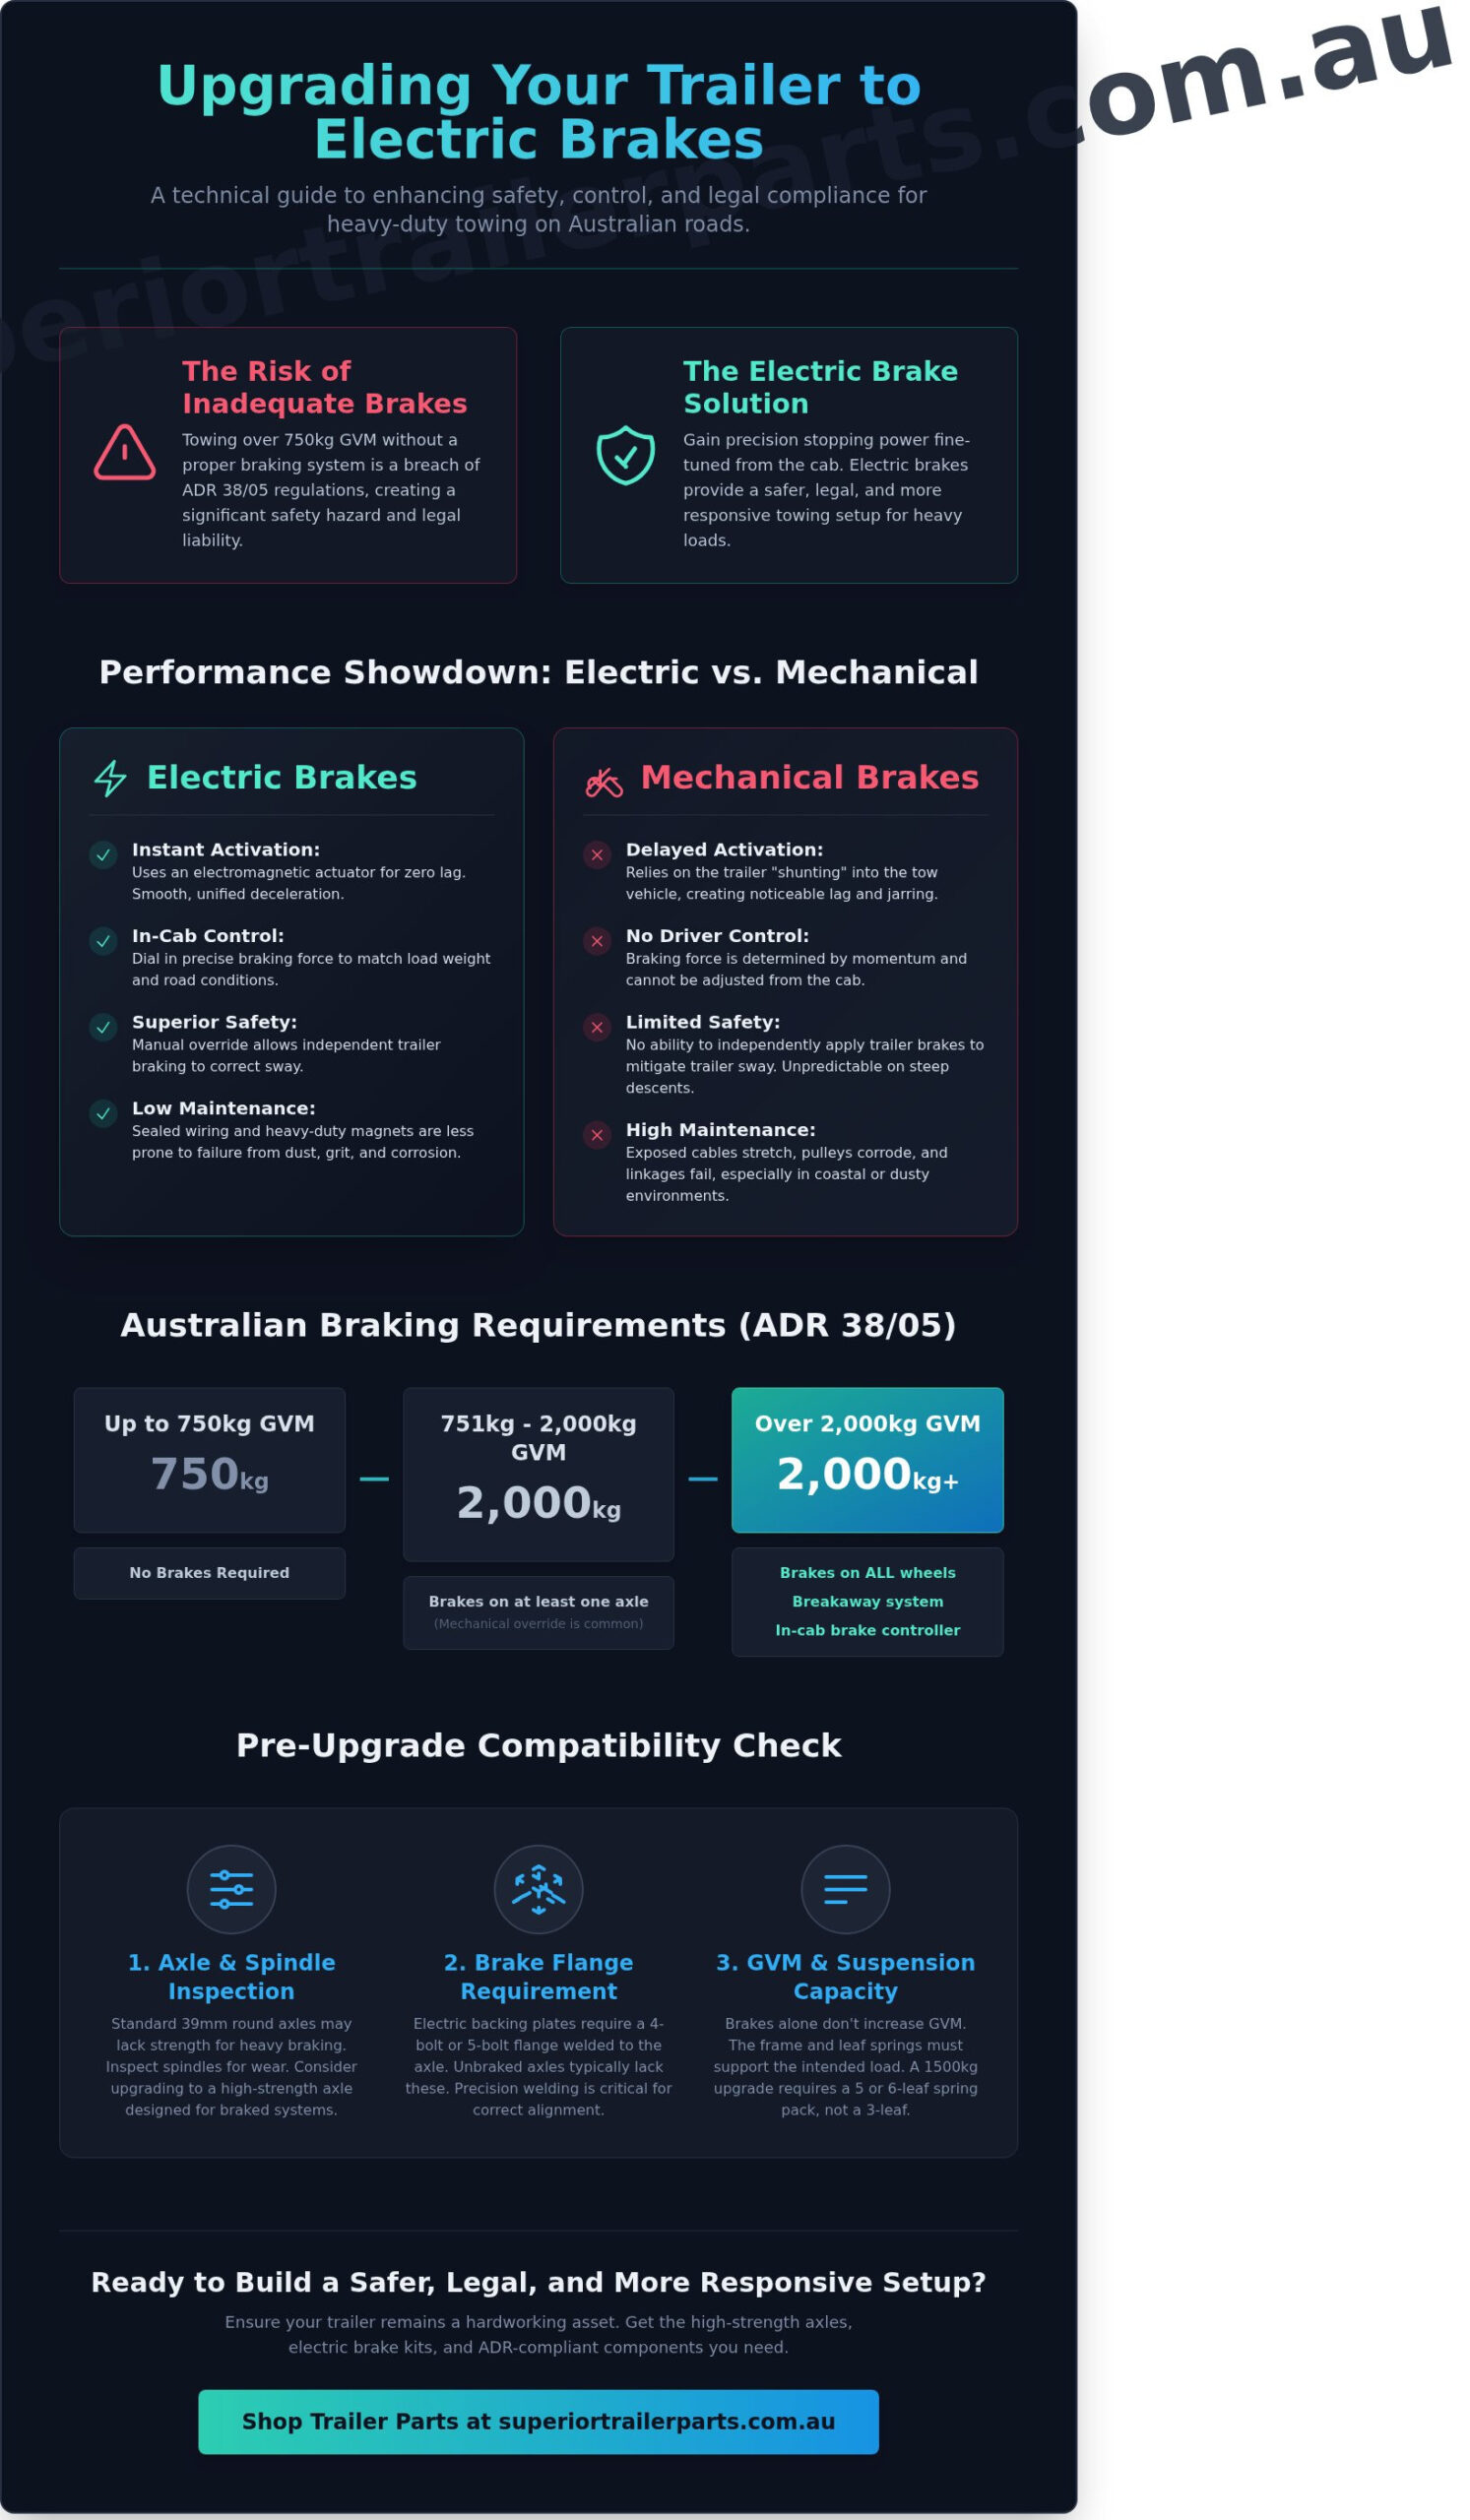
Towing any load exceeding 750kg GVM without an integrated braking system isn’t just a safety hazard; it’s a breach of ADR 38/05 regulations that leaves you legally exposed. You already know that standard override brakes lack the precision needed for heavy-duty hauling on steep gradients. Upgrading trailer to electric brakes gives you the ability to fine-tune your stopping power directly from the cab. It’s about ensuring your gear is fit for purpose and reliable under pressure.
Key Takeaways
- Understand why electric activation provides superior response times and control compared to mechanical systems for heavy-duty towing.
- Assess your existing axle capacity and hub configuration to ensure compatibility with new brake flanges and drums.
- Identify the essential heavy-duty hardware required when upgrading trailer to electric brakes, including backing plates, magnets, and in-cab controllers.
- Learn the systematic installation process for removing old mechanical linkages and establishing a reliable, wired braking system.
- Ensure your conversion meets Australian Design Rules (ADR 38/05) and includes mandatory safety features like visible battery monitors.
Understanding the Shift to Electric Braking Systems
Heavy-duty towing requires precision and reliable stopping power. When you’re hauling several tonnes, relying on the trailer to push against the tow vehicle is inefficient. This is why upgrading trailer to electric brakes has become the standard for professional operators and serious DIYers across Australia. These electric braking systems provide immediate, synchronized stopping power that mechanical systems cannot match. You gain total control from the driver’s seat, allowing you to dial in specific braking force based on your current load weight or road conditions. This level of adjustment is vital for maintaining the longevity of your axles and tyres.
When is an Upgrade Necessary?
Australian safety regulations set a firm 750kg GVM threshold for mandatory trailer braking. While mechanical override brakes meet the legal minimum for many single-axle setups, they have clear performance ceilings. Once a trailer exceeds 2,000kg GVM, Australian Design Rules (ADRs) require brakes on all wheels and a breakaway system, making electric brakes the most practical solution. On tandem axle trailers, mechanical systems often fail to distribute force evenly across all four wheels. If you tow through the Great Dividing Range or similar varied terrain, you need the consistency of electric activation. Mechanical systems rely on momentum, which can be unpredictable on steep descents.
Electric vs Mechanical: A Performance Comparison
Mechanical override brakes operate on a “shunting” principle. The trailer must physically push against the tow ball to compress a master cylinder or pull a cable. This creates a noticeable delay and a jarring sensation during stop-start traffic. Electric brakes eliminate this lag entirely. They use an electromagnetic actuator to engage the brake shoes the moment your brake lights hit. This creates a smooth, unified deceleration across the entire vehicle combination. If you are currently using older hardware, you can find replacement couplings and parts to bridge the gap, but the performance jump to electric is significant.
Safety in high-wind scenarios is a primary advantage. Most modern controllers feature a manual override button. This allows you to apply trailer brakes independently to correct sway without using the vehicle brakes. Maintenance requirements also favor the electric route for long-term use. Mechanical systems involve cables that stretch and pulleys that corrode, especially in coastal environments. Electric systems use heavy-duty magnets and internal wiring, which are less prone to the mechanical failures caused by dust and road grit. This reliability is essential for those who depend on their equipment to work every time they hit the road.
Evaluating Your Current Trailer Setup for Conversion
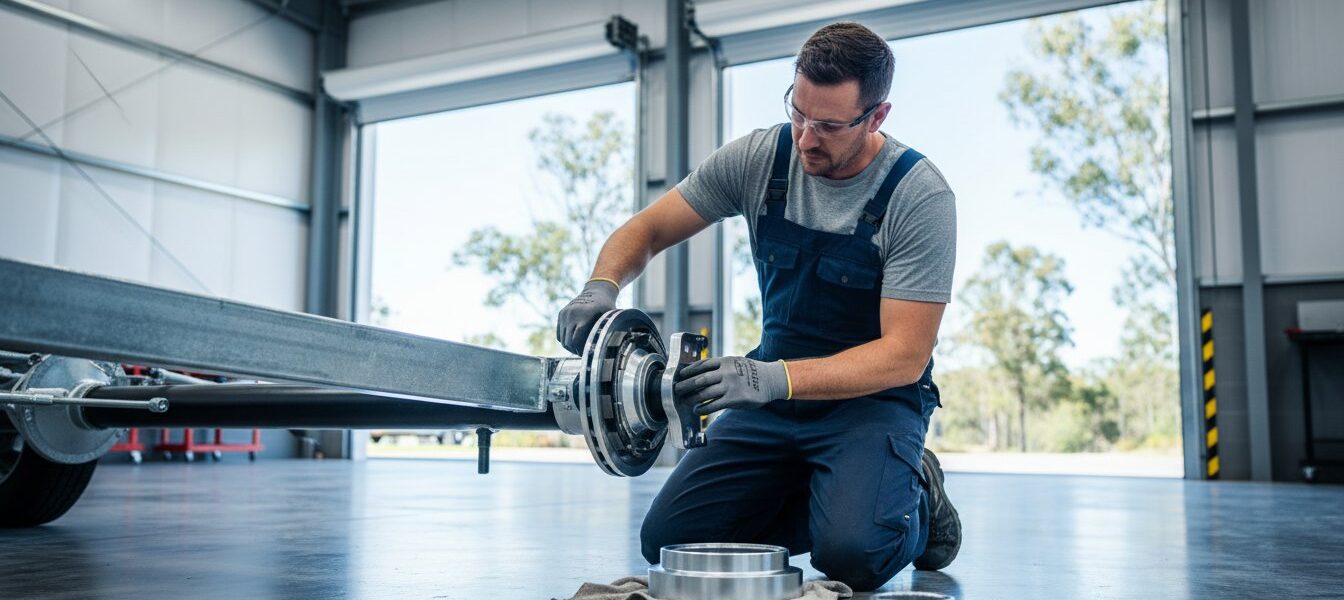
Before ordering parts, you must conduct a thorough physical audit of your trailer. Upgrading trailer to electric brakes involves more than just swapping hubs. You’re changing the mechanical forces applied to the frame and axle. If your foundation isn’t up to the task, the new braking system won’t perform safely. Start by stripping the wheels and inspecting the spindles for wear or pitting.
Axle Compatibility and Flange Requirements
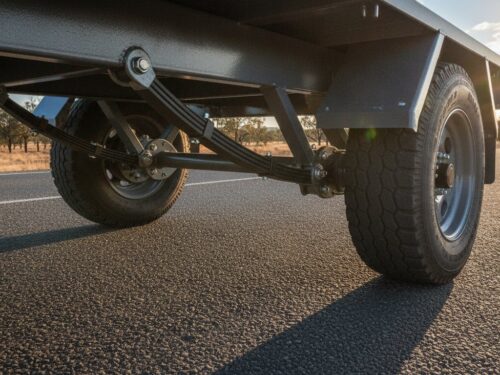
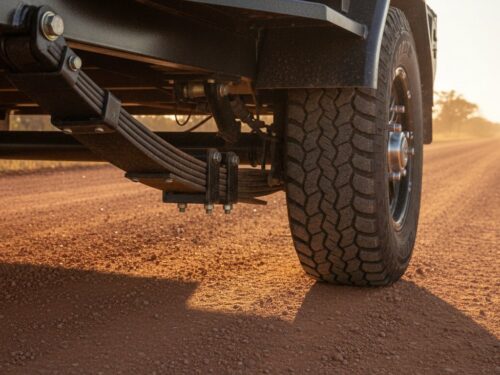
A standard 39mm round axle is common on unbraked trailers rated for 750kg. These axles often lack the structural wall thickness required for heavy-duty braking. Most electric backing plates require a 4-bolt or 5-bolt flange welded securely behind the spindle. If your axle is a 39mm round variety, it likely won’t have these flanges. Welding flanges onto an existing axle requires precision jigs to ensure the brakes sit square to the drum.
You must measure your axle tip-to-tip and the distance between spring centres. Accurate measurements prevent alignment issues that cause uneven tyre wear. If your current axle is bent or undersized, it’s safer to replace the entire unit. We provide high-strength axles designed for Australian conditions. Ensure the spindle profile matches common bearing sets like Slimline or Parallel to simplify future maintenance.
GVM Limits and Structural Considerations
Gross Vehicle Mass (GVM) is the total weight of the trailer and its payload. In Australia, any trailer with a GVM over 750kg must have a functional braking system. When upgrading trailer to electric brakes, you’re often looking to increase this legal rating. However, brakes alone don’t change your GVM. The trailer frame and suspension must also support the increased load.
Check your leaf springs for fatigue. A 3-leaf spring pack might be sufficient for a light box trailer, but a 1500kg GVM upgrade requires a 5-leaf or 6-leaf configuration. During the rebuild, don’t reuse old hardware. Use high-quality galvanised U-bolts to secure the axle to the springs. These bolts provide the necessary clamping force to keep the axle from shifting under the high torque of electric magnets.
- Inspect the drawbar for 3mm minimum wall thickness.
- Check the frame welds for stress cracks near the spring hangers.
- Confirm the coupling is a fixed type, as override couplings aren’t used with electric systems.
Our Australian owned and operated team understands the grit and salt of local roads. If you need a hand checking your specifications, contact our team for expert advice on your setup.
Core Components Required for an Electric Brake Upgrade
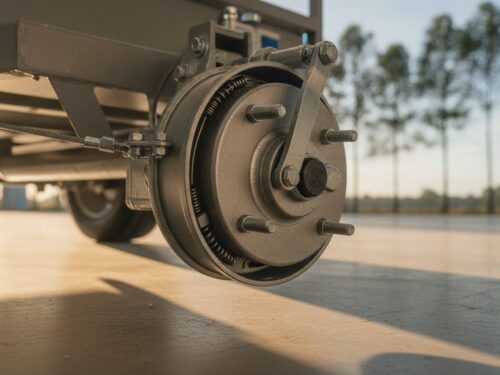
Successful execution of upgrading trailer to electric brakes requires specific mechanical and electrical components. You’ll need a set of backing plates, brake drums, and electromagnets. The backing plates house the brake shoes and the magnet assembly. When the tow vehicle applies current, the magnet grabs the inner face of the drum, pulling the lever that expands the shoes against the drum surface. This creates the friction needed to stop heavy loads safely.
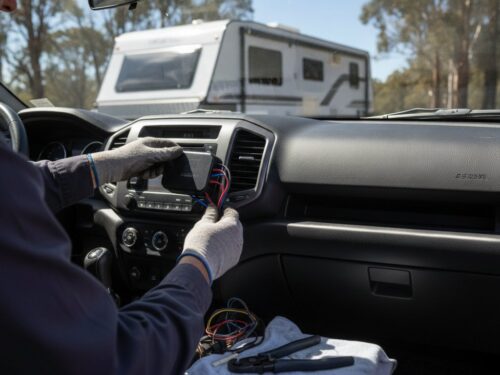
Inside the tow vehicle, an electric brake controller is mandatory. This device regulates the amount of power sent to the trailer brakes based on your braking pressure or inertia. For trailers with a Gross Vehicle Mass (GVM) exceeding 2000kg, Australian Design Rules require a breakaway system. This system includes a dedicated battery and switch that automatically engages the trailer brakes if the trailer disconnects from the tow vehicle. It’s a critical safety feature that prevents runaway trailers on public roads.
Don’t overlook the small hardware that keeps the assembly spinning. Every upgrade should include fresh components to ensure longevity. Use this checklist for your assembly:
- High-temperature wheel bearing grease
- Inner and outer bearings matched to your axle spindle
- Double-lip waterproof seals
- Stainless steel or galvanised dust caps
- Split pins or tang washers for the axle nut
Selecting the Right Drum and Backing Plate Kit
Most standard trailers use 10-inch drums, which are rated for 1600kg per axle. If your GVM exceeds this, move to 12-inch kits, which typically handle 2250kg per axle. For those hitting corrugated tracks, choose the off-road magnet option. These feature a unique retention spring to prevent the magnet from rattling loose on harsh terrain. Match your drum stud pattern to your existing wheels. Common patterns include Ford (5-stud), HQ (5-stud), or Landcruiser (6-stud).
Upgrading the Axle and Coupling
Your current axle must have a welded flange to mount the backing plate. If it lacks this, or if you’re increasing your load capacity, you must select new axles designed for electric brake mounting. Upgrading trailer to electric brakes also means changing how the trailer connects. You’ll switch from an override coupling to a fixed coupling. Because the brakes are now controlled electronically, the sliding mechanism of an override hitch is no longer necessary. Browse our range of couplings and parts to find an ADR-compliant fixed hitch that suits your trailer’s weight rating.
The Installation Process: From Axle Swap to Wiring
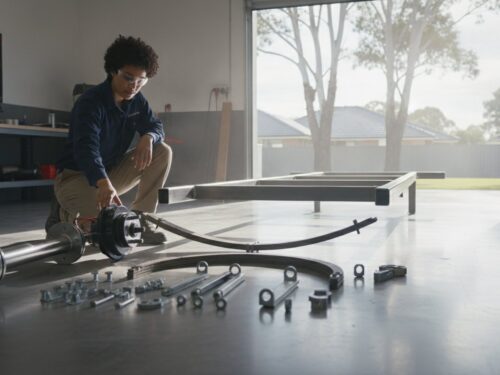
Check the labels on your new backing plates. They are side-specific. The “Left” plate goes on the passenger side, and the “Right” plate goes on the driver side. If you install them backwards, the self-adjusting mechanism won’t function. Secure the plates using high-tensile Grade 8 bolts. Torque these bolts to 50 lb-ft (68 Nm) to prevent vibration from loosening the assembly over long hauls. This rigid connection is vital for transferring braking force to the axle beam.
Mounting the Mechanical Hardware
Pack your bearings with high-temperature marine-grade grease. Seat the inner bearing and the rear seal into the drum first. Slide the drum onto the spindle, then add the outer bearing, washer, and castle nut. Tighten the nut until the drum stops, then back it off 1/6th of a turn. This creates the necessary 0.1mm of end play. Use the star wheel at the bottom of the backing plate to adjust the shoes. Click the wheel until the drum locks, then back it off 10 to 12 clicks for a perfect clearance. The drum should rotate with a very slight drag from the magnets.
- Seat the rear seal flush with the hub face to prevent grease leakage.
- Verify the castle nut is secured with a fresh split pin or tang washer.
- Ensure the brake magnet moves freely on its mounting arm.
Wiring the System for Reliability
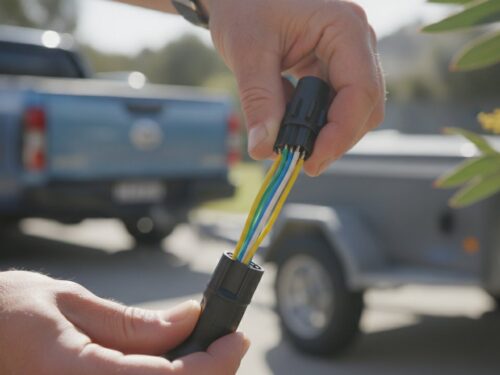
Secure all connections with solder and marine-grade heat-shrink tubing. This prevents moisture ingress and corrosion in harsh Australian environments. Plastic crimp connectors often fail after 12 months of road vibration. Route the wiring through the internal cavity of the drawbar or secure it with heavy-duty conduit along the chassis rail every 300mm. When upgrading trailer to electric brakes, you must also mount a breakaway switch on the drawbar if your trailer exceeds 2000kg GTM.
Browse our range of heavy-duty trailer axles to find the right fit for your brake upgrade.
Legal Compliance and ADR Standards for Braked Trailers
Compliance with Australian Design Rule (ADR) 38/05 is mandatory for any trailer operated on public roads. This standard dictates that trailers with a Gross Trailer Mass (GTM) exceeding 750kg must feature a functional braking system. When upgrading trailer to electric brakes, you must ensure the system matches your vehicle’s GTM rating. For trailers over 2000kg, ADR 38/05 requires brakes on all wheels and an automatic breakaway system. You must also install a battery monitor in the towing vehicle. This monitor provides a visible or audible signal to the driver, confirming the breakaway battery has sufficient charge. It is a critical safety requirement that prevents the trailer from becoming a runaway hazard if it detaches from the hitch.
Understanding Breakaway System Requirements
Trailers with a GTM over 2000kg must have a system that automatically applies the brakes for at least 15 minutes if the trailer disconnects. The breakaway switch is the heart of this system. It features a pin attached to the tow vehicle via a steel cable. If the trailer separates, the pin pulls out, completing a circuit that sends power from the dedicated trailer battery to the electric brake magnets. You must maintain this battery regularly. Lead-acid batteries used in these systems typically require replacement every 2 to 3 years to ensure they hold the charge necessary for emergency activation.
Final Testing and Roadworthiness
New brake shoes require a “bedding in” process to achieve maximum friction. Perform 20 to 30 controlled stops from a speed of 40 km/h, allowing the brakes to cool slightly between each application. This process seats the shoe material against the drum surface. After bedding in, you must calibrate the in-cab controller. Adjust the gain setting so the trailer brakes provide a firm tug without locking the wheels. You will need to readjust this setting whenever the load weight changes significantly. If you are unsure about component compatibility or legal requirements, contact us for expert advice on part selection. Proper calibration ensures your setup remains reliable and safe for long-haul transport across Australia.
Secure Your Load with High-Performance Braking
Upgrading trailer to electric brakes is a practical necessity for any operator handling heavy-duty loads across Australia. The data shows that ADR 38/05 regulations mandate efficient braking systems for all trailers exceeding 2,000kg GTM. Precision matters when selecting your galvanised axles and wiring components. A successful conversion relies on matching your brake controller to the specific weight capacity of your trailer. This process ensures your setup remains legal and safe on the highway. Superior Trailer Parts stocks the reliable, marine-grade hardware required for these technical installations. We’re an Australian Owned and Operated business with a focus on durability and performance. If you need assistance with technical specifications or fitment, our expert technical advice is available to guide your project. We provide nationwide shipping on all heavy-duty components to ensure you get the parts you need without delay. Get your trailer back in service with gear that’s built for local conditions. It’s time to build a trailer you can trust on any road.
Shop ADR-Compliant Electric Brake Kits and Axles
Take the next step toward a safer towing experience today.
Frequently Asked Questions
Do I need a different axle to install electric brakes?
You don’t need a new axle if your current one has a standard brake flange welded behind the hub. If your axle is a plain 39mm round or 40mm square beam, you’ll need to weld a 4-bolt flange to the tip or replace the assembly entirely. Most technicians prefer replacing the axle to ensure the flange is perfectly square. This precision prevents uneven shoe wear and ensures the 10-inch or 12-inch drums seat correctly.
Can I install electric brakes on a trailer with a 750kg rating?
Yes, you can install electric brakes on a trailer with a 750kg rating for improved safety. While Australian Design Rule 38/05 only mandates brakes for trailers over 750kg GTM, upgrading trailer to electric brakes on lighter units reduces strain on your tow vehicle. It provides a smoother towing experience, especially when carrying 100 percent of your rated load. Most 750kg trailers use 39mm round axles which easily accept standard electric backing plates.
What is the difference between 10-inch and 12-inch electric brakes?
The main difference is the load capacity and stopping force. 10-inch brakes are standard for 1,600kg axles, while 12-inch units are designed for 2,250kg or 2,500kg heavy-duty applications. A 12-inch drum provides roughly 25 percent more surface area for the brake shoes. This extra size dissipates heat more effectively during long descents. Always select the size that matches your axle’s weight rating and wheel stud pattern to ensure a proper fit and reliable performance.
Do I need to change my trailer coupling when upgrading to electric brakes?
You must replace your mechanical override coupling with a fixed electric coupling during the upgrade. Electric brakes require a rigid connection because they don’t rely on the physical sliding movement used by mechanical systems. Choose a coupling rated for your specific GTM, such as a 2,000kg or 3,500kg unit. Ensure the new hardware complies with AS 4177.3 standards. This change ensures your trailer remains securely attached while the electric controller manages the braking force.
Is a breakaway system mandatory for all electric brake upgrades?
A breakaway system is mandatory for any trailer with a GTM over 2,000kg. This safety device includes a dedicated battery that applies the trailer brakes for at least 15 minutes if the hitch fails. For trailers between 750kg and 2,000kg, it’s an optional but highly recommended upgrade. Statistics show that breakaway systems prevent serious accidents in 90 percent of decoupling incidents. Always check your local state regulations to confirm specific compliance requirements for your weight class.
How do I wire the electric brakes to my existing trailer plug?
Connect the blue wire from your brake magnets to Pin 5 of a standard 7-pin plug. This pin is the dedicated circuit for electric brakes in Australia. The second wire from the magnets must be grounded to the trailer frame or connected to the white wire on Pin 3. Use 5mm automotive grade wiring to prevent voltage drop. Proper wiring ensures the signal from your in-car controller reaches the magnets without interference or power loss.
Can I mix electric brakes on one axle and mechanical on another?
Don’t mix electric and mechanical brakes on the same trailer. When upgrading trailer to electric brakes, you must ensure all braked axles use the same system for consistent stopping power. Mixing systems causes uneven braking force, which can lead to jackknifing or 40 percent longer stopping distances. If you have a tandem axle trailer, install electric backing plates on both axles. This creates a balanced load and prevents one axle from doing all the work.
How often do electric brake magnets need to be replaced?
Replace your electric brake magnets when the wear indicators are flush with the magnet surface or every 20,000 kilometres. Check the magnet face for uneven scoring or pitting during your annual service. A magnet that has lost 2mm of its original thickness won’t provide the magnetic pull required for maximum friction. Using genuine, heavy-duty magnets ensures your braking system remains reliable in harsh Australian conditions. Consistent maintenance prevents drum damage and maintains safe stopping distances.